4 Ways to Wrap Text in Excel
If you type a long sentence in an Excel sheet, you will see the sentence won’t fit inside the cell width. To fit the entire text inside a single cell you will need to use the Wrap Text command in Excel.
Most Common Way to Apply Wrap Text in Excel
Suppose you have a long text in the dataset like the one below. Let’s use the Wrap Text command to accommodate the sentence in one cell.

- First, select the cell of the long text. I have selected cell B2.
- Then click on the Home tab.
- Select the Wrap Text command from the Alignment group.
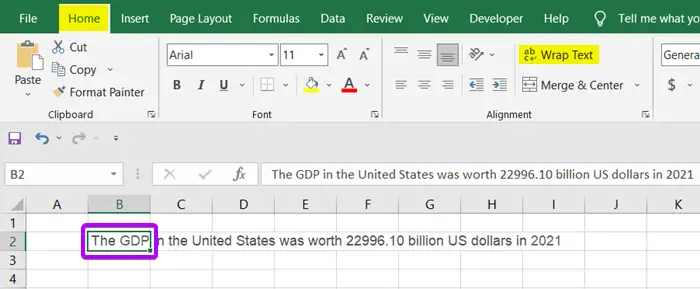
You will find the entire sentence in one cell now.
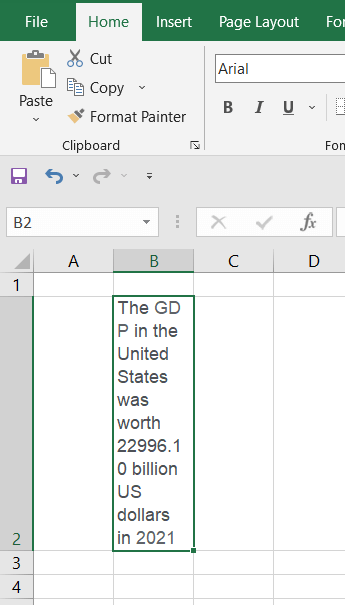
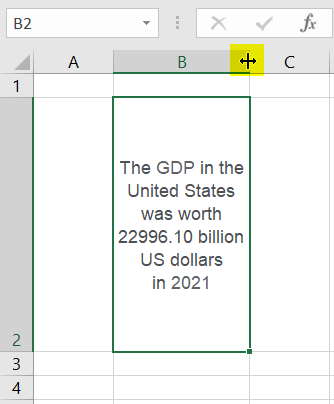
But if you think the text did not fit in the cell perfectly, you can drag the column manually to adjust the length as you like.
Wrap Text in Excel Using Keyboard Shortcut Keys
To wrap text in Excel using keyboard shortcuts, you can follow these steps:
- Select the cell(s).
- Use the following keyboard shortcut keys: ALT + H + W
- Press ENTER.
The text in the selected cell(s) will now wrap, meaning it will automatically adjust to fit within the cell width, and you can see multiple lines of text within the same cell.
Wrap Text in Excel Using the Formula Bar
Another way to wrap a text is to manually wrap it inside the Formula bar.
- Select any cell from the full sentence. You will notice the sentence will appear in the formula bar in one body.
- Take the space bar where you want a text break (making another line) and press ALT+ENTER.
- Then adjust the space of the cell width by dragging the column.

Wrap Text with Format Cells Dialog Box in Excel
Another way to find the Wrap Text command is in the Format Cells dialog box.
- Click on the Home tab.
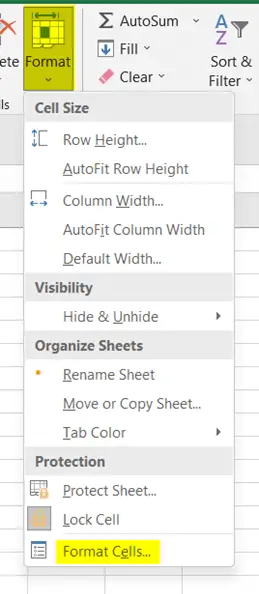
- From the Cells group, hit the Format drop-down menu.
- Select the command Format Cells.
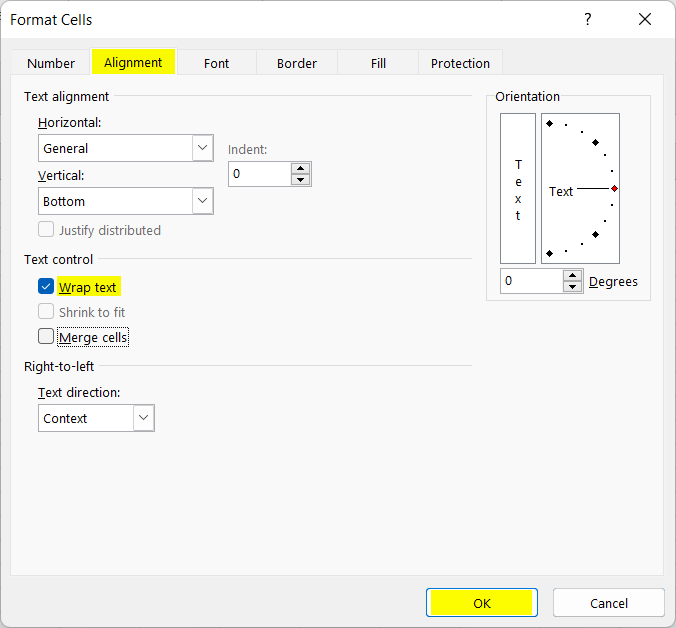
 The Format Cells dialog box will pop up on the screen. Alternatively, you can press the CTRL + 1 to open the Format Cells dialog box.
 - Select the Alignment tab.
- Now in the Text Control section, tickmark the Wrap Text checkbox.
- Finally hit the OK button.

Why Can’t I Wrap Text in Excel?
Wrapping text requires that the cell is large enough to accommodate the wrapped text. If the cell is too small in height, Excel won’t be able to wrap text effectively. To address this, you can adjust the row height to make it taller. Here’s how:
- Select the row(s) that contain the cell with the wrapped text.
- Right-click on the selected row(s).
- Choose “Row Height” or “Row Height…” from the context menu.
- Increase the height to allow for text wrapping, and click “OK.”
How Do I Autofit Text in Excel?
You can use the “AutoFit” feature in Excel to automatically adjust the width of a column or the height of a row to fit the content. To AutoFit text in a cell or column, follow these steps:
AutoFit Column Width
- Select the column(s) to autofit.
- Go to the “Home” tab on the Excel ribbon.
- In the “Cells” group, click the “Format” dropdown arrow.
- Select “AutoFit Column Width.”
AutoFit Row Height
- Select the row(s) to autofit.
- Go to the “Home” tab on the Excel ribbon.
- In the “Cells” group, click the “Format” dropdown arrow.
- Select “AutoFit Row Height.”
Excel will adjust the column width or row height to fit the content within the selected cells, making the text visible without unnecessary extra space.
Conclusion
The Wrap Text command is very useful especially when you intend to insert a heading for the dataset in Excel. It also helps to add details to the data table sometimes. I hope you get the overall idea of using the Wrap Text command properly. Please visit our Blog page for more helpful articles. Have a good day!
Excel Glossary | Autosum | Fill Handle | Conditional Formatting | Merge & Center | Flash Fill | Find & Replace | Freeze Panes | Format Painter | Format Cells | Sort & Filter | Advanced Filter | Text to Columns | Go To Special | Calculation Options | Name Manager | Excel Table | Slicer | Power Query | Add-ins
 The Format Cells dialog box will pop up on the screen. Alternatively, you can press the CTRL + 1 to open the Format Cells dialog box.