An Overview of Slicer in Excel
Slicer allows users to quickly isolate subsets of information from a dataset. As a result, it helps to enhance data analysis and visualization capabilities. It is helpful for things like making financial reports more efficient and analyzing sales trends. In this article, I’ll give you a detailed rundown of the Slicer feature of Microsoft Excel.
What is a Slicer in Excel?
A slicer is a visual filtering tool that allows you to easily filter data in a pivot table or pivot chart in Excel. It contains a user-friendly interface with buttons or sliders that allow you to select specific data subsets to highlight them.
How to Insert Slicer in an Excel Sheet
To insert a Slicer in Excel, follow these step-by-step instructions:
- Select a cell from the dataset and press CTRL+A.
This will select the data range. - Go to the Insert tab from the ribbon at the top of the screen.
- Now select the Table command.
 The Create Table window will show up on the worksheet.
 - Click OK.
Note: If your table has headers, check-mark the My table has headers box. Shortcut: Press CTRL+T to open the Create Table window.
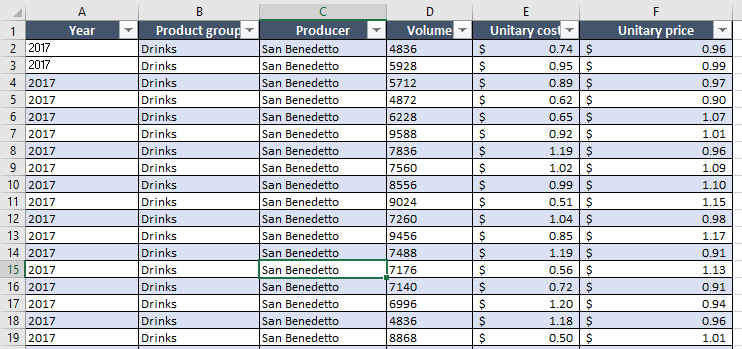
Now, the dataset will turn into a table like the one below.
- Now again, go to the Insert tab.
- Click on Slicer from the Filters group.
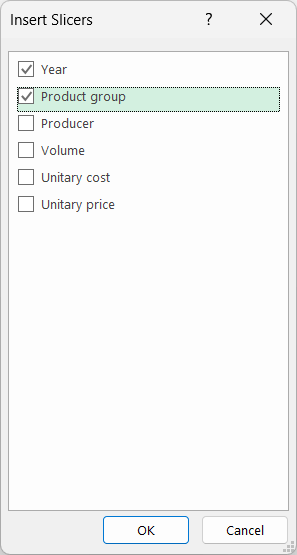
 The Insert Slicer dialog box will appear, showing all the column headings from your selected data range. I’ve selected Year and Product Group from the Insert Slicer dialog box, as I want to highlight these two sections. You can choose as many fields as you want.
- Click OK.
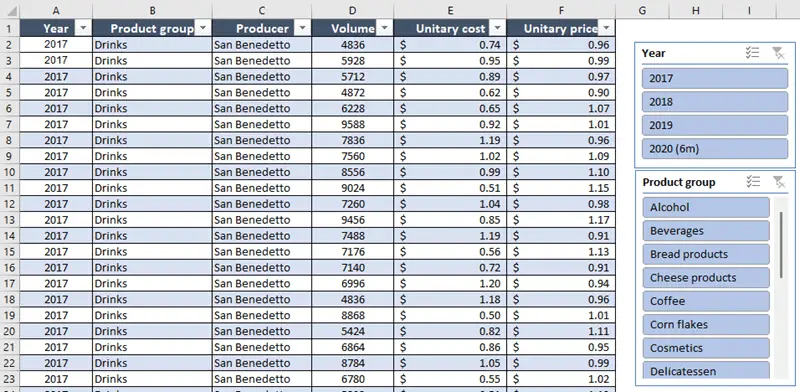
The Slicers will appear beside the table instantly.
Features of Slicer in Excel
1. Single Field Selection
Now that the Slicer is inserted, you can use it to filter your data. Click on any item within the Slicer to filter the data based on your selection.
I chose 2019 from the Slicer Year, and Ice cream from the Slicer Product Group.

2. Multiple Field Selection
To select multiple fields click on the multiple selection command.

Tip: You can select multiple fields by holding the CTRL key while clicking. Or press the ALT+S key to activate the multiple selection command.
3. Removing Field Selections in Slicer
If you have mistakenly added a field, you can remove it by again clicking on it.
To remove all your selected filters at once, click on the top-right icon to remove field selections.
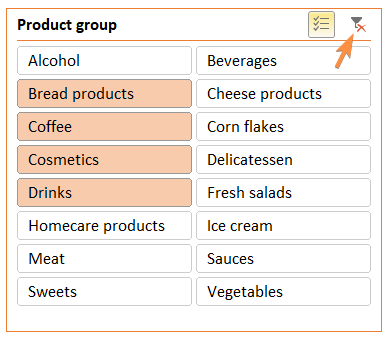
Tip: Press ALT+C to clear the filters.
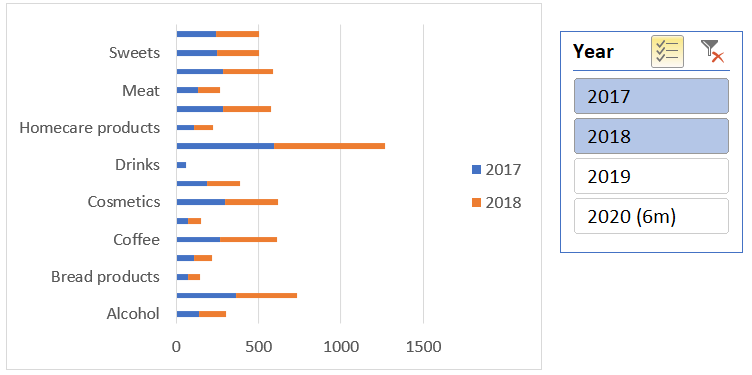
4. Slicer in Pivot Chart in Excel
Slicers act as a visual filter for the pivot chart. You can add a Slicer to your pivot chart the same way you can add it to the data table.
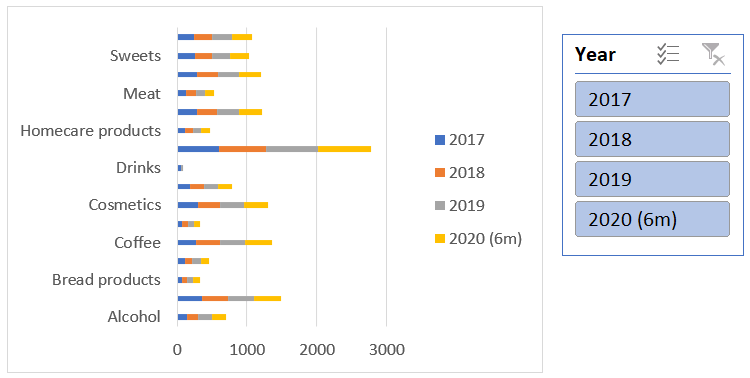
The process of using the Slicer for selecting fields in the pivot chart is exactly the same as the Slicer for tables.
How to Customize a Slicer in Excel
You can place one Slicer in front of another Slicer if you want to keep your Excel sheet neat and simple.
Use the Bring Forward and Send Backward buttons to do that.

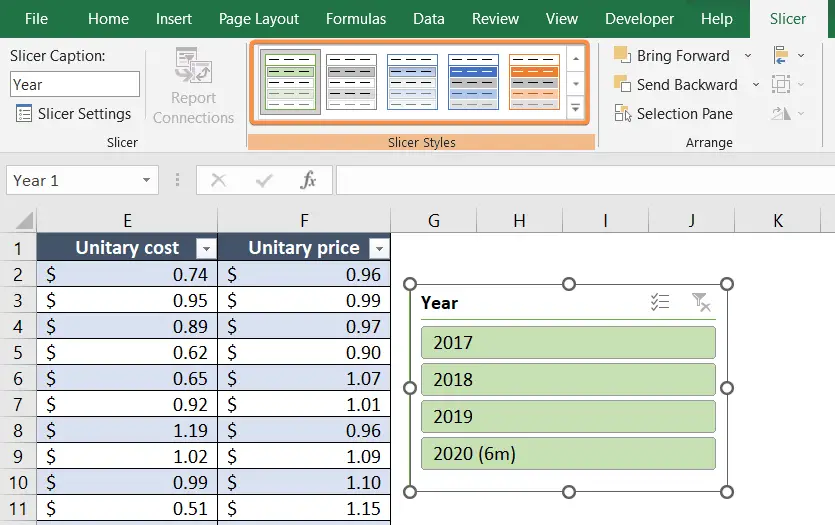
You can also change the color of the Slicers and give them different themes in Excel. The options are available under the Slicer Styles group.
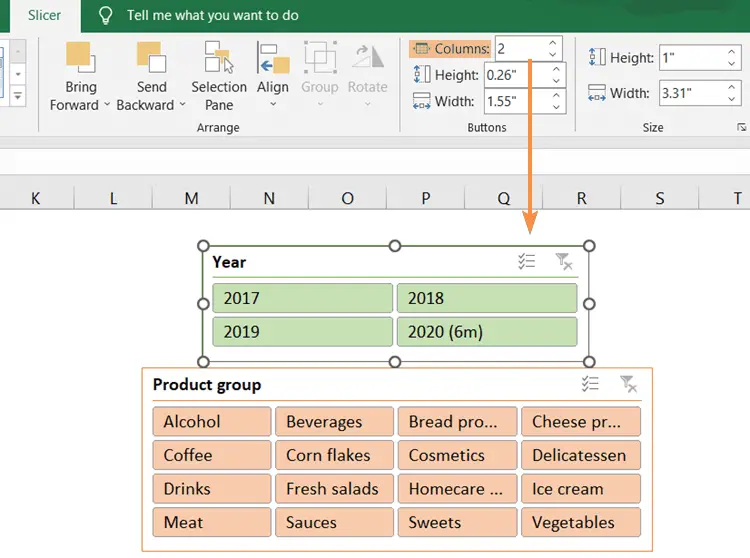
Keeping the filters in one column looks boring and is pretty common. Change the number of Columns in the Buttons group to create a variation in the appearance of the Slicer.
How to Delete Slicer in Excel
If your work is done with the Slicer and now you want to delete it from the worksheet, open the context menu and select the option Remove “Field Name”.
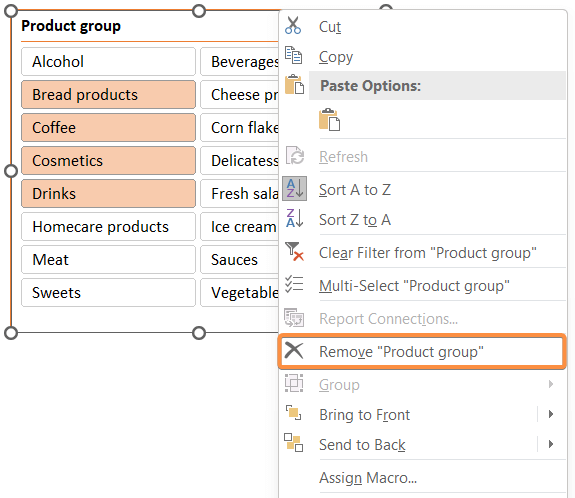
However, the changes you make by using the Slicer will remain on the worksheet even after you delete the Slicer.
Conclusion
Slicer offers a flexible and customizable experience. It provides a user-friendly and interactive way to filter and analyze large sets of data in Excel. You can choose from a variety of options to format and style the Slicer, aligning it with your desired visual theme. I hope you got the complete guide to using a Slicer from this article. Also, if you have any questions regarding the Slicer, leave a comment in the comment section. Thank you.
Excel Glossary | Autosum | Fill Handle | Conditional Formatting | Merge & Center | Wrap Text | Flash Fill | Find & Replace | Freeze Panes | Format Painter | Format Cells | Sort & Filter | Advanced Filter | Text to Columns | Go To Special | Calculation Options | Name Manager | Excel Table | Power Query | Add-ins
 The Create Table window will show up on the worksheet.
 Shortcut: Press CTRL+T to open the Create Table window.
 The Insert Slicer dialog box will appear, showing all the column headings from your selected data range. I’ve selected Year and Product Group from the Insert Slicer dialog box, as I want to highlight these two sections. You can choose as many fields as you want.