5 Ways to Remove Blank Characters in Excel
- Take an empty cell.
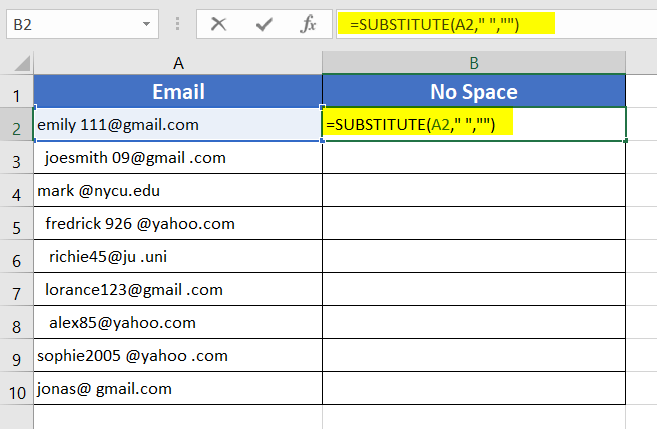
- Use this formula: =SUBSTITUTE(A2,” “,””)
- Hit the ENTER button.
- Double-click on the Fill Handle to copy down the formula.
This formula will replace all occurrences of a blank character or space character (” “) in the text found in cell A2 with nothing (an empty string “”).
In other words, it removes all blank characters and spaces from the text in cell A2.
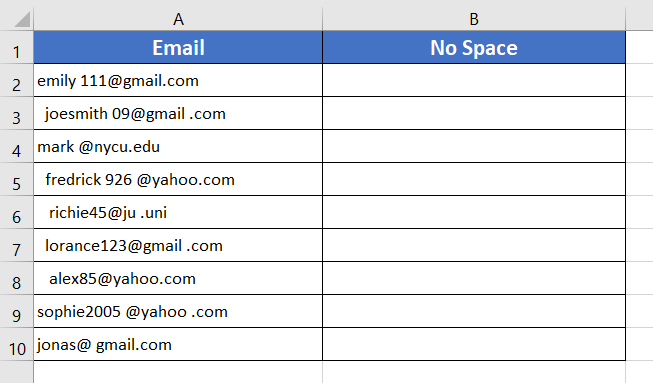
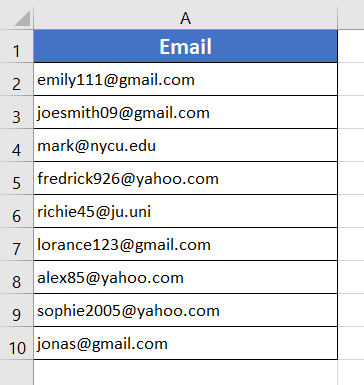
To show you how to remove blank characters in Excel, I have taken a list of email addresses in my dataset. The email addresses are basically copied from a text file. For this reason, the email addresses are not arranged properly in the worksheet. I have created another column here named No Space (column B) to show you the results.
Remove Blank Characters in Excel Using SUBSTITUTE Function
The SUBSTITUTE function allows you to use alternate characters in place of other characters. It is a very reliable way to remove blank spaces in Excel sheets.
Syntax
=SUBSTITUTE(text, old_text, new_text, [instance_num])Formula
=SUBSTITUTE(A2,” “,””)Now, to remove blank line with SUBSTITUTE function, go through the steps below:
- Write the formula in a cell: =SUBSTITUTE(A2,” “,””)

- Hit the ENTER key.
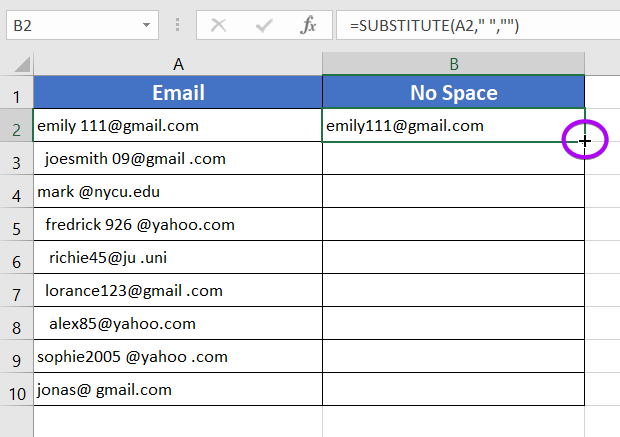
- After that, place the cursor on the bottom-right corner of cell B2. Then, the Fill Handle icon will appear.

- Now, double-click on the Fill Handle icon.
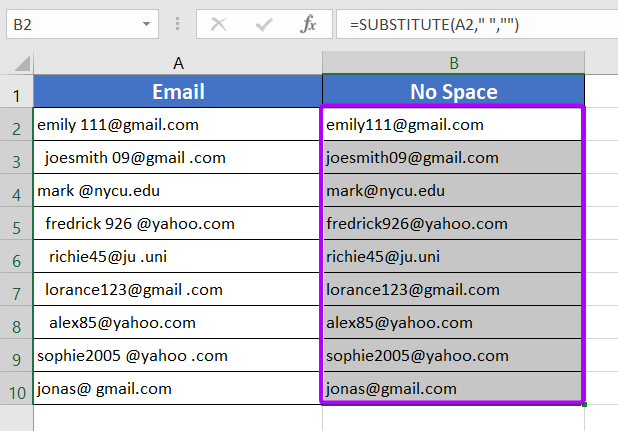
There were multiple blank characters in most of the cells of column A. The black spaces were either at the beginning, middle, or end of the test string. After using the SUBSTITUTE function, you can see that there are no blank characters left in the text strings displayed in column B.
Remove Blank Characters in Excel Using Find and Replace Feature
There exist certain formulas that facilitate the removal of blank characters. But there is a different method that allows the removal to be done without the need for any formula. It is using Excel’s Find and Replace feature. So, it can easily remove any designated character. I am going to use the Find and Replace feature to remove the blank characters in Excel. Hence follow the steps below:
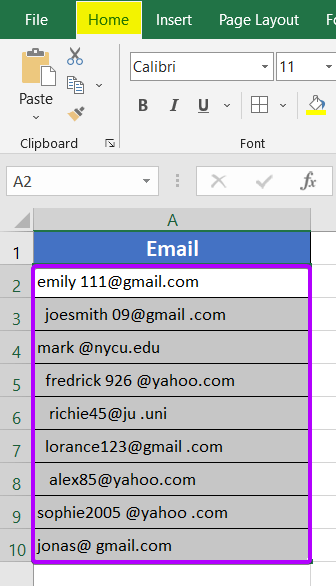
- First, choose the range of cells from A2 to A10.
- Secondly, go to the Home tab.

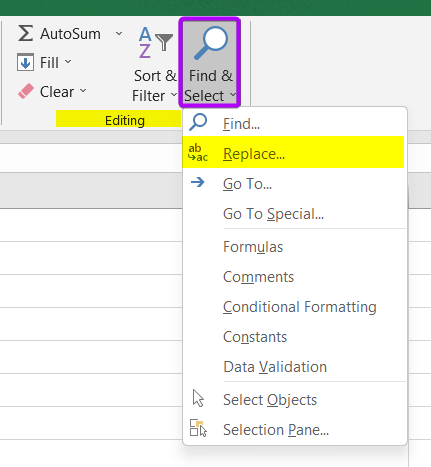
The Find and Select drop-down menu is located in the Editing group of the Home tab. - Now, right-click on the Find and Select drop-down menu.
- After that, select the option named Replace from the drop-down menu.

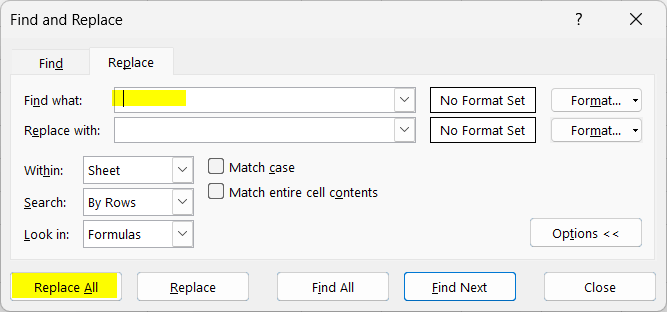
You will see the Find and Replace dialog box will pop up in the Excel sheet. - Then, open the Replace tab.
- Now, inside the Find What box, type a space “ ” and leave the Replace With box.
I did not enter any characters in the Replace With box as I don’t want anything replacing the space “ ”. However, you can mention anything you want in the Replace With box, and you will get your desired result. - Now, hit the Replace All button.

- Finally, click on the Close button.
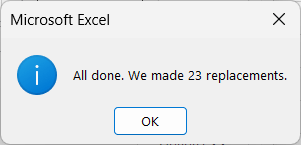
You will see a window with this message.

- Hit the OK button.
I have removed the unwanted blank characters present in the Excel sheet with Find and Replace feature.
- 7+ Methods to Remove Characters from Left in Excel
- 5 Approaches to Remove Characters from the Right in Excel
- 3+ Ways to Remove Dashes in Excel
Clear Blank Characters in Excel Using Power Query
Blank spaces can also affect how your data is processed and analyzed. For example, if you’re performing a pivot table analysis, blank spaces can interfere with the grouping and sorting of data. By removing blank spaces, you can ensure that your data is properly processed and analyzed.
Note: This approach only eliminates spaces at the start and end of words. But it does not remove any spaces between them.
To clear blank characters with Power Query, follow the steps below:
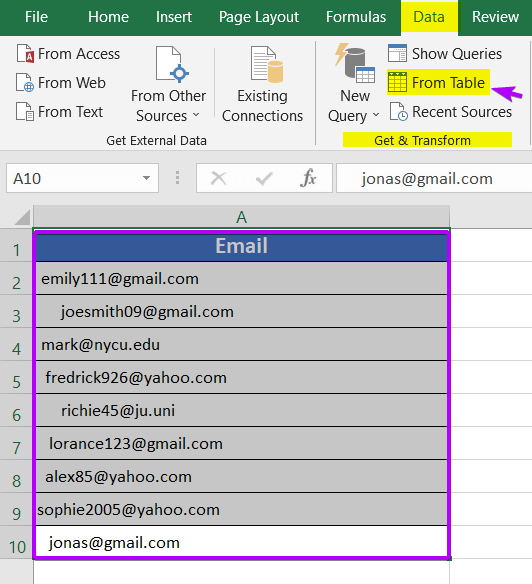
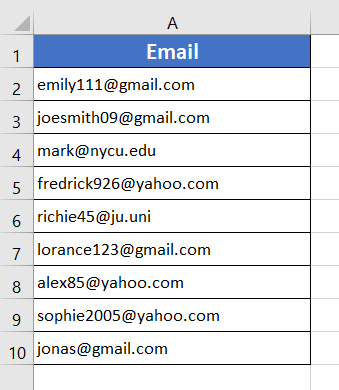
- Begin with selecting the cell range A2:A10.
- Then, go to the Data tab.
- Now, from the Get and Transform group, select the From Table command.
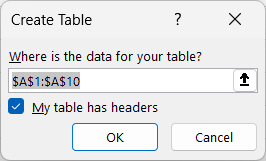
 A window named Create Table will pop up.
 - Check the cell range in the window.
Helpful Tips:- If the data range mentioned in the Create Table window is not correct, you can adjust it again.
- In my dataset, I have table headers. For this reason, I put a tick mark on My Table Has Headers. If your table does not have headers, you can leave the checkbox empty.
- Click on the OK button.

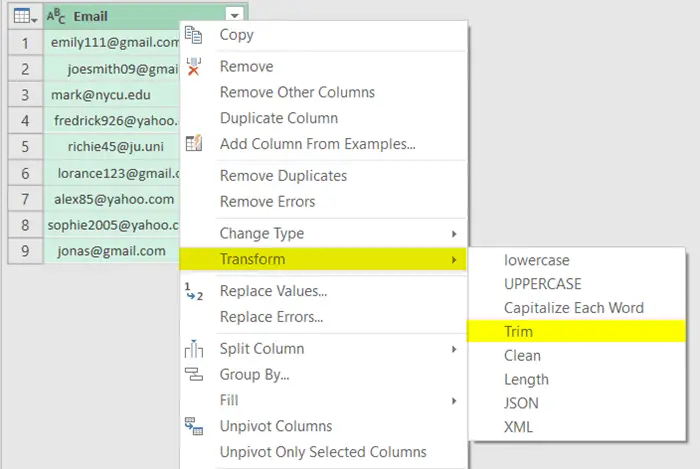
Now the Power Query Editor will appear on the screen. - Take the cursor to the column header and right-click on the column header.
Note: Do not right-click on the small drop-down icon on the column header. You have to click on the body of the column header.
- From the menu, take the cursor to Transform and select Trim.
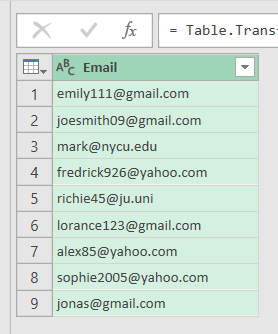
 You will notice the extra spaces are no longer present.

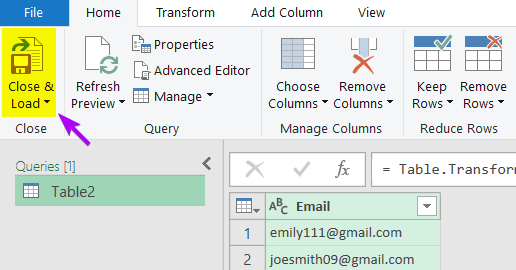
- Click on the Close and Load command to close the Power Query Editor.
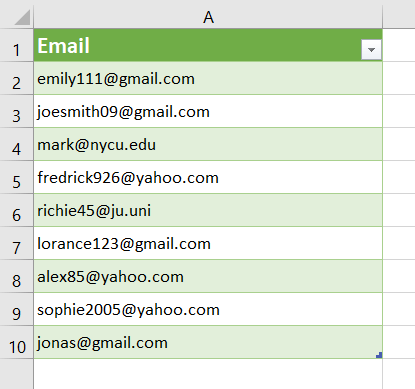
You will find the Power Query‘s results are now sent to a separate Excel sheet rather than the original Excel file.
Clear Blank Characters in Excel Using TRIM Function
Another way to chop out irregular spacing is by using the TRIM function in Excel.
Note: The TRIM function can only eliminate the starting and ending blank characters from the cells.
Syntax
=TRIM(text)Formula
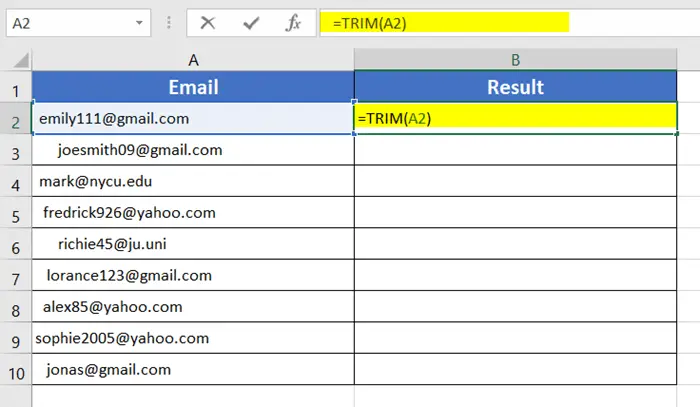
=TRIM(A2)To clear the blank characters with TRIM function, go through the procedure below:
- Take a spare column in the worksheet to perform the formula.
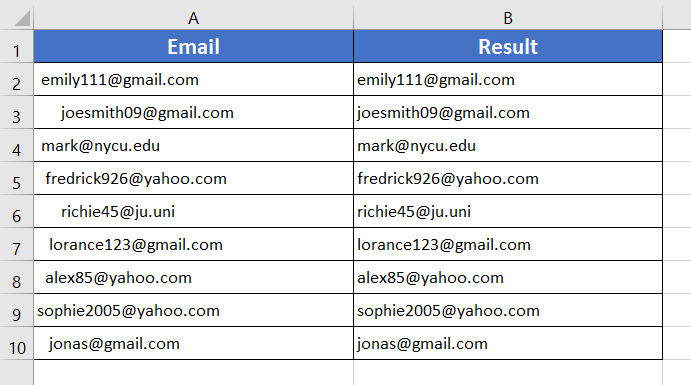
I took column B and gave it the column header Result. - Write the formula in cell B2.

- Press ENTER to apply the formula.
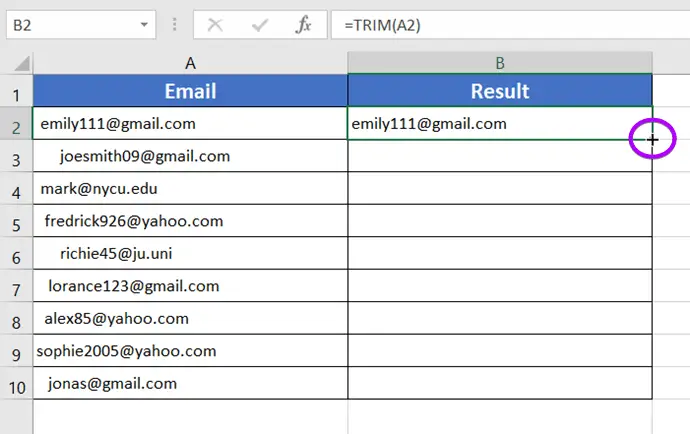
- Now, double-click on the Fill Handle icon located at the bottom-right corner of cell B2.
The Fill Handle icon will copy the formula into the entire cell range B2:B10.

The TRIM function has trimmed out all the extra spaces, and the results are displayed in column B.
- 6 Ways to Remove the First 2 Characters in Excel
- 6 Ways to Remove the First 4 Characters in Excel
- Remove Non-Printable Characters in Excel [5+ Methods]
Use a VBA Code to Remove Blank Characters in Excel
VBA (Visual Basic for Applications) is a programming language that is integrated with Microsoft Excel. It is a really helpful tool that can customize the functionality of Excel. In this method, I am going to use the VBA codes to instruct it to remove blank characters from the worksheet.
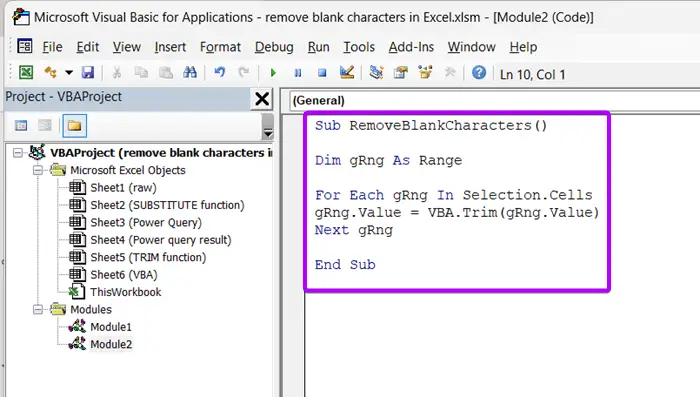
This piece of VBA code can count all the columns having data in an Excel sheet. Just insert the code inside a new Module in your Visual Basic Editor and Run it.
Sub RemoveBlankCharacters()

Dim gRng As Range

For Each gRng In Selection.Cells
gRng.Value = VBA.Trim(gRng.Value)
Next gRng

End Sub
To remove blank characters with a VBA code, go through the steps below:
- At first, go to the Developer tab.
- Now, click on the Visual Basic command from the Code group to open VBA.
 Shortcut: Press Alt+F11 or Alt+Fn+F11 to open VBA.
The VBA window comes in front of the Excel sheet. - Now take the cursor to the project panel and right-click on your current sheet name.
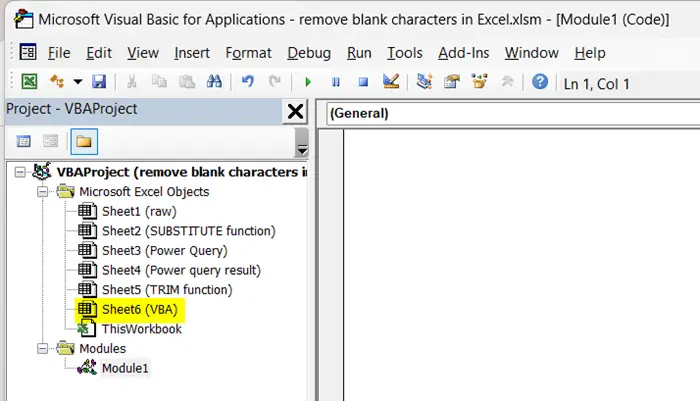
The sheet name that I am working with in my workbook is VBA.

- From the drop-down menu, take the cursor to Insert then select Module.
It will add a Module to your sheet. Here, Module2 is added to my sheet. - Insert the VBA code now.

- After that, click on the top-right cross icon to close the VBA window.
You will return to the Excel sheet again. - Then select the cell range A2:A10.
- Now, under the Developer tab, click on the Macros icon.
Shortcut: Use Alt+F8 or Alt+Fn+F8 to open Macros.

- From the Macro dialog box, hit the Run button.
This way you can remove the black characters with the help of the VBA in Excel.
Conclusion
I’ve discussed five very handy techniques that you can use to remove blank characters from an Excel sheet. You can find more articles about removing characters in Excel on our website. Click here to explore more about Excel. You are invited to drop your valuable opinion in the comment section below. Have a nice day!
Frequently Asked Questions
How do I remove blank text in Excel?
To remove blank text in Excel, you can use the IF and TRIM functions together. Here’s a formula that effectively removes blank text: =IF(TRIM(cell_reference)=””, “”, TRIM(cell_reference))
Replace “cell_reference” with the reference to the cell containing the text. This formula checks if the trimmed version of the text is blank and returns an empty string if true, otherwise returns the trimmed text. It’s a concise way to clean up data by removing cells with only spaces or entirely blank content in Excel.
How do I remove a ghost character in Excel?
To remove a ghost character in Excel, you can use a combination of functions, such as SUBSTITUTE or TRIM, to eliminate unwanted or invisible characters. Here’s a general approach: =SUBSTITUTE(cell_reference, CHAR(128), “”)
Replace “cell_reference” with the reference to the cell containing the text with the ghost character. Adjust CHAR(128) to the specific ASCII code of the ghost character you want to remove. This SUBSTITUTE formula helps eradicate specific characters that may be causing issues in your Excel data.
How do I remove invisible characters in Excel?
To remove invisible characters in Excel, use the CLEAN function. It eliminates non-printable characters that might not be visible but can cause issues in data. Here’s how to use it: =CLEAN(cell_reference)
Replace “cell_reference” with the reference to the cell containing the text with invisible characters. The CLEAN function is effective in cleaning up data by removing non-printable characters, ensuring a cleaner and more accurate dataset in Excel.
Related Articles
