How to Remove Dashes in Excel Without Removing Zeros [5 Ways]
Sometimes we use datasets that contain dashes but we need those data without dashes. That’s why we need to remove them. But here we face some problems. When we try to remove dashes, some data containing zeros in the leading position is also deleted. Microsoft Excel automatically removes the leading zeros from a number. So our main goal is to remove those dashes but not the leading zeros.
1. Using the SUBSTITUTE Function to Remove Dashes in Excel Without Removing Zeros
To remove dashes in Excel without removing zeros we can use the SUBSTITUTE function. It is the easiest method. It is employed to swap out one character for another.
Syntax
SUBSTITUTE(text,old_text,new_text),old_text,new_text)Formula
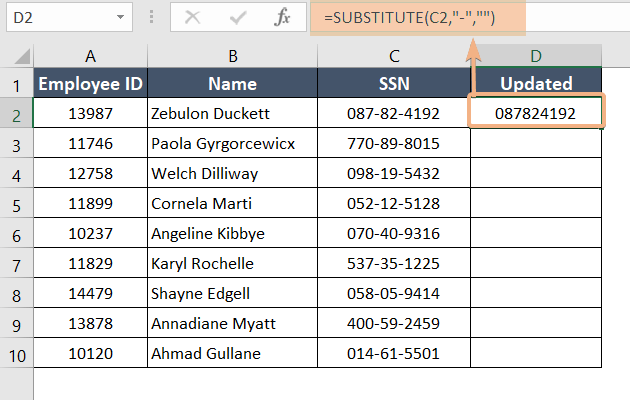
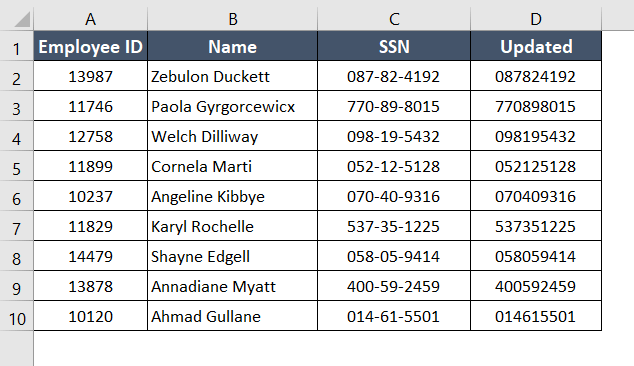
=SUBSTITUTE(C2,"-","")Formula Breakdown
This formula utilizes the SUBSTITUTE function in Excel, targeting cell C2. It replaces hyphens (“-“) with an empty string (“”). In essence, it removes all hyphens from the content of cell C2.
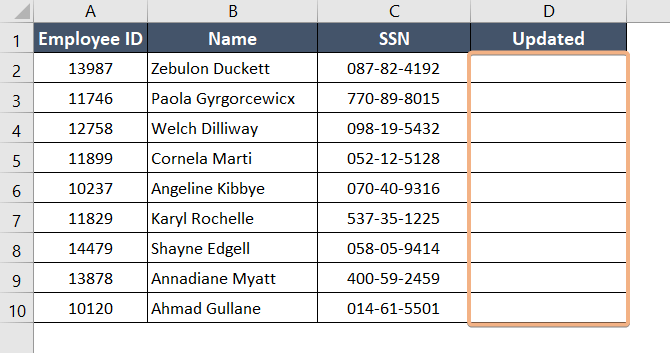
To remove dashes without removing zeros in Excel use the SUBSTITUTE function. Follow the steps below:
- Copy the formula above.
- Apply the formula in cell D2.

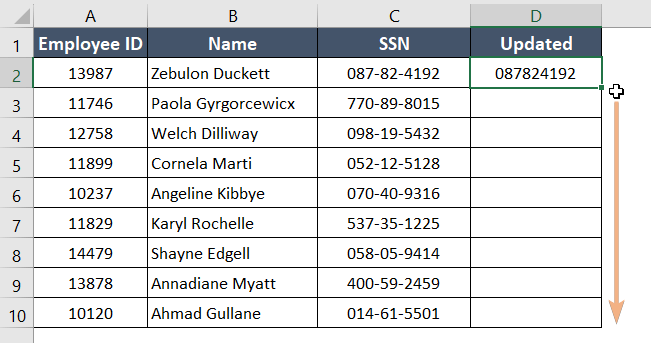
- Drag the Fill Handle from D2 to D10.

Final Result
Therefore, all dashes have been eliminated.
2. Using REPLACE Function to Remove Dashes in Excel Without Removing Zeros
The REPLACE function allows for the replacement of any character from any cell. We can use Excel’s REPLACE function to replace dashes but not remove zeros by following the instructions below.
Syntax
= REPLACE(old_text, start_num, num_chars, new_text)Formula
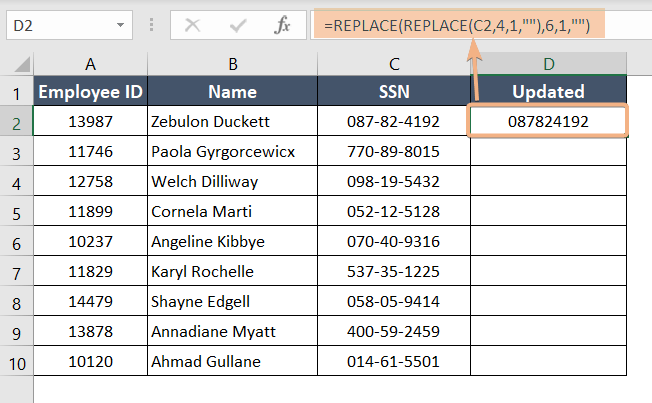
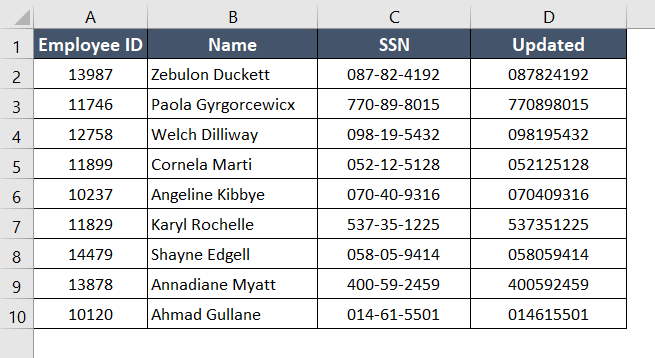
=REPLACE(REPLACE(C2,4,1,""),6,1,"")Formula Breakdown
This Excel formula employs the REPLACE function twice on cell C2. It first removes the character at the 4th position and then removes the character at the 6th position.
Essentially, it deletes characters at positions 4 and 6 in the content of cell C2, modifying the original text.
The REPLACE function in Excel can be used to remove dashes without removing zeros. Take the actions listed below:
- Write the formula in cell D2 and apply it.

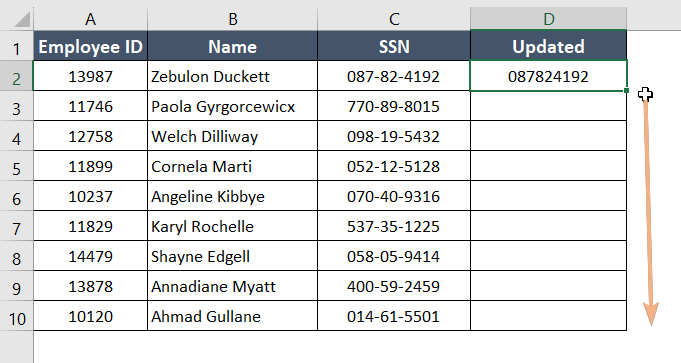
- Drag from D2 to D10.

Final Result
Finally, we see that the REPLACE Function removes all dashes also it does not remove zeros in the first position of the string.
3. Using Flash Fill Feature to Remove Dashes in Excel Without Removing Zeros
The Flash Fill method is another method to remove dashes in Excel without removing zeros. But in this method, there is a little problem. Microsoft Excel can automatically remove the leading zeros. By following this method we can easily solve this problem.
Dashes can be eliminated in Excel using the Flash Fill feature, but zeros remain. Perform the following actions:
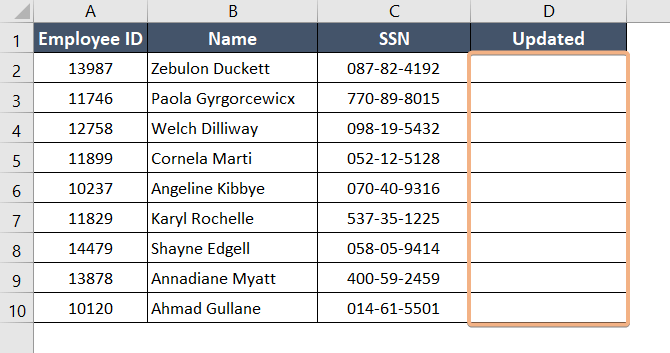
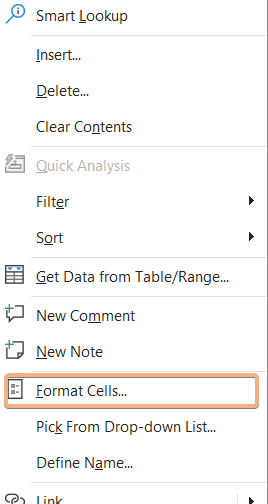
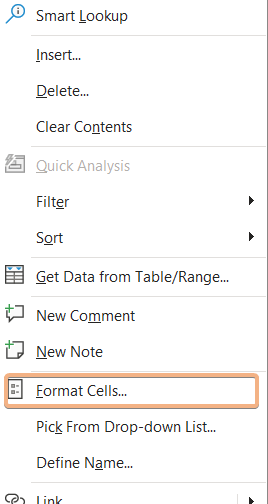
- Select Column D2:D10 and then click the Right Button of the mouse.

- Click Format Cells.

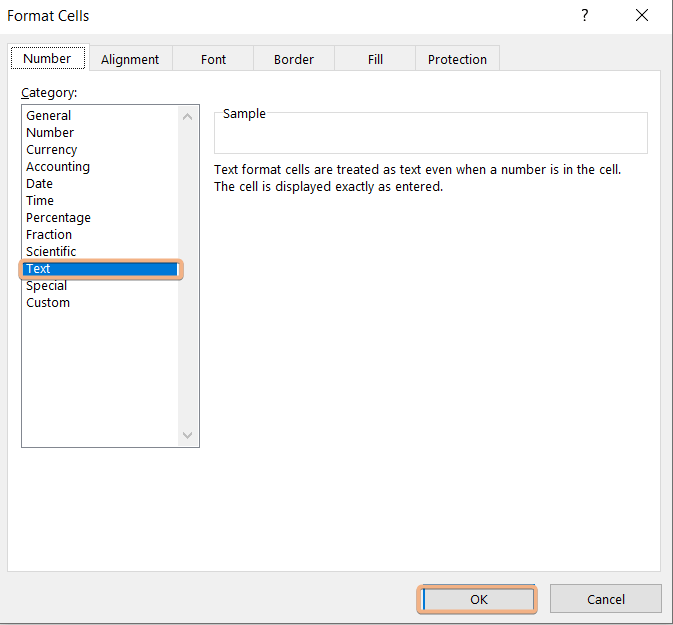
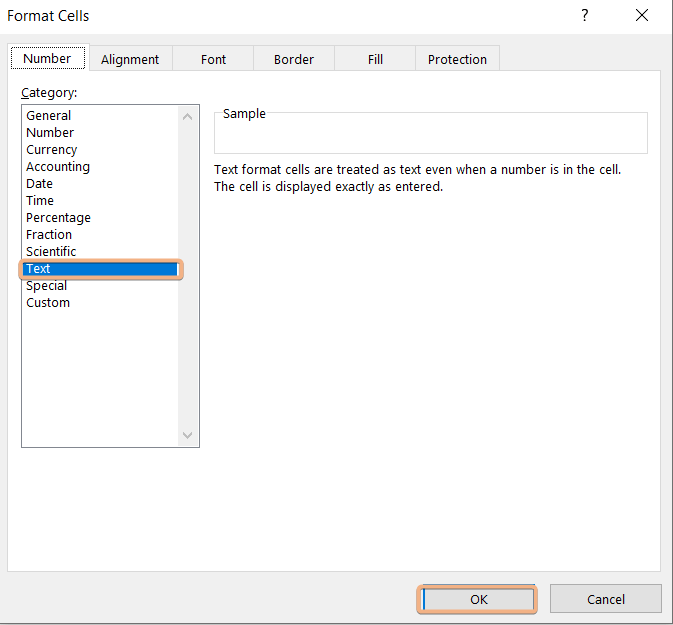
- Click Text.

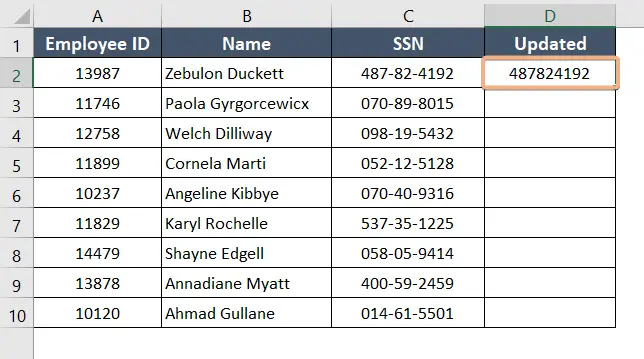
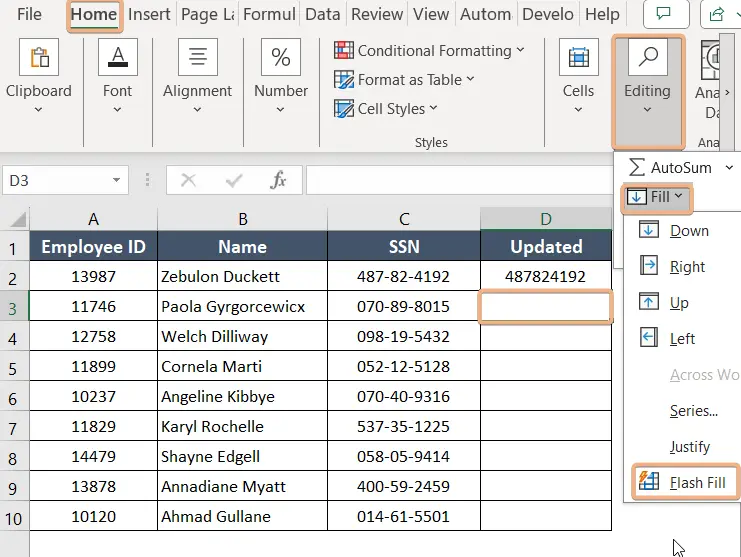
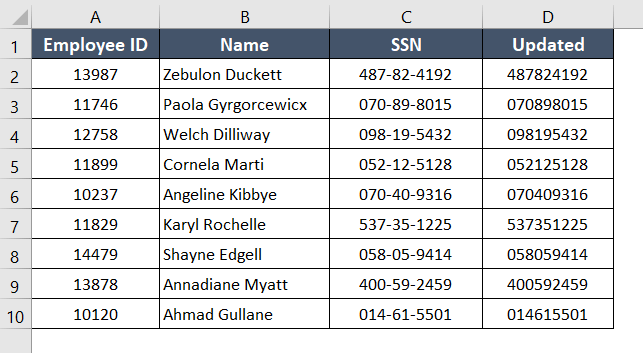
- Choose a cell (D2) and manually enter 487824192 without using dashes.

- Then select the next cell (D3).
- Go to Data.
- Then choose Flash Fill in the Data Tools section. or press CTRL+E.

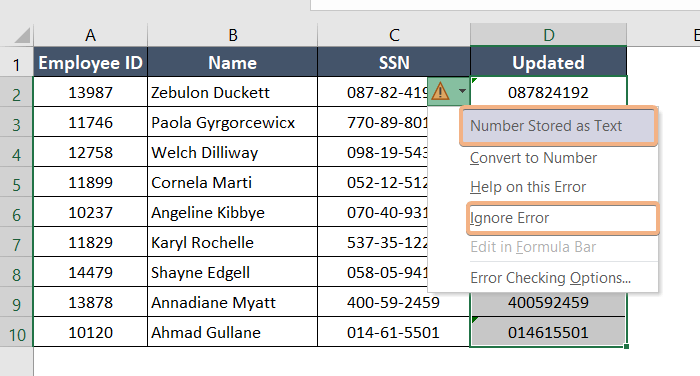
- First, click Warning Sign.
- Then click Number Stored as Text and Ignore All.

Final Result
All dashes from the dataset have been removed by Flash Fill without removing zeroes.
4. Remove Dashes in Excel Without Removing Zeros Combining Multiple Functions
We can use a combination of multiple functions to remove dashes without removing zeros.
This process also makes use of the TEXTJOIN, IFERROR, INDIRECT, MID, and ROW functions.
Syntax
=TEXTJOIN(new_text, TRUE, IF(MID(text, ROW(INDIRECT("1:" & LEN(text))), 1) = "old_text", new_text, MID(text, ROW(INDIRECT("1:" & LEN(text))), 1)))Formula
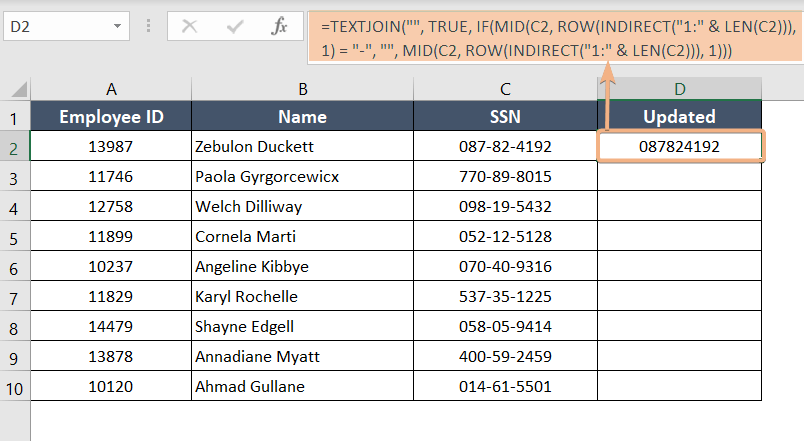
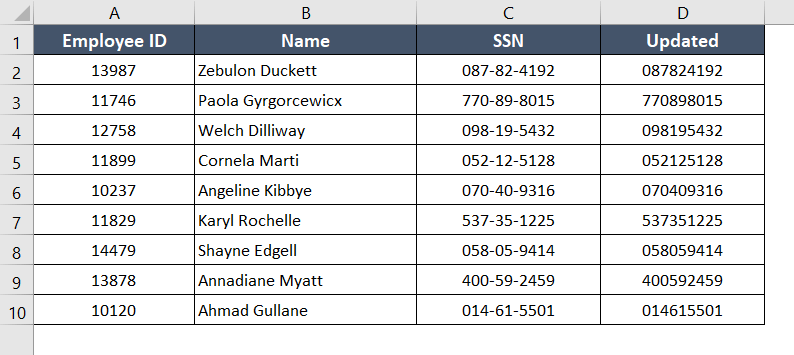
=TEXTJOIN("", TRUE, IF(MID(C2, ROW(INDIRECT("1:" & LEN(C2))), 1) = "-", "", MID(C2, ROW(INDIRECT("1:" & LEN(C2))), 1)))Formula Breakdown
This formula in Excel utilizes the TEXTJOIN, MID, ROW, and IF functions.
- It iterates through each character in cell C2, excluding hyphens (“-“), and joins the remaining characters into a single text string.
- The ROW(INDIRECT(“1:” & LEN(C2))) generates an array of numbers from 1 to the length of C2, facilitating the examination of each character individually.
- The MID function extracts each character, and the IF condition checks for the presence of hyphens, excluding them from the final result.
- The TEXTJOIN function then concatenates the filtered characters into a coherent text string.
To remove dashes without removing zeros, utilize Excel’s TEXTJOIN, IFERROR, INDIRECT, MID, and ROW functions in combination. Perform the following actions:
- Copy and apply the formula in cell D2.

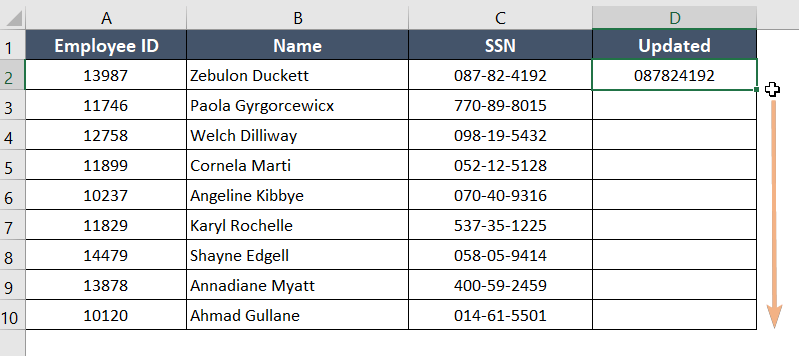
- Drag D2 to D10.

Final Result
By using the combination of multiple functions we can easily remove dashes, without removing zeros,
5. Applying VBA Code to Remove Dashes in Excel Without Removing Zeros
The last method of this article is the use of VBA code to remove Dashes in Excel. The process is given below. By using VBA code we can remove dashes but the zeros that are present in the first can be also removed because of the formatting of the cell. We have to change the formatting of the cell to restore zeros.
Usually, the Cells are present in General format but we need to change it to Text format, so first zero is considered as text not number. To do this thing follow the process:
Usage guide
- Select D2:D10 and then click the Right Button of the mouse.

- Click Format Cells Option.

- A new Dialogue Box will be opened and Click Text. You can change your current cell format to any type of format you want. Then after that click OK.

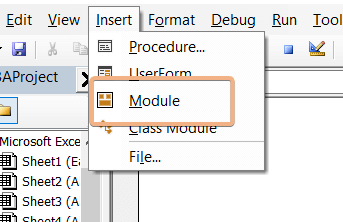
- Go Press ALT+F11 and open the Visual Basic Editor.
- Next, choose Insert to create a Module.

- Copy the following code and paste it to the newly built module.
Sub RemoveDashesPreserveLeadingZeros() Dim rng As Range Dim cell As Range Dim outputCell As Range Dim result As String ' Prompt the user to select a range On Error Resume Next Set rng = Application.InputBox("Select a range with dashes to process:", Type:=8) On Error GoTo 0 ' Exit if the user cancels the input box If rng Is Nothing Then Exit Sub End If ' Prompt the user to select a cell for the output results On Error Resume Next Set outputCell = Application.InputBox("Select a cell for the output results:", Type:=8) On Error GoTo 0 ' Exit if the user cancels the input box If outputCell Is Nothing Then Exit Sub End If ' Loop through each cell in the selected range For Each cell In rng result = Replace(cell.Value, "-", "") ' Remove dashes ' Check if the original cell had leading zeros and add them back If Len(cell.Value) > 0 And Left(cell.Value, 1) = "0" Then Do While Left(result, 1) = "0" And Len(result) > 1 result = Right(result, Len(result) - 1) Loop result = "0" & result ' Add leading zeros back End If ' Place the modified value in the output cell outputCell.Value = result ' Move to the next output cell Set outputCell = outputCell.Offset(1, 0) Next cell End Sub - Save the code by pressing CTRL+S.
- Go to Developer and click the Macros button or you can easily open the Macro dialog box by pressing ALT+F8.

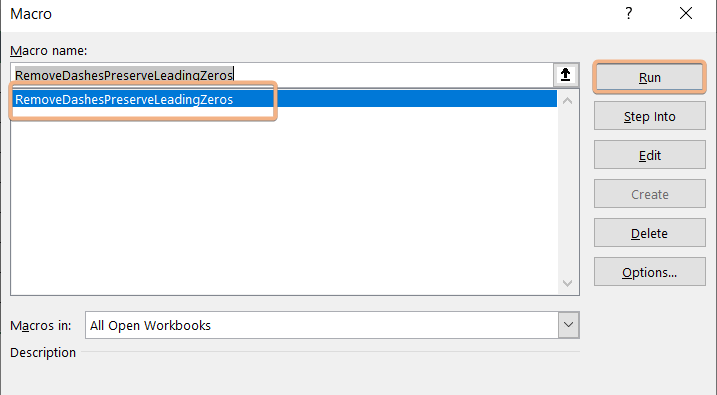
- Click Run by selecting RemoveDashesPreserveLeadingZeros.

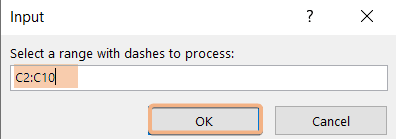
- Select the range C2:C10 and click OK.

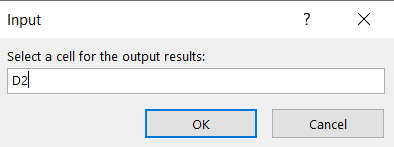
- Select cell D2 and click OK.

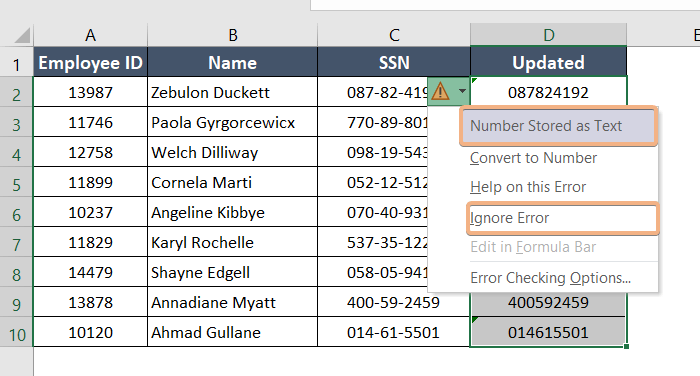
- After that, a warning sign will appear beside D2:D10. Click the warning sign, it will show us if we want to Store it as text or Convert it as a Number. If we click Stored as text the number will be saved as text and the leading zeros are present in the text. If we Convert as a number, it will be saved as a number, and zeros in the leading position will be removed. So, firstly click, Stored as Text, then click Ignore All.

Final Result
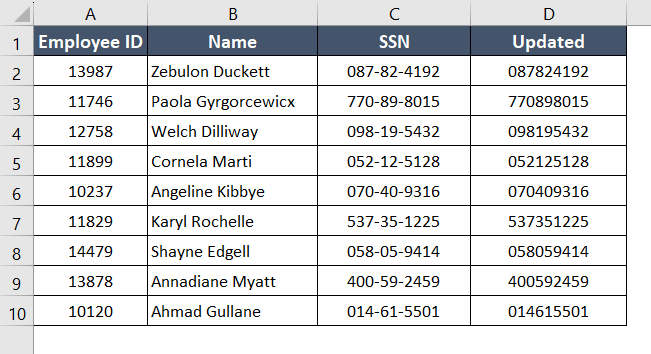
Finally, we see that we can remove dashes using VBA code also it will preserve leading zeros.
Conclusion
In this article, we have discussed 5 methods to remove dashes in Excel without removing zeros. The SUBSTITUTE, REPLACE, and Combination of Functions easily remove dashes and preserve zeros. However, the VBA method and Flash Fill method can not easily preserve zeros though they can easily remove dashes. For this type of problem, we need to convert the Number to Text first. Then we can easily remove dashes and preserve zeros.
Frequently Asked Questions (FAQs)
How do I get rid of dash lines in Excel?
To remove dash lines in Excel, you can use the SUBSTITUTE function to replace the dash lines with an empty string. Here’s a generic formula: =SUBSTITUTE(A1, “-“, “”)
- Replace “A1” with the reference to the cell containing the text with dash lines.
- This formula will replace all occurrences of the dash (“-“) with an empty string, effectively removing the dash lines from the content of the cell.
- Adjust the cell reference based on where your data is located.
How do I get Excel to show zero instead of dash?
To make Excel show zero instead of a dash for cells with zero values, you can use the following formula: =IF(A1=0, 0, A1)
- Replace “A1” with the reference to the cell you want to modify.
- This formula checks if the value in cell A1 is zero.
- If it is, it displays 0; otherwise, it displays the original value. This way, you’ll see zero instead of a dash for cells with zero values.
- Adjust the cell reference based on where your data is located.
How do I make Excel not remove zeros?
If you want to prevent Excel from automatically removing leading zeros in a cell, you can format the cell as text before entering the data. Here’s how:
- Select the cell or range of cells where you want to enter or preserve leading zeros.
- Right-click on the selected cell(s) and choose “Format Cells.”
- In the Format Cells dialog box, go to the “Number” tab.
- Select “Text” from the category list.
- Click “OK” to apply the changes.
Now, when you enter data into the selected cell(s), Excel will treat the entry as text, and leading zeros will not be automatically removed.
If you’ve already entered data and leading zeros have been removed, you may need to re-enter the data after formatting the cells as text to preserve the leading zeros.
How do you keep leading zeros in sheets?
To keep leading zeros in Google Sheets, you can follow these steps:
- Select the cells or range of cells where you want to keep leading zeros.
- Right-click on the selected cells and choose “Format cells.”
- In the Format Cells panel, go to the “Number” tab.
- Select “Plain Text” from the options.
- After formatting the cells as plain text, enter your data.
- The leading zeros should now be preserved, and Google Sheets will not automatically remove them.
Remember that formatting as plain text should be done before entering data to ensure that leading zeros are not removed. If data entry has already occurred, and the system has removed leading zeros, you may need to re-enter the data after formatting the cells as plain text.
