3 Ways to Remove Specific Characters in Excel
Sometimes the data that we work with may contain unwanted characters that can make it difficult to read, sort, or analyze. Whether it is extra spaces, dashes, commas, or any other character, it can be frustrating to deal with. Luckily, Excel offers a variety of ways to remove specific characters from a cell or a range of cells. Thus, you can clean up your data and make it more manageable. In this article, I will show you 3 different ways to remove specific characters in Excel.
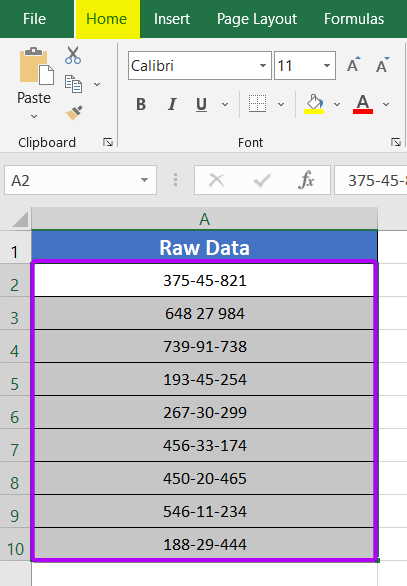
In this article, I will be using a list of social security numbers or SSNs in a column named Raw Data as an example dataset. The SSNs have two hyphens (-) as special characters in each number. I want to remove these hyphens (-) and want no spaces between the numbers.
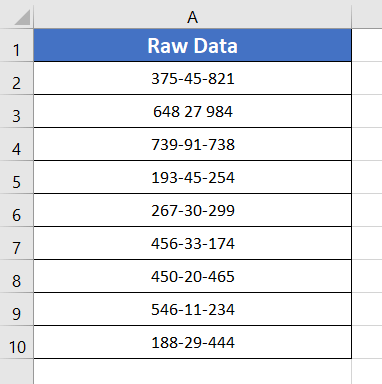
Let me break down to you how I removed these specific characters in Microsoft Excel.
Remove Specific Characters Using Find and Replace Tool in Excel
There are some formulas that can help you remove characters. But there is another way to do the work without applying any function. You can easily remove specific characters with the Find and Replace feature in Excel. To do that, follow the steps below:
- At first, select the cell range A2 to A10.
- Then, go to the Home tab.

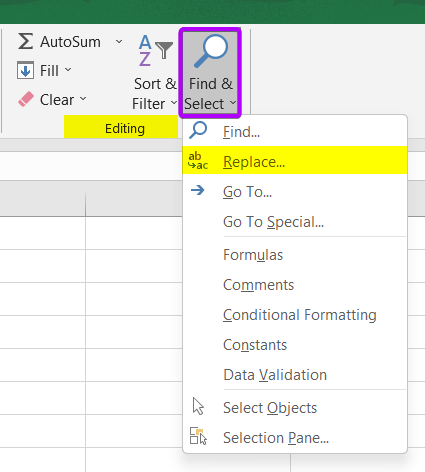
- Now, right-click on the Find and Select drop-down menu. You can find this option in the Editing group.
- Then, select the option named Replace from the drop-down menu.
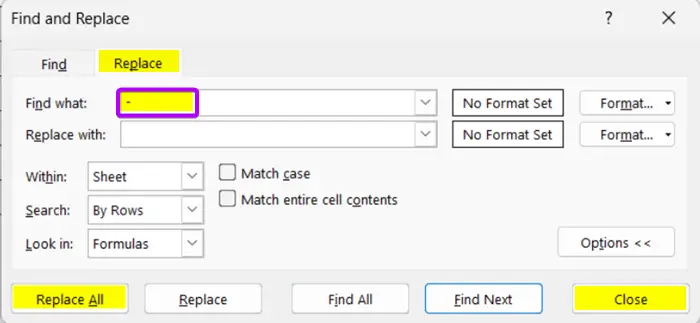
 You will see the Find and Replace dialog box popping up on the worksheet.
 - Open the Replace tab.
- Inside the Find What box, type “-” and skip the Replace With box.
I did not enter any characters in the Replace With box because I don’t want anything replacing the hyphens (-). For example, if you want a slash (/) in replace of the hyphens (-), you can enter a slash (/) there. - Now hit the Replace All button and click on Close.

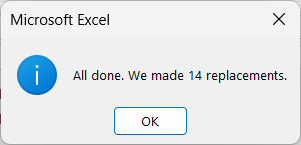
You will see a window with this message.

- Click on the OK button.
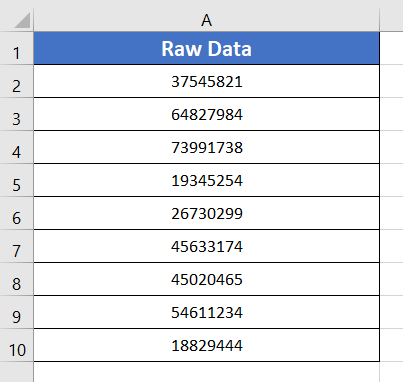
Now, you can see that now there are no special characters in the cell range in the image.
- 4 Ways to Remove First Word in Excel
- 6 Ways to Remove the First 2 Characters in Excel
- 6 Ways to Remove the First 4 Characters in Excel
Using SUBSTITUTE Function to Remove Specific Characters in Excel
The SUBSTITUTE function is entitled to replace a specified text string with a new text string in a given cell or range of cells.
Syntax
=SUBSTITUTE(text, old_text, new_text, [instance_num])Formula
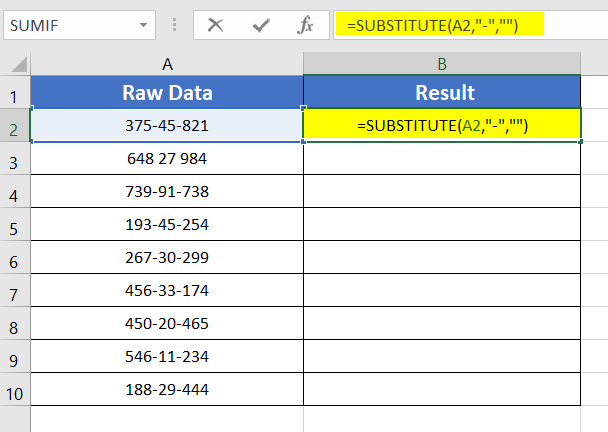
=SUBSTITUTE(A2,"-","")Formula Explanation
- Text: It is the cell reference that you want to change or modify.
- Old_text: It is the mention of the characters that you want to replace with something new.
- New_text: It is the mention of the new characters that you want to replace the old_text with.
- [instance_num]: It is an optional argument. It defines the occurrence of the old_text that you want to replace. If you omit this argument, all instances of the old_text will be replaced.
Now, go through the steps below to remove special characters with SUBSTITUTE function in Excel:
- Take an empty column to enter the results.
- Write the formula in a cell: =SUBSTITUTE(A2,”-“,””)

- Press the ENTER key.
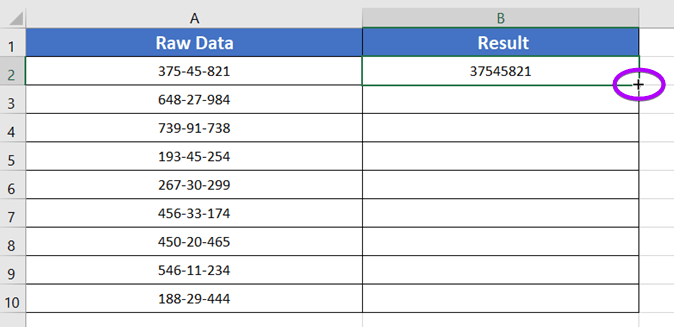
- After that place the cursor on the bottom-right corner of cell B2. The Fill Handle icon will appear.
- Then, double-click on the Fill Handle icon.
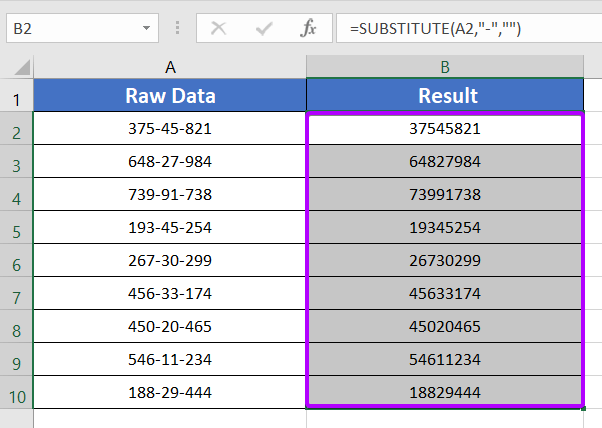
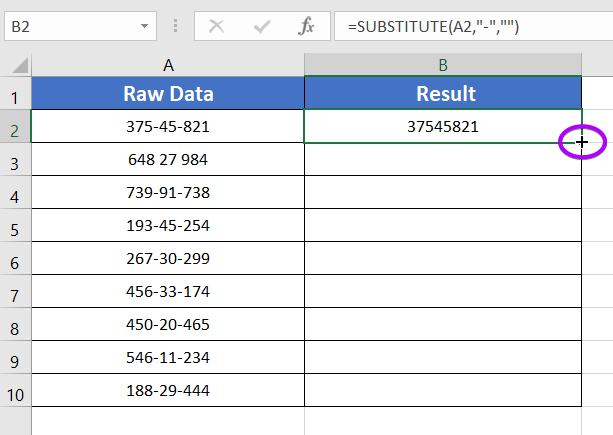 You can see the result of removing special characters using the SUBSTITUTE function.
- 5 Ways to Remove Blank Characters in Excel
- 5 Ways to Remove Numeric Characters from Cells in Excel
- 6 Ways to Remove Single Quotes in Excel
Apply MID and CONCATENATE Functions to Remove Specific Characters in Excel
The MID function is commonly used to extract parts of the original text string that you want to keep. Using this function, you can specify the starting position and also choose how many characters to remove. On the other hand, the CONCATENATE function is used to combine two or more text strings into a single cell.
Syntax
=CONCATENATE(MID(text, start_position, num_characters), MID(text, start_position, num_characters),MID(text, start_position, LEN(text)))Formula
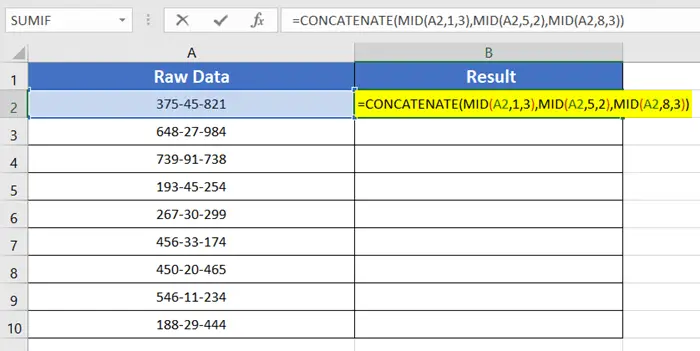
=CONCATENATE(MID(A2,1,3),MID(A2,5,2),MID(A2,8,LEN(A2)))Formula Explanation
The first MID function extracts the first 3 characters of the original text string (“375“) of cell A2. Here, 1 indicates the starting number where we start counting the characters. 3 indicates the position of the character. In the second MID function, 5 indicates the starting position of the second set of characters. 2 indicated the number of characters to keep. The third MID function extracts the remaining characters of the original text string, starting from position 8. And 3 indicating the 3 characters to store. Lastly, I applied the CONCATENATE function is used to combine the extracted parts into a single text string.
Now, follow the steps below to remove specific character in Excel:
- Select cell B2.
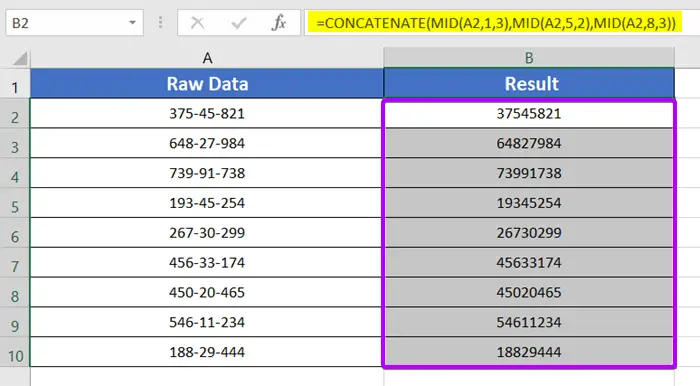
- Then, enter the formula: =CONCATENATE(MID(A2,1,3),MID(A2,5,2),MID(A2,8,LEN(A2))).

- Now, press the ENTER key.
- After that, place the cursor on the bottom right corner of cell B2. The cursor sign will appear as the Fill Handle (+) icon.

- Now, double-click on the Fill Handle (+) icon.
This way, by adjoining some small and easy functions, you can make your custom-made formulas. It works fine, just like the other techniques.
Conclusion
I have discussed three super easy ways to remove any sort of specific characters in Excel. The characters could be either numerical or text-type. In both cases, these techniques will work. I hope you find this article helpful. To find out more about removing characters-related articles, click here to read our other blogs. Please feel free to comment in the comment box if you have any confusion regarding this topic. Thank you and have a good day!
Frequently Asked Questions
How do I remove 3 digits from left in Excel?
To remove 3 digits from the left in Excel, use the following formula: =RIGHT(A1, LEN(A1)-3)
Replace A1 with the reference to the cell containing your original value. This formula utilizes the RIGHT function to extract characters from the right side of the text and removes the first 3 digits.
What is the trim function in Excel?
The TRIM function in Excel is used to remove leading and trailing spaces from a text string. It does not affect single spaces between words. To use TRIM, enter the following formula: =TRIM(text)
Replace “text” with the cell reference or the text string from which you want to remove extra spaces. The TRIM function is useful for cleaning up data, especially when dealing with imported or user-inputted information that may contain unnecessary spaces.
How do I shorten text in Excel?
To shorten text in Excel, use the LEFT, RIGHT, or MID functions based on your specific needs. For example, to shorten text from the left: =LEFT(cell_reference, desired_length)
Replace “cell_reference” with the reference to the cell containing your text and “desired_length” with the number of characters you want to keep from the left side.
For other directions (right or middle), use RIGHT or MID accordingly. This method is helpful for truncating text or extracting specific portions of a string in Excel.
Related Articles
