How to Import XML Data from Web to Excel
You can have your XML file either on your local disk or on the web. However, as long as you are using Microsoft Excel to retrieve information from your Excel file, you are in no trouble. Excel will offer you to import XML data from any potential source. Anyways, if you are looking for ways to import an XML file from websites, this blog will help you all the way. Here, I will discuss the steps to import XML data from the web to Excel. So, without any delay, let’s begin.
About the Setup
To show you the steps to import an XML file from the web, I’m going to use the sitemap link of Microsoft’s official website. If you follow the link below, you will end up getting an XML file online. Now let me show you import this XML file to Microsoft Excel.
https://www.microsoft.com/en-us/learning/sitemap.xmlGuide to Import an XML File from Web to Excel
Microsoft Excel has a powerful feature called Power Query to import data from multiple sources. To import an XML file from Web to Excel, follow these steps:
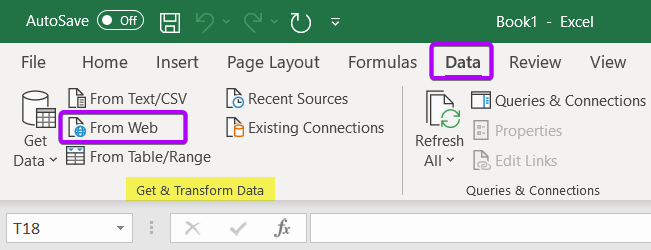
- Go to the Data tab in the ribbon.
- Then, click on the From Web command in the Get & Transform Data group.
This will allow you to insert a website link to retrieve information from an online XML file.
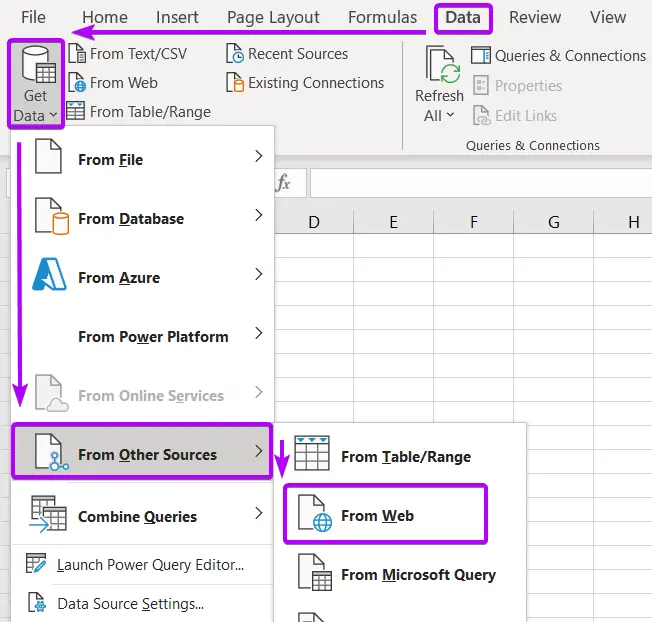
 Alternatively, to get From Web option by following Data > Get Data > From Other Sources > From Web.
- Select the From Web command and From Web dialog box appears.
- Now, insert a weblink that refers to an XML file just below the URL section.
- After that, hit OK.
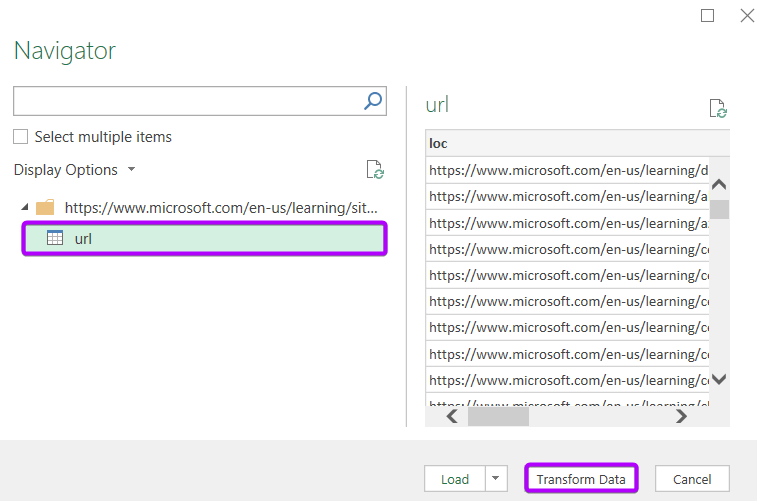
 Now, the Navigator window appears. Here, in the left column of the Navigator window, you will see your weblink with a folder sign. If you expand the folder, you will see “url” just beside a tabular icon.
 - Select ‘url’ to expand its content on the right side of the Navigator window.
- Finally, click on the Transform Data command to proceed.
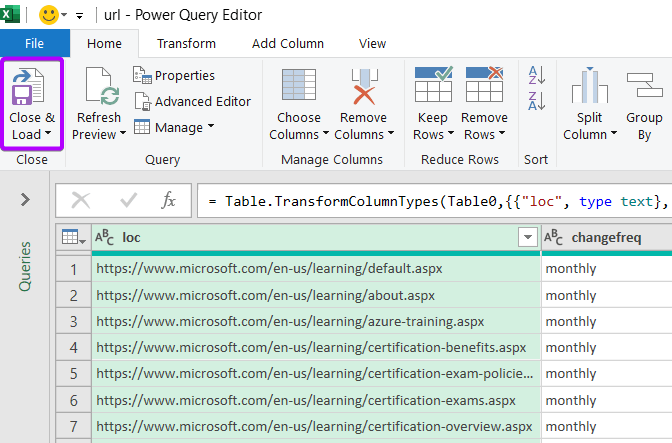
 Now, Excel will take you to the Power Query Editor window. Here, you will see the XML file has been extracted in columns and rows. You can edit the XML data here if you like.
 - Then, hit the Close & Load button to load the XML data in an Excel worksheet.
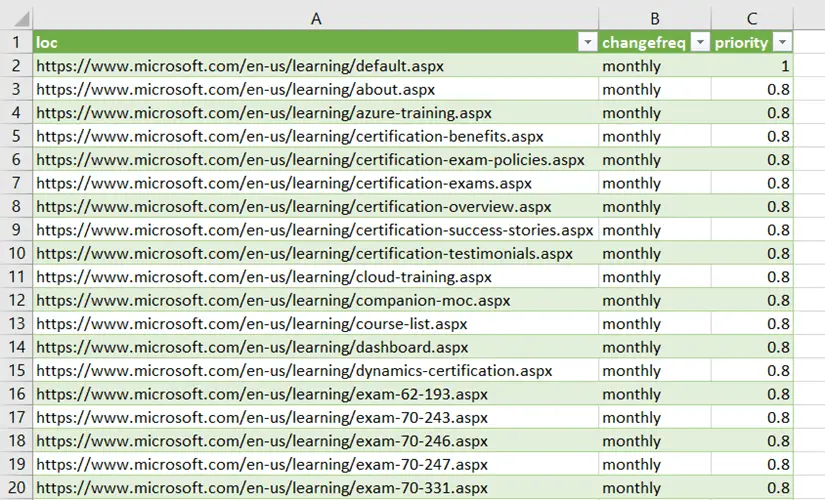
Now, you have successfully imported XML data from the web to an Excel worksheet. However, the connection is semi-dynamic. So, if there any changes occur in the XML data online, the Excel worksheet will be updated automatically if you refresh your worksheet.
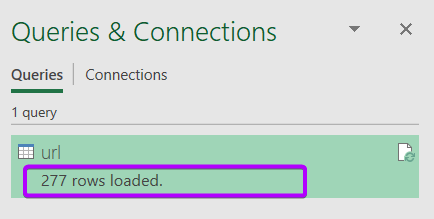
In Queries & Connections task pane, under the Queries tab, you will see how many rows have been loaded from the XML file to Excel.
Conclusion
So, I’ve demonstrated the steps to import an XML file from the web to an Excel worksheet. I hope you will find this article helpful. If you have any further queries regarding XML file importing and exporting, feel free to drop them in the comment section below. I will try to respond as soon as possible. Thanks for the read.
Frequently Asked Questions
How do I convert XML to XLSX?
To convert XML to XLSX in Excel:
- Open Excel and go to the Data tab.
- Click Get Data, select From File, and choose From XML.
- Locate and open your XML file.
- Excel will display the XML data; use the Power Query Editor to refine if needed.
- Click Close & Load to import the XML data into Excel.
- Once loaded, go to File, choose Save As, and select Excel Workbook (*.xlsx) as the format.
- Save the file to convert XML to XLSX format.
How to extract data from XML file?
To extract data from an XML file:
- Open Excel and go to the Data tab.
- Select Get Data, then From File, and choose From XML.
- Locate and open your XML file.
- Excel will display the XML data in a structured table.
- Use the Power Query Editor to filter, transform, and extract specific data.
Click Close & Load to import the extracted data into Excel. Alternatively, use XPath queries for more precise extraction.
How do I edit an XML file in Excel?
To edit an XML file in Excel, follow these steps:
- Open Excel and go to the Data tab.
- Click Get Data, select From File, and choose From XML.
- Locate and open your XML file.
- Excel will display the XML data in a structured table.
- Make edits directly in the cells or use the Power Query Editor for advanced transformations.
Once edited, click Close & Load to save changes back to the XML file.
Related Articles
- 4 Ways to Open an XML File in Excel
- A Complete Guide to Convert a CSV File to an XML File in Excel
- 5 Steps to Convert an Excel File to XML File
- An Overview of XML in Excel
- How to Map an XML File in Excel (Complete Guide)
- How to Remove XML Mapping in Excel (Quickest Way)
- How to Create an XML Schema Using Data in Excel
- 2 VBA Codes to Open an XML File in Excel
 Alternatively, to get From Web option by following Data > Get Data > From Other Sources > From Web.
 Now, the Navigator