How to Convert CSV File to XML File in Excel [Step-by-Step Guide]
A CSV (Comma-Separated Values) file stores information by separating them using commas. CSV files can be opened in spreadsheet programs, such as Microsoft Excel or Google Sheets. You can identify a CSV file by looking at its extension which is (.CSV).
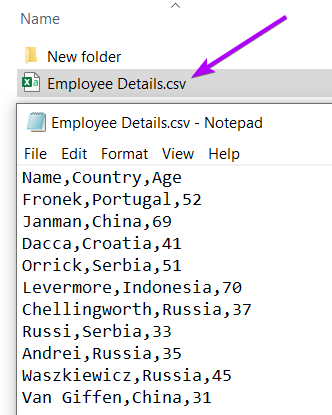
However, I’ve taken a CSV file named Employee Details.CSV, as shown in the picture below. Now I’m going to show you how to convert this CSV file to an XML file using Microsoft Excel.
Step 1: Open the CSV File in Excel
First, you need to open the CSV file in Microsoft Excel.
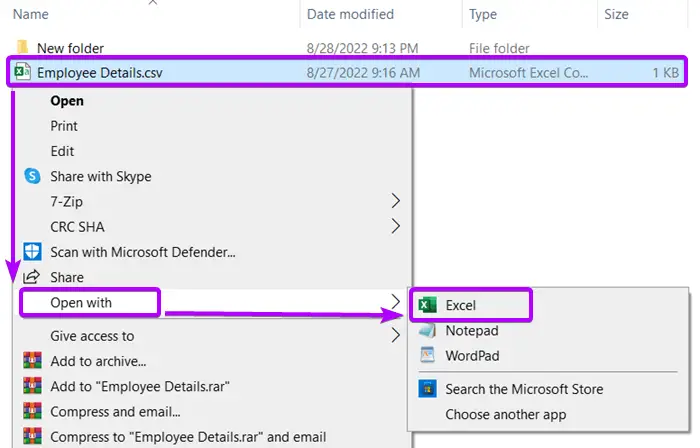
To open a CSV file in Excel:
- Right-click on the CSV file.
- Go to Open with > Excel to import the CSV file into Microsoft Excel.
Alternatively, you can double-click on the CSV file to open it in Excel.
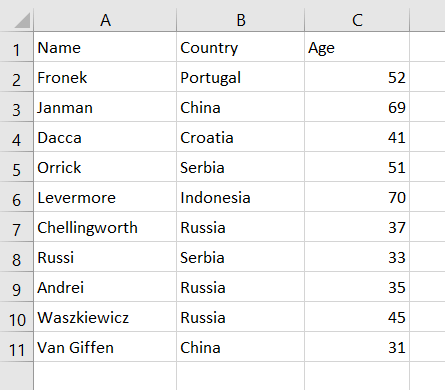
After importing the CSV file, it will look like the following picture. Here, you will notice that each value separated by a comma in a CSV file has been inserted into different columns in Excel.
- 2 VBA Codes to Open an XML File in Excel
- How to Remove XML Mapping in Excel (Quickest Way)
- How to Create an XML Schema Using Data in Excel
Step 2: Create an XML Schema
To convert your CSV file into an XML file, you need to specify how your data will be stored in an XML file. For this purpose, you need to create an XML schema. The XML schema is a template of an XML file where you specify how data will be converted from an Excel file to an XML file.
I’ve already published a detailed guide on creating an XML schema for Excel files. You can read it first, in case you don’t know how to create an XML schema for exporting Excel files as an XML file.
Here’s a sample XML schema for your reference:
<?xml version="1.0" encoding="UTF-8" standalone="yes"?>
<dataset xmlns:xsi="http://www.w3.org/2001/XMLSchema-instance">
	<record>
		<Name>Fronek</Name>
		<Country>Portugal</Country>
		<Age>52</Age>
	</record>
	<record>
		<Name>Janman</Name>
		<Country>China</Country>
		<Age>69</Age>
	</record>
</dataset>
Step 3: Import XML Schema Inside Excel
So far, I have imported my CSV file inside MS Excel and created an XML schema based on my Excel data.
Now, it’s time to connect the XML schema with the Excel data. The process of connecting the XML schema with the Excel data is called mapping.
Here’s how to map an XML file with an Excel dataset:
- First, go to the Developer tab.
To add the Developer tab in Excel: Go to “File” > “Options”. In the Excel Options window, select “Customize the Ribbon.” On the right side, check the “Developer” option. Finally, click “OK.” - Then click on the Source command in the XML group.
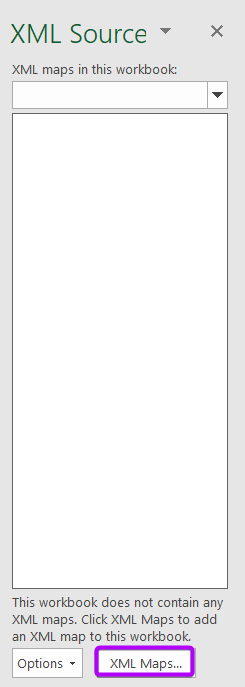
XML Source task pane appears.
- Click the XML Maps button at the bottom of the XML Source task pane.

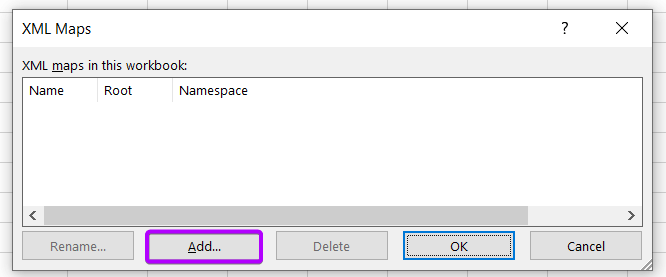
XML Maps dialog box appears. - Click on the Add button in the XML Maps dialog.

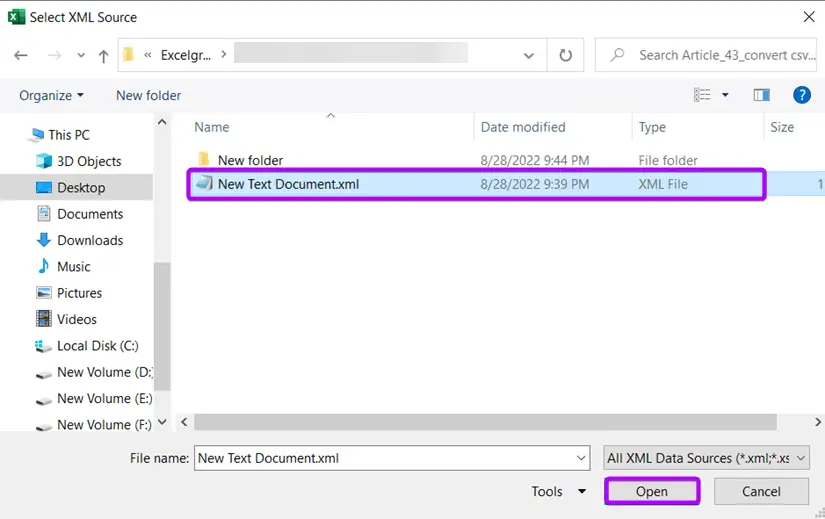
- Next, browse your folders to locate the XML schema file in the Select XML Source window.
- After selecting the XML schema, hit the Open button.

Then, a rectangular dialog box will appear. - Click OK on it.
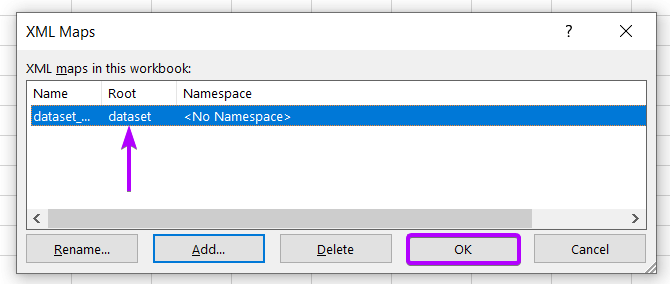
 Finally, you will see your XML schema in the XML Maps dialog box.
 - Select the XML schema and hit the OK button.
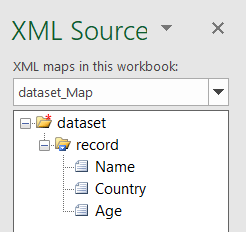
 Finally, you will see that the XML schema has been imported into the XML Source task pane as in the picture below.
Step 4: Connect XML Schema with the Excel Data
To connect the XML schema with the Excel dataset:
- Select the first column header name in the Excel dataset.
- After that, double-click on the same column header in the XML Source task pane.
- Repeat this process for the rest of the columns.
In this case, after selecting the Name column header in the Excel sheet, double-click on the Name column header in the XML Source task pane.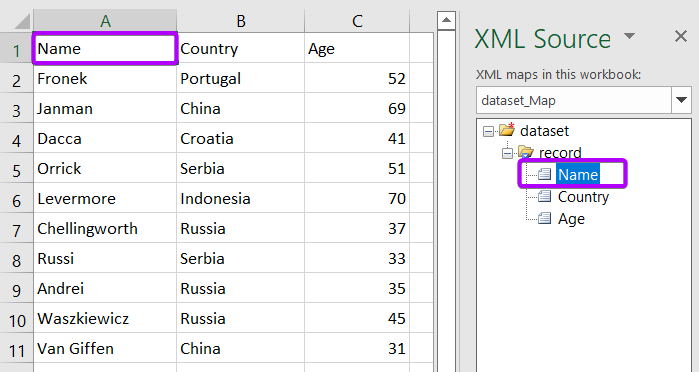
If everything is alright, the first column in the Excel sheet will turn into a table. This means the initial process of mapping is successful.
Now, repeat the same procedure for all the rest of the columns. When all the columns in the Excel sheet turn into an Excel table, you can be sure that the mapping has been done correctly.
Thus, if you select any column header name in the XML Source task pane, the corresponding column in the Excel sheet will be automatically highlighted.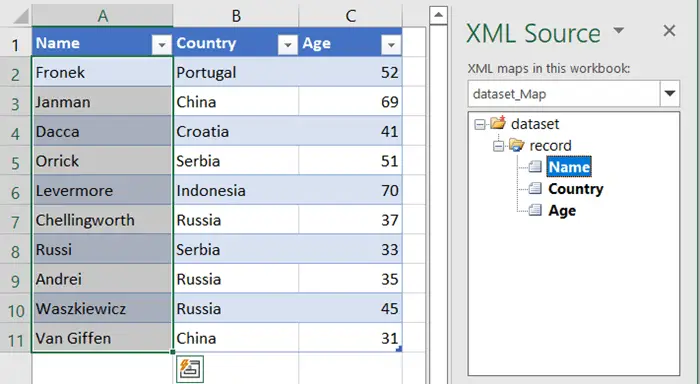
Step 5: Export the Excel Table as an XML File
To export the Excel Table as an XML file:
- Go to the Developer tab.
- Hit the Export button in the XML group.
- Create a filename for your XML file.
- Now hit the Export button.
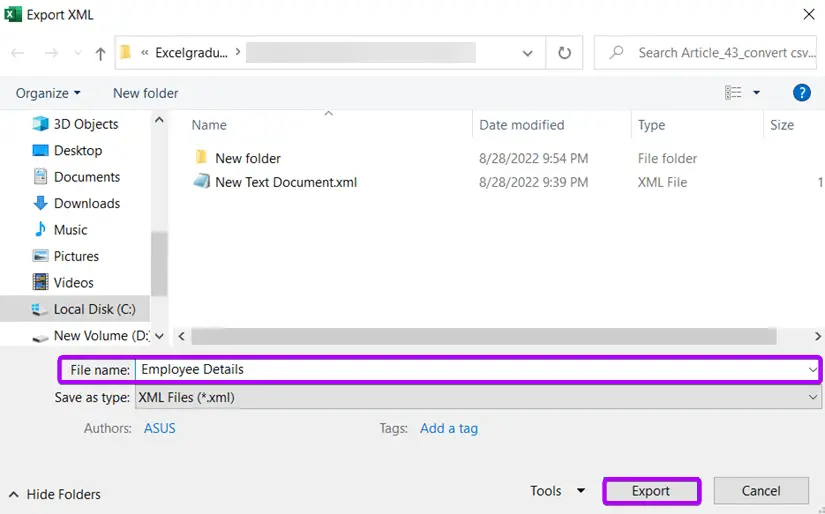
Finally, the Excel Table has been exported as an XML file. You can check this out in the folder where you’ve exported it.
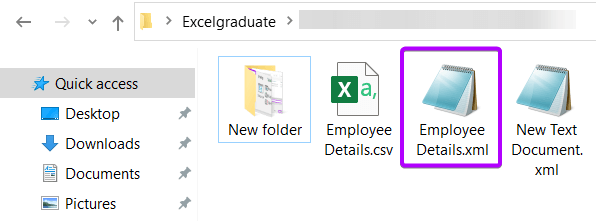
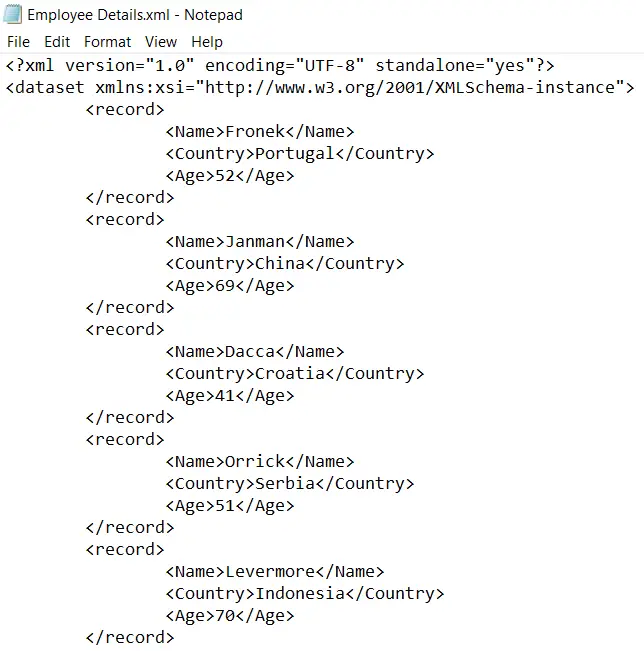
Open the XML file in Notepad. You can see how the CSV file has been converted into an XML file now.
Conclusion
I’ve given a complete guide on converting a CSV file to an XML file in Microsoft Excel. I hope you’ve found this article really helpful. If you have any questions regarding converting a CSV file into an XML file in Excel, please let me know in the comment section below. Thanks.
Frequently Asked Questions
Why use XML over CSV?
Use XML over CSV when you need:
- Hierarchical Data: XML excels at representing nested or hierarchical data.
- Metadata: Embed metadata within the data using attributes.
- Data Validation: Enforce structure with XML Schema or DTDs.
- Data Types: Support for various data types, including custom types.
- Extensibility: Define custom tags for specific needs.
- Machine-Readable: Self-descriptive structure aids software processing.
- Interoperability: Widely used in web services, configuration files, and more.
Consider XML for complex documents, rich formatting, and where data structure flexibility is essential.
Can Excel be converted to XML?
Yes, Excel can be converted to XML. You can save an Excel spreadsheet as an XML file by using the “Save As” option and choosing the XML file format. This allows you to export your Excel data into an XML format, which is useful for data interchange, integration with other systems, or structured data representation.
What is the difference between XML and CSV format?
The main difference between XML and CSV formats is that XML is a structured markup language, while CSV is a plain-text, comma-separated data format. XML offers a hierarchical structure with metadata, data types, and nested elements, making it suitable for complex and semantically rich data. In contrast, CSV is simple and tabular, ideal for basic data storage, but lacks the hierarchical and structural capabilities of XML.
Related Articles

 Finally, you will see your XML schema in the XML Maps dialog box.
 Finally, you will see that the XML schema has been imported into the XML Source task pane as in the picture below.