2 Ways to Rename Group in Pivot Table in Excel
- Click on the cell containing the group name in your Pivot Table.
- Press the F2 key to enable edit mode for the selected cell.
- Type the new name for the group.
- Press the ENTER button to confirm the changes.
Renaming a group in a Pivot Table is a straightforward process that allows you to customize the display according to your preferences.
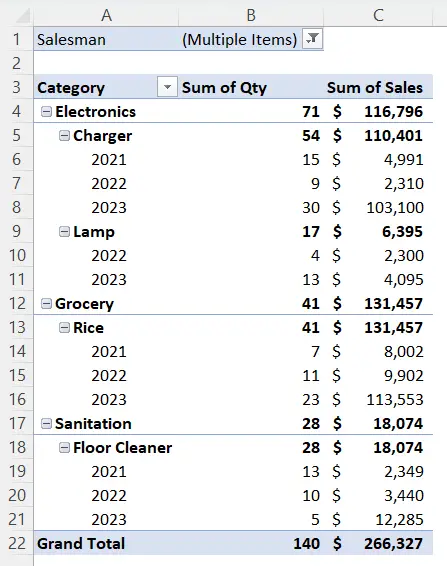
Here, I have arranged the Pivot Tables in Excel. This Pivot Table shows the sales report with the categories, the invoice dates, the quantity, and the sales values.

Rename Group by Editing in the Formula Bar in Excel Pivot Table
- Go to the group name, you want to rename.
- Now, navigate to the formula bar.

- Enter a new name in the formula bar.
- Press ENTER button.

- Repeat the same for the other groups if you want to change.
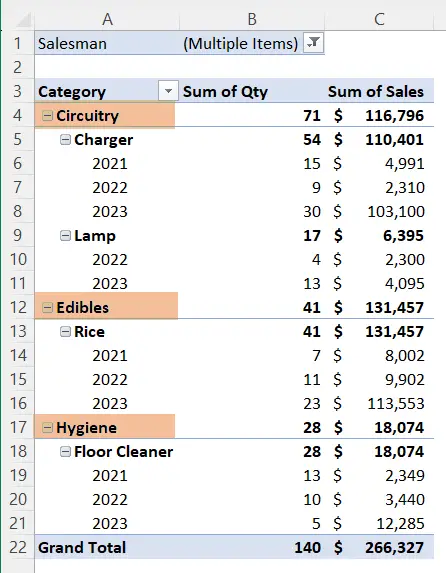
By following the above steps, you can rename group names easily. You can see the result.

Rename Group Using Keyboard Shortcut in Pivot Table
Use the keyboard shortcut to rename the group inside a Pivot Table. Follow the steps below:
- Select the cell that contains the group name.
- Click F2 to enable the edit mode.

- Enter the new name of the group.
- Then, click ENTER button.
Now, you can see the renamed group name in the Pivot Table in Excel.

Conclusion
In conclusion, renaming a group in a Pivot Table is a simple yet powerful customization feature that enhances the clarity and relevance of your data presentation. By following a few easy steps, you can tailor the group names to better suit your analysis needs, providing a more intuitive and personalized experience within your Excel Pivot Table. In this article, I have added 2 ways to rename group names in Pivot Table in Excel. Basically, I have added a manual way and a shortcut key to rename the group name in Pivot Table in Excel. So, you can follow the article and solve the issues.
Frequently Asked Questions
How to rename row labels in Pivot Table?
To rename row labels in a Pivot Table in Excel, use the following steps:
- Click on the cell containing the row label you want to rename.
- Go to the PivotTable Analyze tab.
- Navigate to Active Field in the Excel ribbon.
- Enter the new name in the Active Field for the row label.
- Press ENTER button to apply the changes.
This process allows you to customize row labels in a Pivot Table to better reflect the nature of your data or improve overall clarity in your analysis.
How do I change the order of groups in a Pivot Table?
To change the order of groups in a Pivot Table in Excel, you can use the following steps:
- Click on any cell within the grouped data in your Pivot Table to select it.
- Right-click on the selected group, and from the context menu, choose Group command.
- In the Grouping dialog box that appears, you may find an option like Starting at. Adjust the order by specifying the desired values.
Alternatively, you can also sort the Pivot Table based on the specific field that represents the groups. Right-click on a cell in the column you want to sort, choose Sort option, and then specify the sorting order.
By following these steps, you can effectively change the order of groups in your Pivot Table based on your preferences or criteria.


