Power Query IF Statements with Multiple Criteria [2 Examples]
IF statements in Power Query can be used with multiple criteria. This feature allows you to apply conditional logic in programming or data manipulation tools like Power Query. Instead of having a simple true or false condition, this functionality lets you create more complex conditions by combining multiple criteria.
For example, you might want to execute a certain action only if two or more conditions are met simultaneously. This capability enhances the flexibility and precision of your logic, enabling you to tailor your operations based on a combination of factors, and making your decision-making processes more nuanced and adaptable to various scenarios.
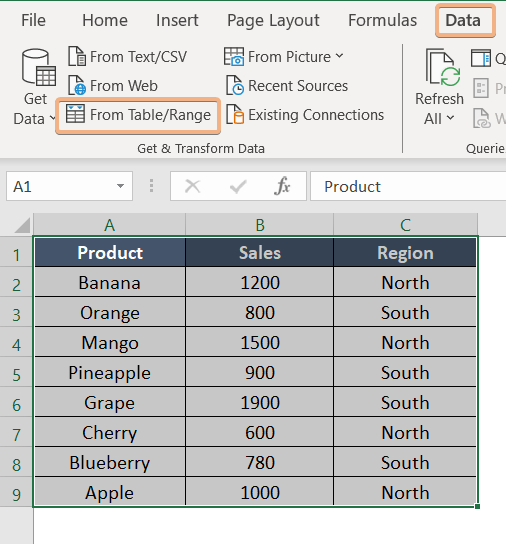
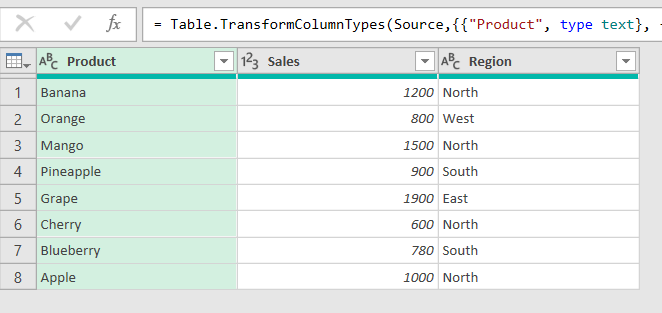
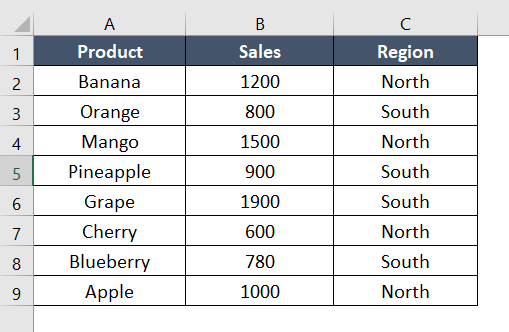
In this article, we’re working with a dataset featuring columns such as ‘Product,’ ‘Sales,’ and ‘Region.’ I’ll guide you through creating a new ‘Category’ column based on multiple criteria from the ‘Sales’ and ‘Region’ columns. The dataset is outlined below:
Example 1: Using IF Statements with Multiple Criteria in Custom Column Feature In Power Query
When working with Power Query’s Custom Column feature, you can enhance your data transformation by using IF statements with multiple criteria. This powerful capability allows you to create dynamic conditions for custom columns based on various factors. For instance, you can construct complex logic to determine the values in a new column based on the simultaneous satisfaction of multiple conditions. This flexibility enables precise data manipulation, catering to diverse scenarios and refining your dataset according to specific criteria.
To create a custom column with multiple criteria using IF statements, simply follow these steps:
Step 1: Select Table/Range to Launch the Power Query Editor
- Choose the table.
- Select the “Data” tab after launching the Excel ribbon.
- After clicking “Get Data,” choose “From Table/Range.”

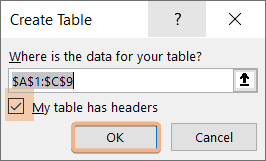
- Enable the feature “My Table has a Header.”

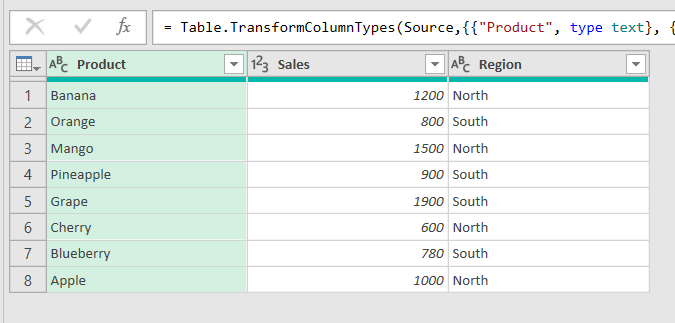
- Your data will be displayed when the Power Query Editor launches.

Step 2: Create a New Column Using Custom Column Feature
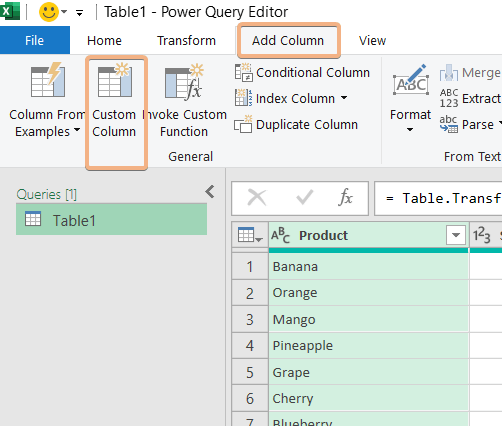
- Select the “Add Column” tab in the Power Query Editor.
- Choose “Custom Column” from the menu.

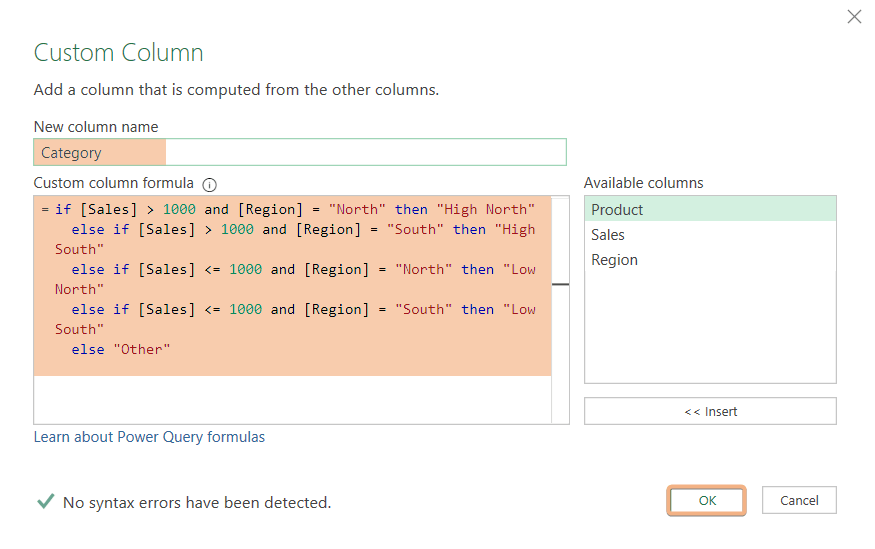
- In the “Custom Column” dialog, enter a new column name (e.g., “Category”) and use the following formula:
= if [Sales] > 1000 and [Region] = "North" then "High North"
  else if [Sales] > 1000 and [Region] = "South" then "High South"
  else if [Sales] <= 1000 and [Region] = "North" then "Low North"
  else if [Sales] <= 1000 and [Region] = "South" then "Low South"
  else "Other"
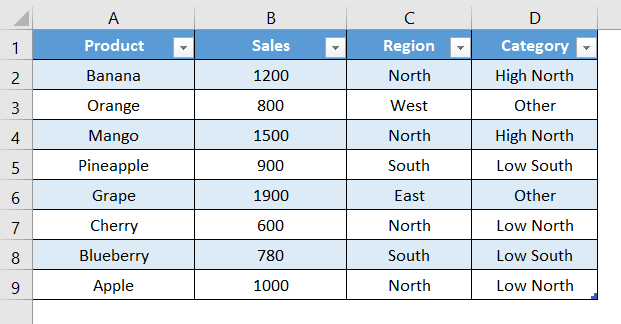
- Click OK to apply the changes. A new column named “Category” will be added to your table.

- Click “Close & Apply” to close the Power Query Editor and load the modified table back into Excel.
After applying these steps, your dataset should have a new “Category” column based on the specified conditions. The resulting dataset might look like this:
Example 2: Applying Multiple Criteria IF Statements in Power Query’s Advanced Editor
In Power Query’s Advanced Editor, using multiple criteria with IF statements helps make data changes more detailed. It lets you set up conditions based on different things at the same time. For example, you can decide what to do with data when it meets a few rules. Doing this in the Advanced Editor gives you more control and makes your data changes more precise.
Follow these steps to create a new “Category” column using IF statements with multiple criteria in the Advanced Editor in Power Query:
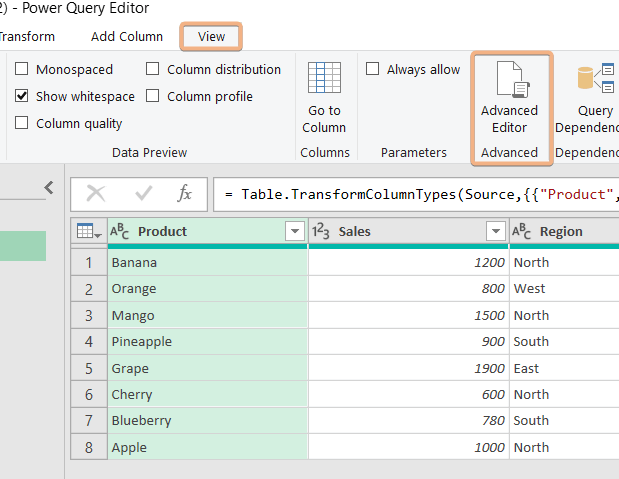
- Go to the Power Query Editor, and navigate to the “Home” tab.

- Click on “Advanced Editor.”

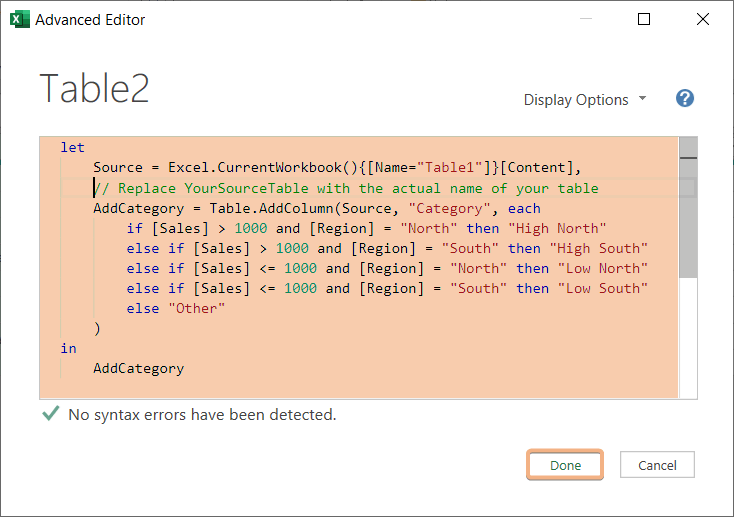
- Replace the existing M code with the following:
let Source = Excel.CurrentWorkbook(){[Name="Table1"]}[Content], // Replace YourSourceTable with the actual name of your table AddCategory = Table.AddColumn(Source, "Category", each if [Sales] > 1000 and [Region] = "North" then "High North" else if [Sales] > 1000 and [Region] = "South" then "High South" else if [Sales] <= 1000 and [Region] = "North" then "Low North" else if [Sales] <= 1000 and [Region] = "South" then "Low South" else "Other" ) in AddCategory - Replace “Table2” with the actual name of your table.
- After pasting the code, click “Done” to apply the changes.

You will see a new column “Category” added to your dataset.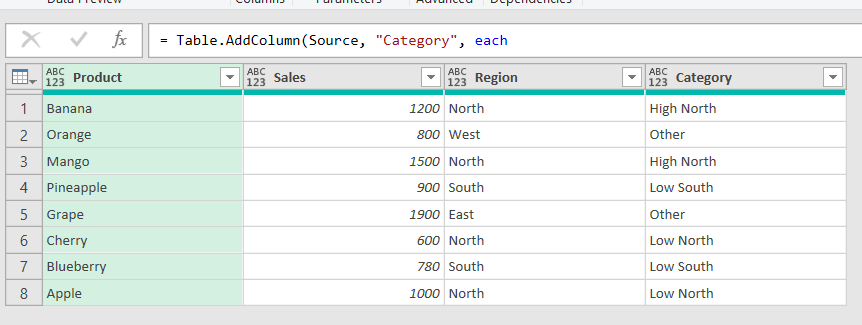
Conclusion
In this example, I demonstrated how to create a new column in Power Query using IF statements with multiple criteria. By following this method, you can effectively address a variety of related problems.
Frequently Asked Questions
How do you add multiple IF conditions in Power Query?
To add multiple IF conditions in Power Query, follow the steps below:
- Open Power Query Editor.
- Select the table.
- Go to the “Add Column” tab.
- Click “Custom Column.”
- Enter a name for the new column.
- In the formula box, use nested IF statements: = if [Condition1] then “Result1” else if [Condition2] then “Result2” else “DefaultResult”
- Replace [Condition1] and [Condition2] with your actual conditions.
- Adjust the results as needed.
- Click OK to apply the changes.
Can I write 2 conditions in an if statement?
Yes, you can write 2 conditions in an IF statement using the AND or OR operators.
For example:
= if [Condition1] AND [Condition2] then "ResultIfTrue" else "ResultIfFalse"Replace [Condition1] and [Condition2] with your specific conditions, and modify the results accordingly.
Can I use multiple IF functions?
Yes, you can use multiple IF functions, and you can also nest them to create more complex conditional logic in Power Query. For example:
= if [Condition1] then "Result1" else if [Condition2] then "Result2" else "DefaultResult"In this example, if Condition1 is true, it returns “Result1”; otherwise, it checks Condition2 and returns “Result2” if true, and “DefaultResult” if both conditions are false. You can extend the nesting for additional conditions as needed.
What is the difference between multiple if and else if?
The primary difference between using multiple `if` statements and ‘else if’ statements lies in how conditions are evaluated. Multiple `if` statements check each condition independently, allowing multiple blocks of code to be executed. In contrast, `else if` statements check conditions sequentially, executing the block of code corresponding to the first true condition encountered and skipping subsequent conditions. The choice depends on whether you want an independent evaluation of each condition or a sequential evaluation with only one block of code executed.
