IF Statements in Power Query [3 Examples]
In Power Query, the IF statement is a conditional logic tool that allows you to make decisions based on specified conditions. This feature enhances data transformation capabilities, enabling dynamic data processing and filtering within the Power Query Editor.
- IF statements enable dynamic decision-making in creating new columns.
- Conditions can be tailored to specific criteria for enhanced data customization.
- Helps improve data quality by applying targeted transformations.
- Provides control over column creation based on diverse conditions.
In this article, I showed you how to use the IF statement in Power Query Editor.
IF Statements Vs Conditional Column in Power Query
An alternate method of implementing conditional logic that is comparable to IF statements is the “Conditional Column” feature in Power Query. The Conditional Column feature provides a graphical user interface for creating conditional expressions without having to write M code manually. It allows you to define conditions and specify corresponding values or expressions for a new column based on those conditions.
While IF statements in M code offer a more code-centric approach, the Conditional Column feature provides a graphical interface for achieving similar conditional logic outcomes in Power Query.
In Power Query, IF statements are commonly used to create a new column by defining conditions for values in existing columns. This is particularly useful when you want to derive additional information or categorize data based on specific criteria.
For example, you might use an IF statement to evaluate the values in an existing column and assign a label or category to each row in a new column. This enables you to dynamically extend your dataset with meaningful information, making it more suitable for analysis, reporting, or visualization.
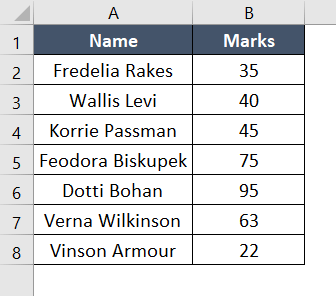
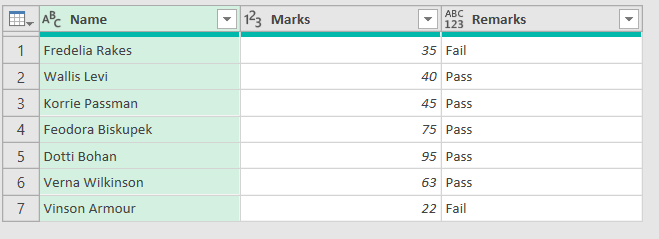
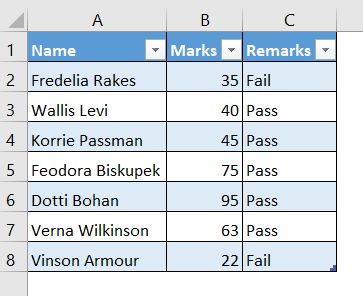
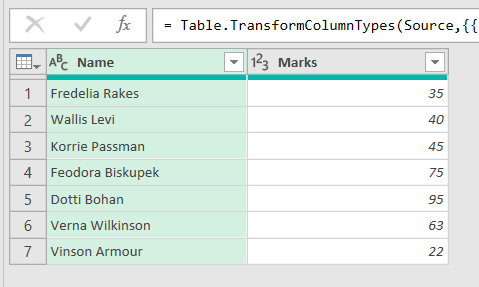
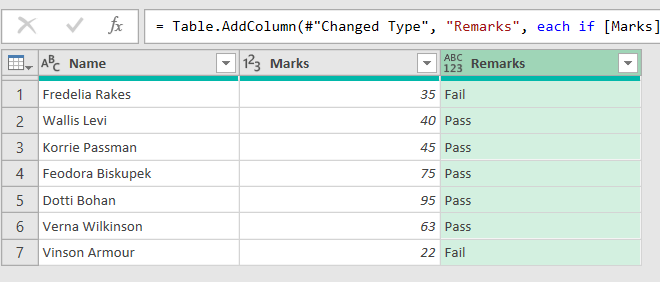
In this article, the dataset featuring “Name” and “Marks” allows you to effortlessly determine students’ pass/fail status. This is achieved by introducing a new column called “Remarks” using either IF Statements or a conditional column. The process entails establishing a condition, such as Marks >= 40, to signify passing.
Example 1: Creating a New Column in Power Query Using the Conditional Column Feature
Conditional columns in Power Query enable you to create new columns based on specified conditions, offering a dynamic approach to data transformation. Essentially, conditional columns use the IF statement logic, allowing you to tailor column values based on certain criteria, offering a versatile and efficient method for customizing data within the Power Query environment.
- Conditional Column simplifies IF statement implementation without direct M code.
- Enhances readability and usability, making it accessible for users with varying coding expertise.
- Enables users to dynamically shape data without extensive coding.
Follow these steps to effortlessly create a new column using the Conditional Column feature:
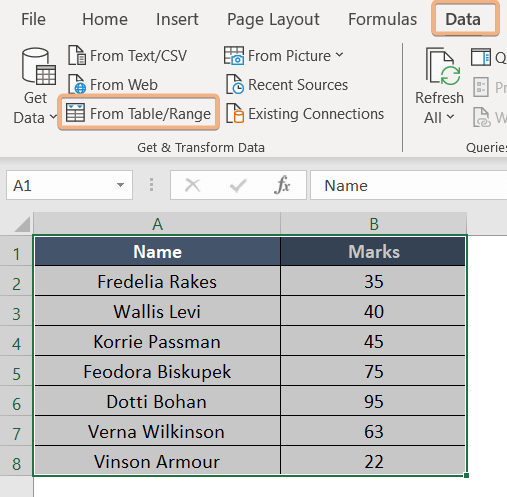
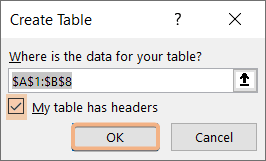
Step 1: Access Power Query Editor from Table/Range
- Select the table.
- Go to the “Data” tab in the Excel ribbon.
- Click on “Get Data” and choose “From Table/Range.”

- Checked “My Table has a Header”.

- The Power Query Editor will open, displaying your data.

Step 2: Apply Conditional Column to Create a New Column
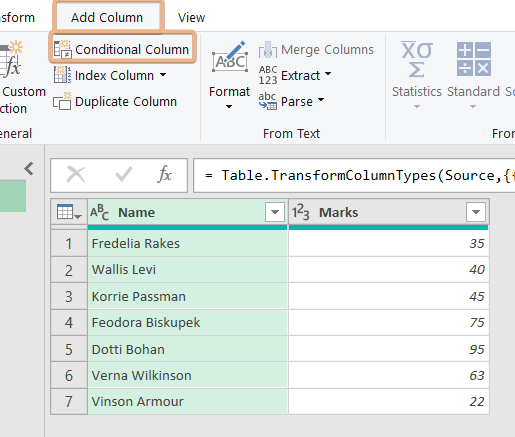
- In the Power Query Editor, select the “Add Column” tab.
- Click on “Conditional Column.”

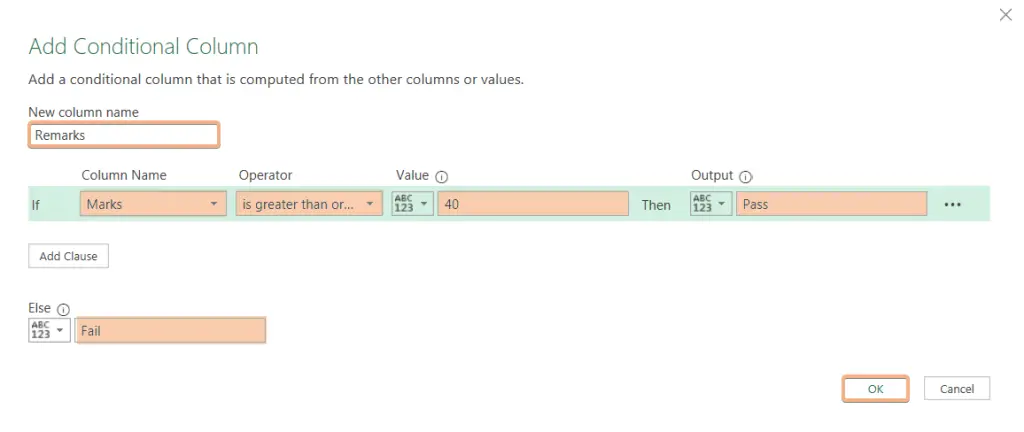
- In the “New column name” field, enter “Remarks”.
- Choose the “Marks” column.
- Choose “greater than or equal” the operator.
- Enter the value =40.
- Specify the outputs for true (“Pass“) and false (“Fail”).

- Click “OK” to apply the changes. A new column named “Remarks” will be added to your table.

Click “Close & Apply” to close the Power Query Editor and load the modified table back into Excel.
Example 2: Using the IF Statement in the Custom Column
The IF statement in the Custom Column formula bar in Power Query applies conditional logic when creating or transforming columns. By using IF statements in the Custom Column formula bar, you can dynamically customize your data transformations based on specific criteria, providing a flexible and powerful way to shape your data.
You can utilize a formula containing the IF statement to generate a “Remarks” table distinguishing between “pass” and “fail.” Follow the steps below:
- Open Power Query Editor in Excel.
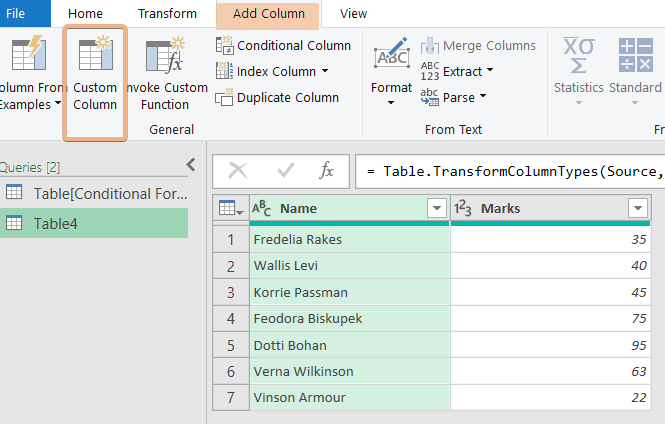
- In the Power Query Editor, select the “Add Column” tab.
- Click on “Custom Column.”

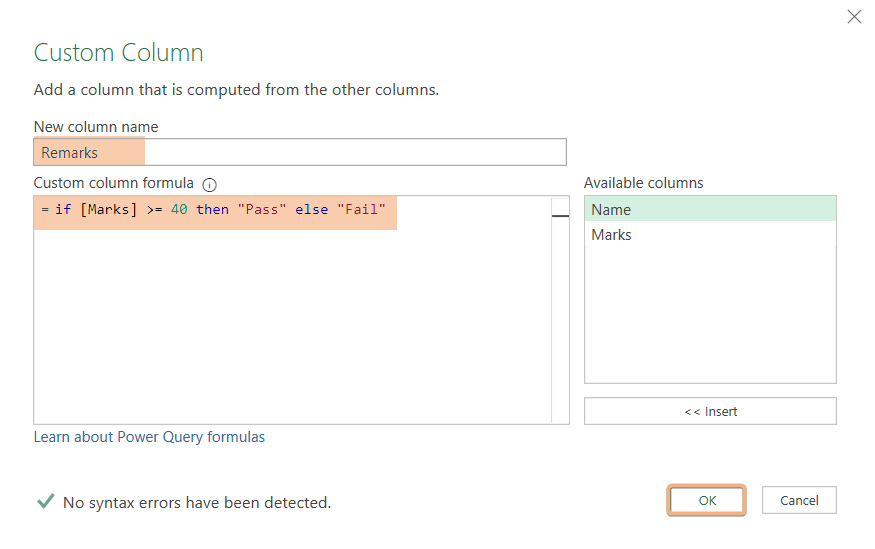
- In the “New column name” field, enter “Remarks”.
- In the “Custom column formula” field, enter the following formula: =if [Marks] >= 40 then “Pass” else “Fail”.
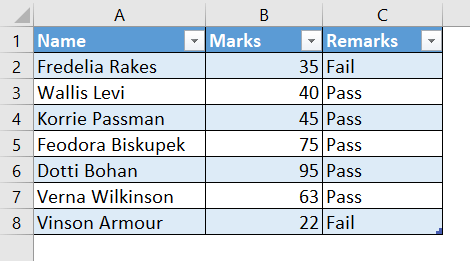
 This formula checks if the “Marks” column is greater than or equal to 40 and assigns “Pass” or “Fail” accordingly.
 - Click “OK” to apply the changes. A new column named “Remarks” will be added to your table.

To exit the Power Query Editor and reload the edited table in Excel, select “Close & Apply”.
Example 3: Using the IF Statement in the Advanced Editor to Create a New Column
The Advanced Editor in Power Query is a feature that provides direct access to the underlying M code. It allows users to write, edit, and optimize custom transformations, providing more control over data manipulation processes within the Power Query Editor in Excel.
To create a new column named “Remarks,” utilize the IF statement in the Advanced Editor. Here’s how:
- Open Power Query Editor in Excel.
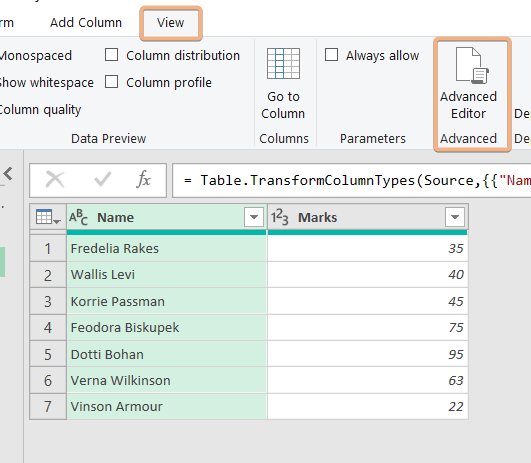
- Go to the “View” tab and click “Advanced Editor.”

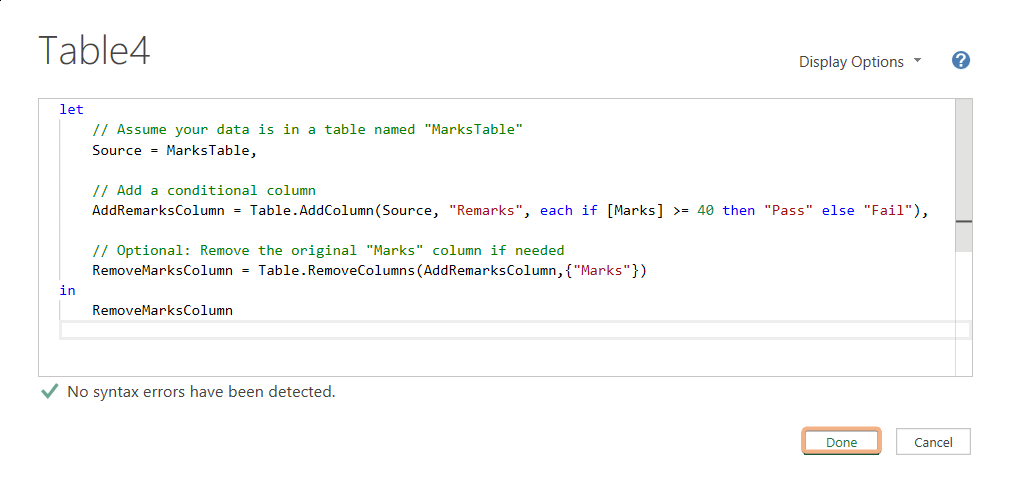
- Copy the code below:
let // Assume your data is in a table named "MarksTable" Source = Excel.CurrentWorkbook(){[Name="Table4"]}[Content], // Add a conditional column AddRemarksColumn = Table.AddColumn(Source, "Remarks", each if [Marks] >= 40 then "Pass" else "Fail"), // Optional: Remove the original "Marks" column if needed RemoveMarksColumn = Table.RemoveColumns(AddRemarksColumn,{"Marks"}) in RemoveMarksColumn - Paste the provided code into the Advanced Editor.
- Click “Done” to apply the changes.
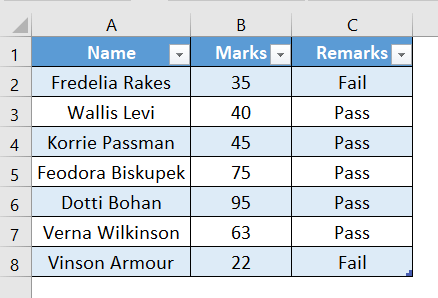
 Following that, you’ll be able to discern which students have successfully passed and which ones have not.
Conclusion
I present three examples demonstrating effective ways to use IF statements in Power Query Editor. By following these methods, you can efficiently leverage IF statements in Power Query for your data transformations.
Frequently Asked Question
How do you use IF statements in Power Query?
In Power Query, you use the IF statement within the formula bar to create conditional logic. For example, =if [Condition] then [ValueIfTrue] else [ValueIfFalse].
How do IF statements enhance data transformation in Power Query?
IF statements enhance data transformation by enabling dynamic decision-making. They empower users to create customized transformations based on specified conditions.
Can you demonstrate nested IF statements in Power Query?
Certainly! Nested IF statements involve placing one IF statement within another, providing a way to handle more intricate conditions and create sophisticated data transformations.
 This formula checks if the “Marks” column is greater than or equal to 40 and assigns “Pass” or “Fail” accordingly.