How to Use Nested IF Statements in Power Query [5 Examples]
This hierarchical structure enables you to build intricate logic to handle various scenarios within your data transformations, providing a flexible and powerful tool for customizing your analysis based on multiple criteria.
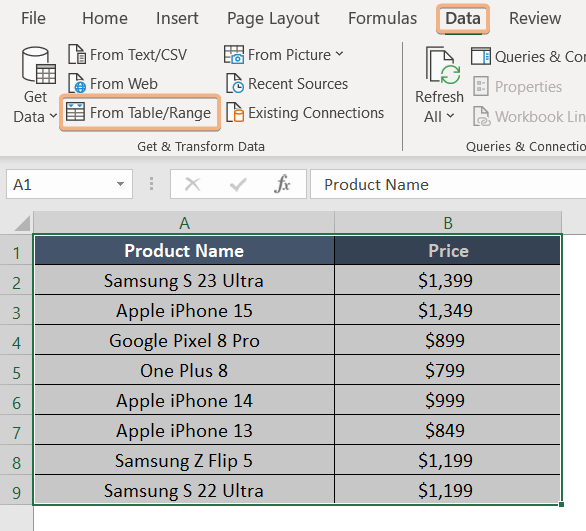
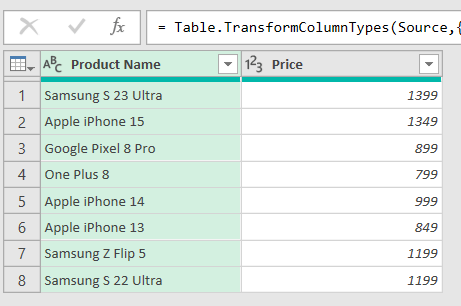
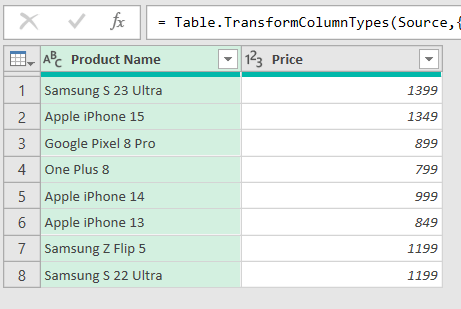
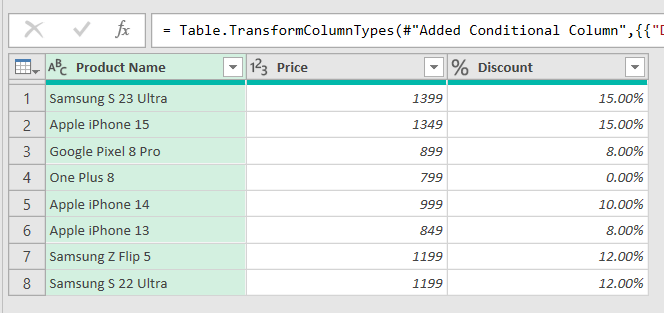
In this article, I’ve got a dataset featuring products and their corresponding prices. The ‘Product’ column includes various mobile phone products, and the ‘Price’ column displays their respective prices. I’ll guide you through the process of creating a new ‘Discount’ column based on these prices.
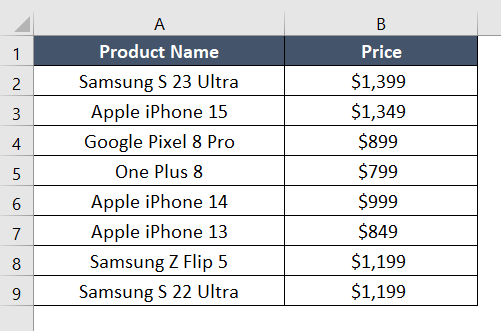
Example 1: Using Nested IF Statement in Conditional Column Feature in Power Query
Using nested IF statements within Power Query’s Conditional Column feature allows for the creation of sophisticated conditional logic for data transformation. This feature enables users to define intricate conditions by embedding multiple IF statements within one another. For example, you can set up a series of criteria to categorize or modify data based on hierarchical conditions. This hierarchical structure provides a powerful tool for handling complex scenarios and tailoring data columns according to specific and nuanced requirements.
Follow these step-by-step instructions to effectively use nested IF statements in Power Query’s Conditional Column feature:
Step 1: Open the Power Query Editor from a Table or Range
- Choose the table.
- Navigate to the Excel ribbon’s “Data” tab.
- Click “Get Data,” then select “From Table/Range.”

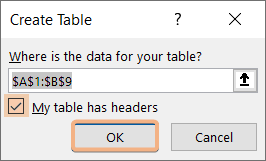
- Turn on “My Table has a Header.”

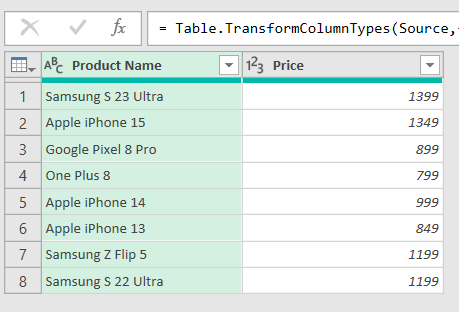
- When the Power Query Editor opens, your data will be visible.

Step 2: Create a New Column By Applying the Conditional Column
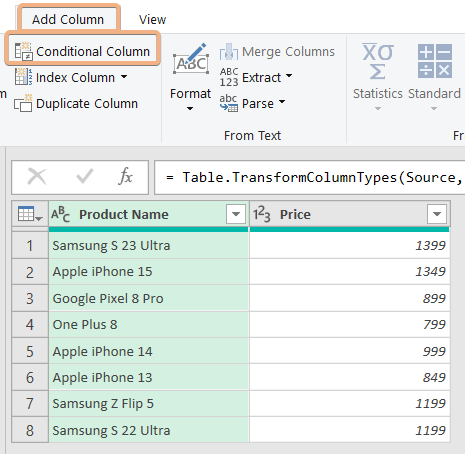
- Choose the “Add Column” tab in the Power Query Editor.
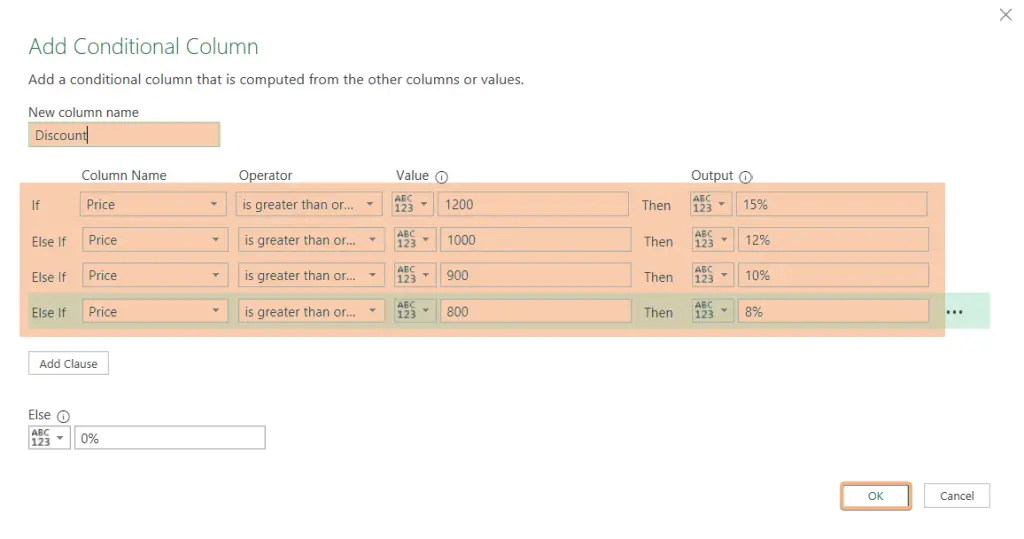
- Click on “Conditional Column.”

- In the “New column name” field, enter “Discount”.
- Choose the “Price” column.
- Choose “greater than or equal” the operator.
- Enter the value =1200.
- Indicate 15% for the outputs.
- Click on ‘Add Clause’ and provide your additional conditions.

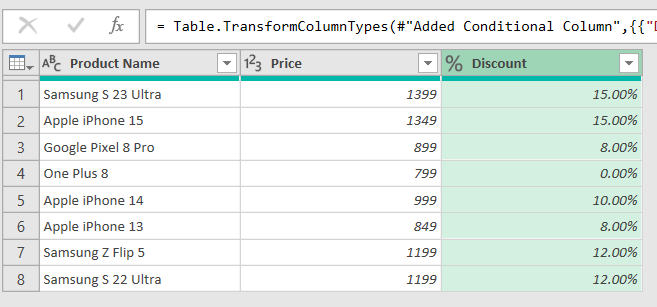
- Click “OK” to apply the changes. A new column named “Discount” will be added to your table.

By following these steps, you can effortlessly create the discount amount based on the respective prices.
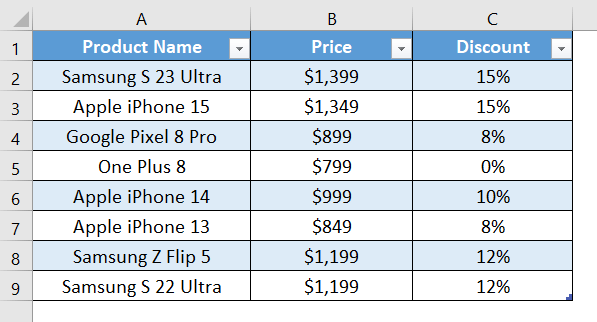
Example 2: Using Power Query’s Custom Column Feature with Nested IF Statement
Utilize Power Query’s Custom Column feature to its fullest potential by incorporating nested IF statements. This technique enables you to create complex and customized logic within your data transformations, allowing for precise and flexible column creation based on multiple conditions.
Utilize Power Query’s Custom Column feature to effortlessly create a new column named ‘Discount.’ Here’s a simple guide:
- Open the Power Query Editor.
- In the Power Query Editor, you will see a window with your table data.

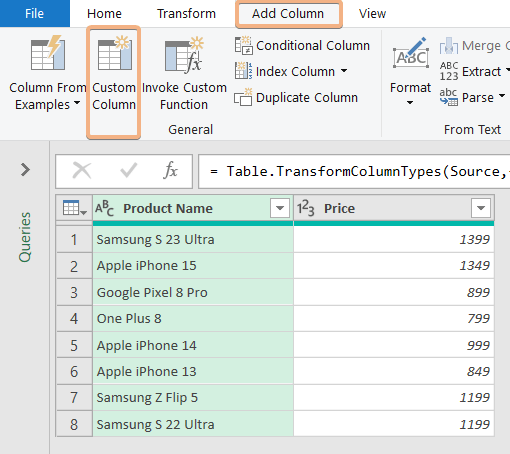
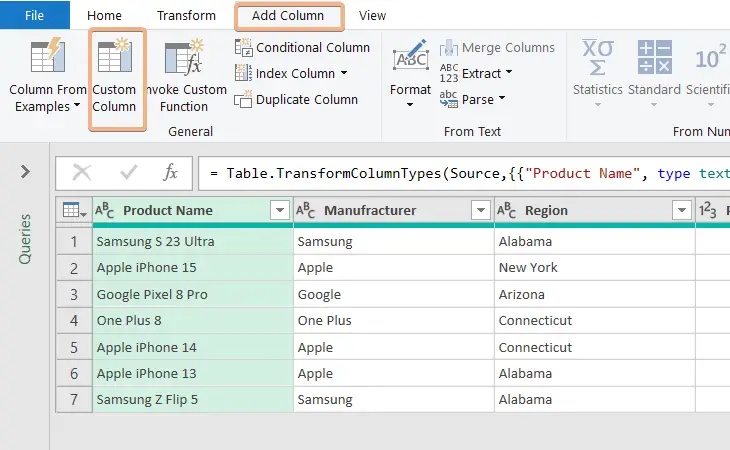
- Click on the “Add Column” tab in the Power Query Editor.
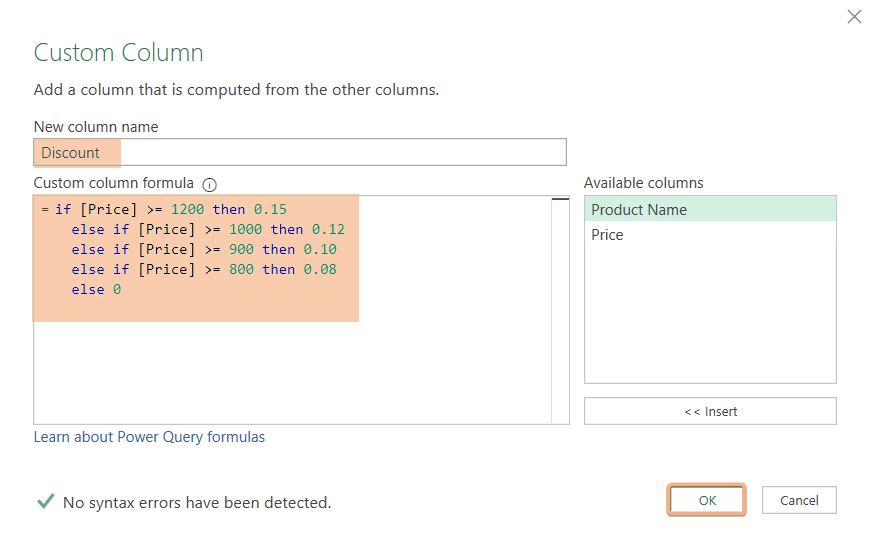
- Choose “Custom Column.”

- In the “Custom Column” dialog box, enter the following formula for the “Discount” column:
= if [Price] >= 1200 then 0.15
else if [Price] >= 1000 then 0.12
else if [Price] >= 900 then 0.10
else if [Price] >= 800 then 0.08
else 0
This formula checks the conditions one by one and assigns the corresponding discount based on the price.
- After entering the formula, click “OK” to create the new “Discount” column.
- Close the Power Query Editor by clicking “Close & Apply” in the Home tab.

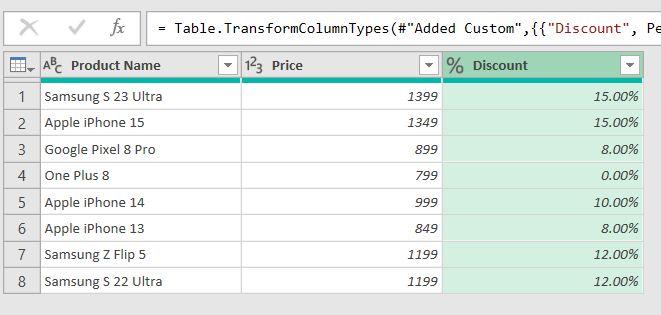
Your Excel table should now have a new column named “Discount” with values calculated based on the specified conditions. The discounts will be in decimal format (e.g., 0.15 for 15%). If you want to display them as percentages, you can format the column in Excel after applying the changes.
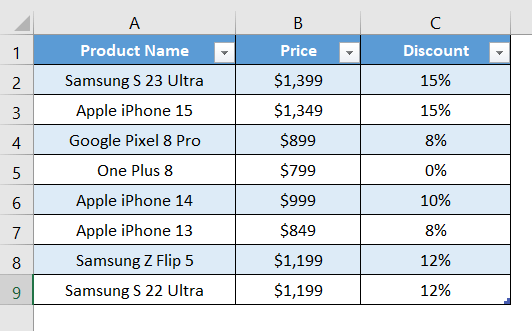
Example 3: Utilizing the Advanced Editor Feature of Power Query with a Nested IF Statement
Make your data work smarter by using the Advanced Editor in Power Query. With its help and a nested IF statement, you can easily customize and organize your data based on different conditions. This combination gives you more control and makes your data tasks simpler.
Use the Advanced Editor function in Power Query to quickly add a new column called “Discount.” Here’s a short manual:
- Open the Power Query Editor.

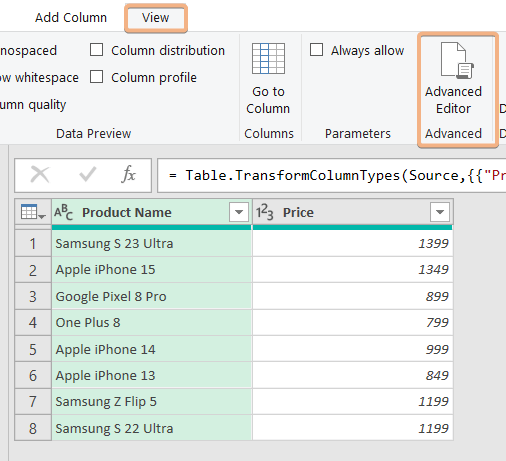
- Click on “Advanced Editor” in the Home tab.

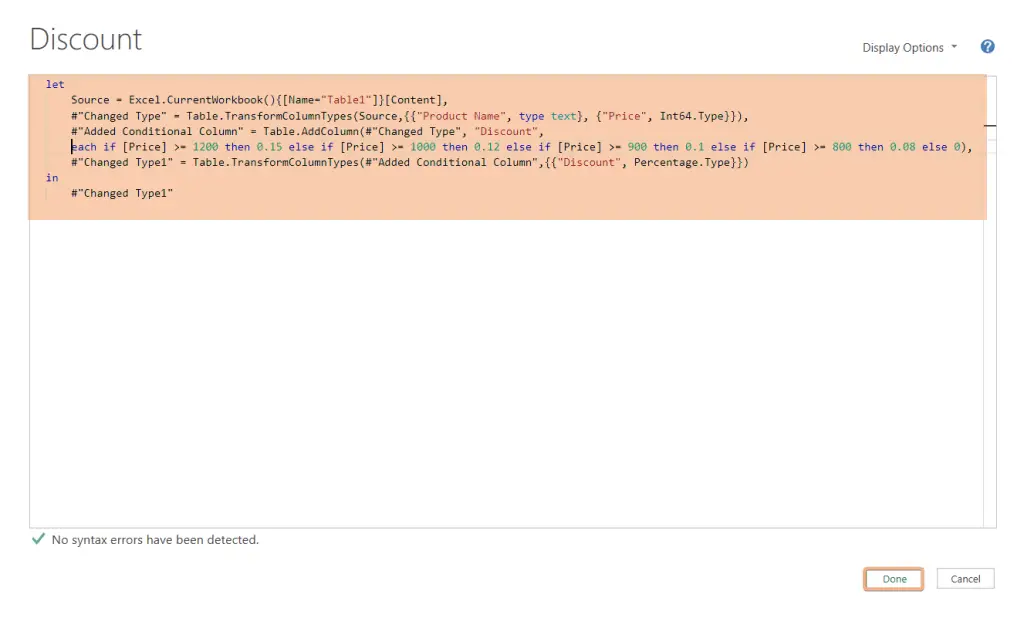
- Replace the existing code with the code below:
let
Source = Excel.CurrentWorkbook(){[Name="Table3"]}[Content],
#"Changed Type" = Table.TransformColumnTypes(Source,{{"Product Name", type text}, {"Price", Int64.Type}}),
#"Added Conditional Column" = Table.AddColumn(#"Changed Type", "Discount",
each if [Price] >= 1200 then 0.15 else if [Price] >= 1000 then 0.12 else if [Price] >= 900 then 0.1 else if [Price] >= 800 then 0.08 else 0),
#"Changed Type1" = Table.TransformColumnTypes(#"Added Conditional Column",{{"Discount", Percentage.Type}})
in
#"Changed Type1"
- Click “Done” to apply the changes.

This M code will add a new column named “Discount” based on the specified conditions.
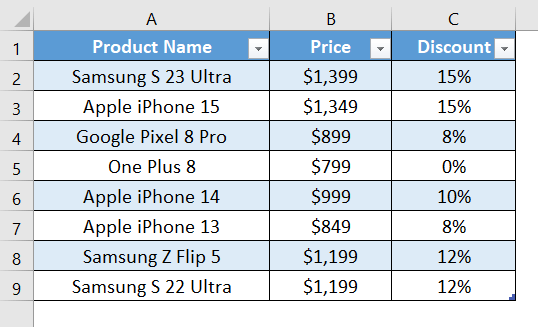
Example 4: Utilizing Nested IF Statement in the Custom Column Feature of Power Query with Multiple Criteria
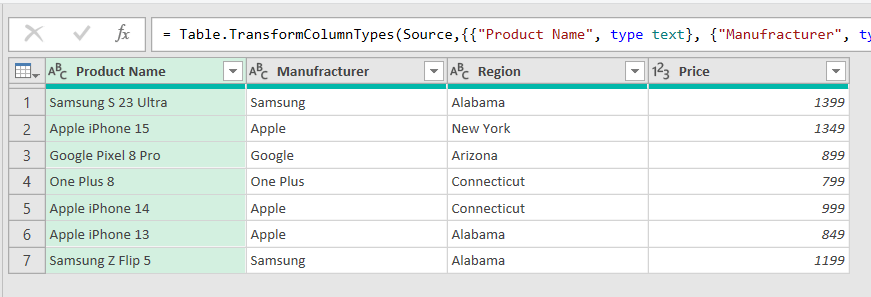
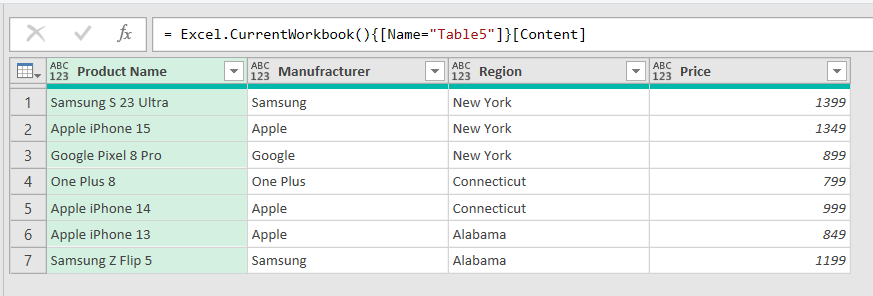
Create a custom column named ‘Discount’ using nested IF statements with multiple criteria. In this example, the dataset includes ‘Product Name,’ ‘Manufacturer,’ ‘Region,’ and ‘Price.’ I’ll demonstrate how to determine discounts based on ‘Region’ and ‘Manufacturer.’ Check out the dataset below:
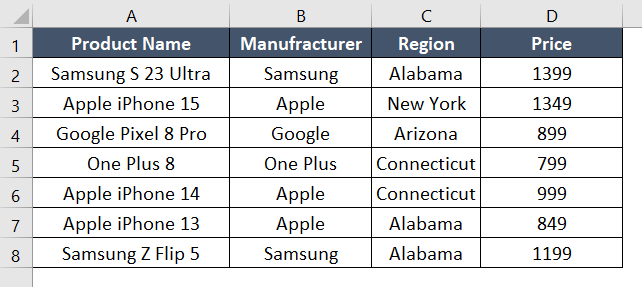
To create a ‘Discount’ column using the Custom Column feature with IF statements for multiple criteria, follow these steps:
- Open Power Query Editor in Excel.

- In the Power Query Editor, select the “Add Column” tab.
- Click on “Custom Column.”

- In the “New column name” field, enter “Discount”.
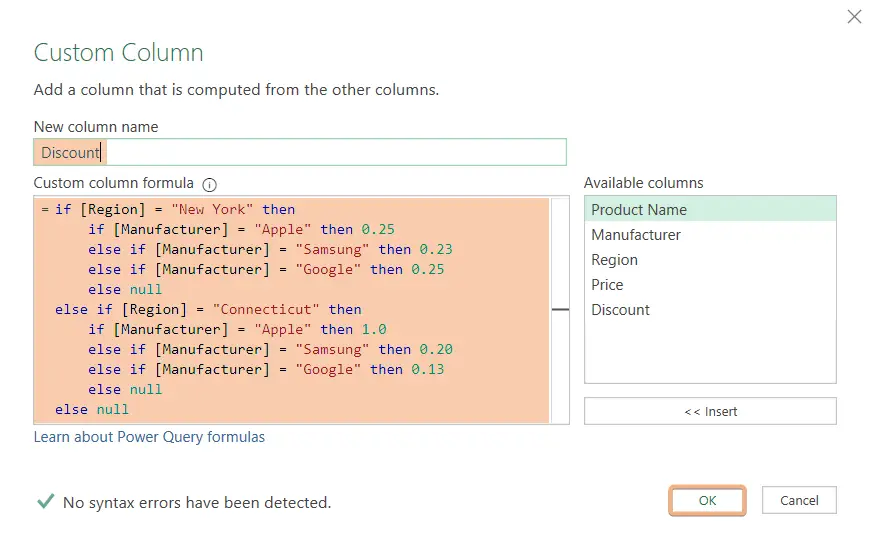
- In the “Custom column formula” field, enter the following formula:
if [Region] = "New York" then
if [Manufacturer] = "Apple" then 0.25
else if [Manufacturer] = "Samsung" then 0.23
else if [Manufacturer] = "Google" then 0.25
else null
else if [Region] = "Connecticut" then
if [Manufacturer] = "Apple" then 1.0
else if [Manufacturer] = "Samsung" then 0.20
else if [Manufacturer] = "Google" then 0.13
else null
else null
- Click “OK” to apply the changes. A new column named “Discount” will be added to your table.

Now, your Excel table should have a new column named “Discount” with values calculated based on the specified conditions.
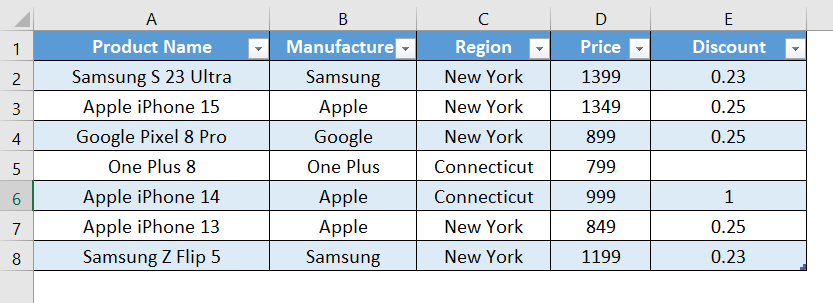
Example 5: Using Power Query’s Advanced Editor Feature with Nested IF Statement with Multiple Criteria
The Power Query code, implemented in the Advanced Editor, incorporates a nested IF statement with multiple criteria to create a custom column named “Discount.” This code analyzes the “Region” and “Manufacturer” columns, assigning specific discount values based on predefined conditions.
Creating a new column using Power Query’s Advanced Editor with a nested IF statement and multiple criteria, follow the steps outlined below:
- Launch the Power Query Editor.

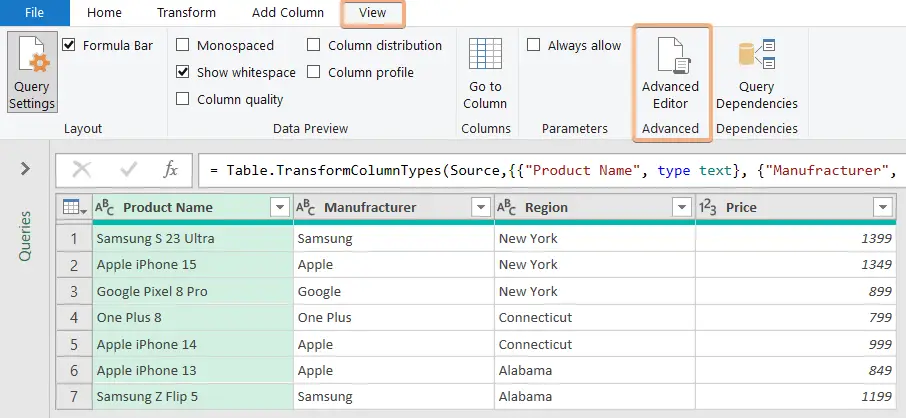
- Using the Home tab, select “Advanced Editor”.

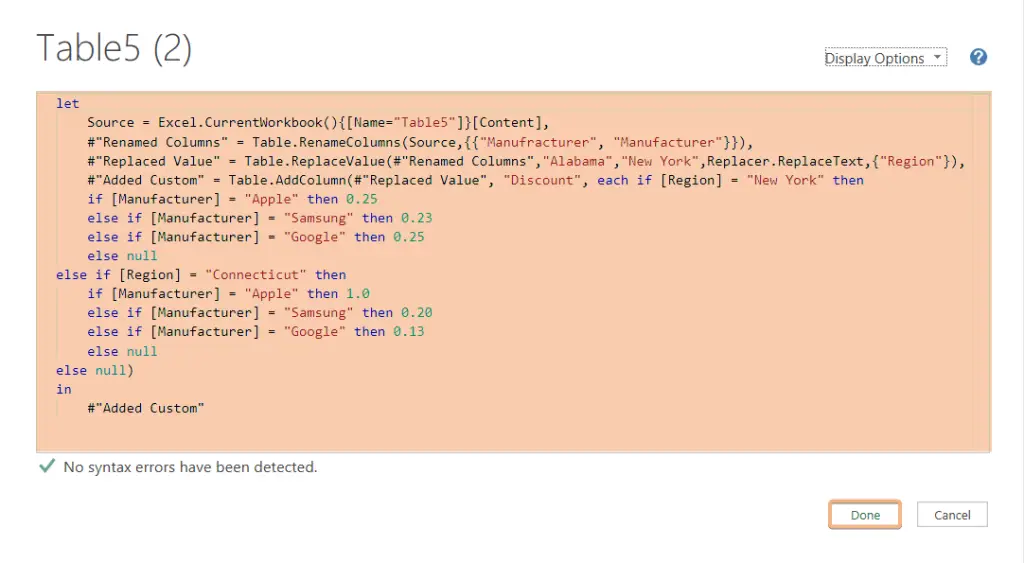
- Replace the existing code with this provided code.
let
Source = Excel.CurrentWorkbook(){[Name="Table5"]}[Content],
#"Renamed Columns" = Table.RenameColumns(Source,{{"Manufracturer", "Manufacturer"}}),
#"Replaced Value" = Table.ReplaceValue(#"Renamed Columns","Alabama","New York",Replacer.ReplaceText,{"Region"}),
#"Added Custom" = Table.AddColumn(#"Replaced Value", "Discount", each if [Region] = "New York" then
if [Manufacturer] = "Apple" then 0.25
else if [Manufacturer] = "Samsung" then 0.23
else if [Manufacturer] = "Google" then 0.25
else null
else if [Region] = "Connecticut" then
if [Manufacturer] = "Apple" then 1.0
else if [Manufacturer] = "Samsung" then 0.20
else if [Manufacturer] = "Google" then 0.13
else null
else null)
in
#"Added Custom"
- Click “Done” to apply the changes.

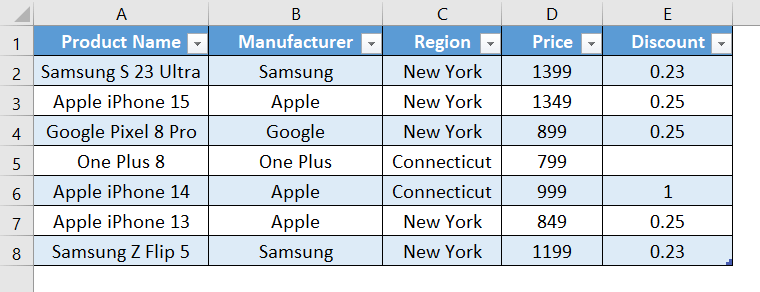
This code creates a new column named “Discount” based on the specified conditions for “New York” and “Connecticut” using the Advanced Editor in Power Query. Adjust the criteria or discount values as needed.
Conclusion
In this article, I will walk you through the application of nested IF statements within the Power Query. You will explore practical examples illustrating the usage of nested IF statements for both single and multiple criteria scenarios. By diligently following these illustrative methods, you’ll not only grasp the fundamentals but also develop a profound understanding of the nuanced applications of nested IF statements in the Power Query. This knowledge will empower you to efficiently manipulate and transform data, enhancing your capabilities in data analysis and decision-making.
Frequently Asked Questions
Can I use multiple conditions in a single nested IF statement in Power Query?
Yes, you can use multiple conditions within a single nested IF statement in Power Query. The syntax for a nested IF statement is as follows:
if condition1 then
// do something
else if condition2 then
// do something else
else if condition3 then
// do something else
else
// do something if none of the conditions are true
You can extend the else if clauses to include additional conditions as needed. This allows you to create a sequence of conditions and associated actions within a single nested IF statement, providing a compact and readable way to express complex logic in Power Query.
What is the advantage of using nested IF statements in Power Query?
Using nested IF statements in Power Query provides several advantages:
- Simplifies complex logic into a single, readable formula.
- Conditions are evaluated sequentially, ensuring the first true condition is acted upon.
- Useful for creating a new column with values calculated based on multiple conditions.
- Enhances code readability and ease of maintenance.
- Helps in minimizing the number of intermediary columns.
- Offers flexibility in customizing data transformations.
- This can lead to improved performance by processing logic in a single pass.
How do I avoid errors when using nested IF statements in Power Query?
Tips to Avoid Errors with Nested IF Statements in Power Query:
- Ensure correct syntax and proper use of parentheses.
- Use consistent indentation for readability.
- Consider using the Advanced Editor for clearer code structure.
- Confirm correct spelling and case of column and variable names.
- Test each condition separately to identify issues.
- Always include an else clause for fallback options.
- Break down complex logic into multiple steps for easier troubleshooting.
- Explicitly handle null values if applicable.
- Ensure compatible data types for values being compared.
- Add comments explaining the logic for future reference.
- Employ error-handling functions for exceptional cases.
- Review results and use debugging features for identification and resolution.
By following these tips, you can create robust and error-free nested IF statements in Power Query.
Can I use ELSE IF statements within nested IF statements in Power Query?
Yes, you can use else if statements within nested if statements in Power Query. This allows you to define multiple conditions and actions within a single logical construct. Each else if clause is evaluated only if the preceding conditions are not met.
