2 Ways to Add Developer Tab in Excel
By default, your Excel may not have the Developer tab in the main ribbon. But that’s not a big issue. Because you can add the Developer tab in the main ribbon with only a few clicks. This blog will show you 2 methods to add the Developer tab in Excel.
Watch 2 Ways to Add Developer Tab in Excel
Add Developer Tab in Excel by Right-clicking on Excel Ribbon
Generally, the Developer tab is seen between the View and Help tabs in the main ribbon.

If you don’t see it there then follow these steps below:
- Right-click anywhere on the main ribbon.
A little dialog box will appear. - Select Customize the Ribbon option.

- Select Developer from the Main Tabs list.
- Hit OK.

Now, the Developer tab will be seen in the main ribbon between the View and Help tabs.

Read More: How to Enable & Disable Power Pivot Add-In in Excel
Add Developer Tab in Excel Using Excel Option
To add the Developer tab in Excel using Excel Option, here are the steps below:
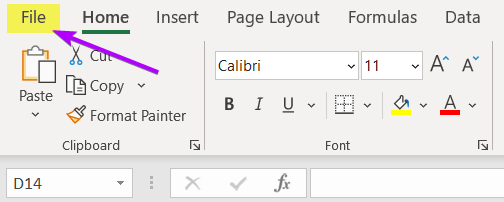
- Click on File beside the Home tab.

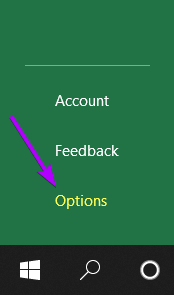
- Click on Options.
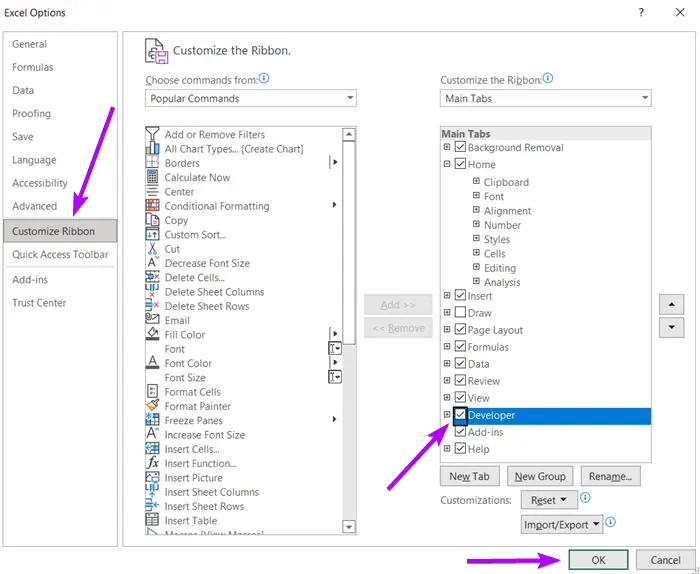
 A new window named Excel Options will open.
 - Select Customize Ribbon from the left-most option column.
- Then, select Developer in the Main Tabs list.
- Now, click OK.

Now the Developer tab has been added to the main ribbon between the View and Help tabs.

Conclusion
I hope this short article has helped you to add the Developer tab in Excel without any trouble. Thanks.
Frequently Asked Questions
What is the shortcut key for the Developer tab in Excel?
In Excel, the shortcut key to access the Developer tab is ALT + L > A. Press “ALT,” followed by “L” (for the View tab), and then “A” (for the Developer tab). This keyboard shortcut allows you to quickly switch to the Developer tab in Excel.
How do I add a button in Excel?
To add a button in Excel, follow these steps:
- Go to the Insert tab in the Excel ribbon.
- In the Illustrations group, click on Shapes.
- Choose the Button shape from the list of shapes.
- Click and drag on the worksheet to draw the button.
- Right-click on the button and select Assign Macro to link it to a macro or specific action.
- In the Assign Macro dialog box, choose the macro you want to assign or record a new one.
- Click OK to confirm.
By following these steps, you can easily add a button in Excel and associate it with a macro for streamlined automation.
How to create a macro in Excel?
To create a macro in Excel, follow these steps:
- Open Excel and navigate to the View tab.
- Click on Macros in the Macros group.
- Select Record Macro from the dropdown menu.
- In the Record Macro dialog box, provide a name for your macro.
- Choose a location to store the macro: either in the current workbook or in a new workbook.
- Optionally, assign a shortcut key for quick access.
- Select OK to start recording your actions.
- Perform the actions you want to include in the macro.
- After completing the actions, go back to the View tab and click on Macros.
- Choose Stop Recording to finish creating the macro.
By following these steps, you can successfully create a macro in Excel to automate a series of actions.


