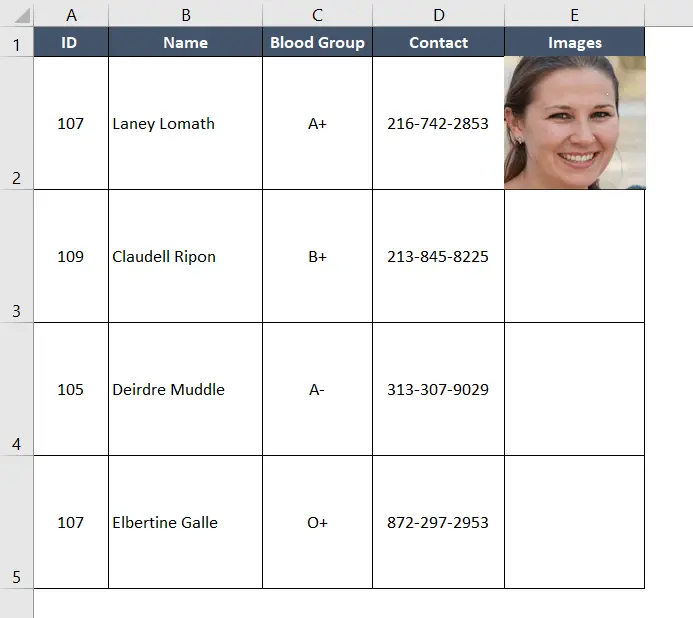
How to Insert Pictures in Excel Automatically Size to Fit Cells
Using Shortcuts to Insert Pictures in Excel Automatically Size to Fit Cells
However, Microsoft Excel includes a ton of shortcuts that help us do work faster and save time. To start, you can apply keyboard shortcuts to insert pictures in Excel that automatically size to fit cells. The procedure is given below.
You can use shortcuts to insert pictures into Excel that will automatically resize to fit the cells. Take the actions listed below:
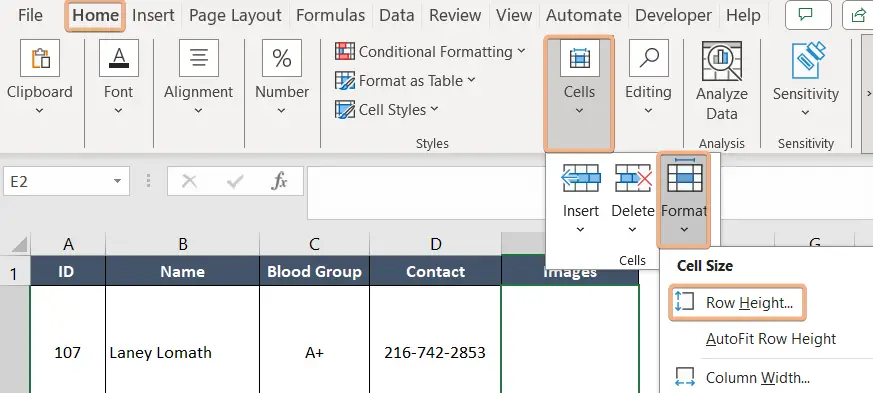
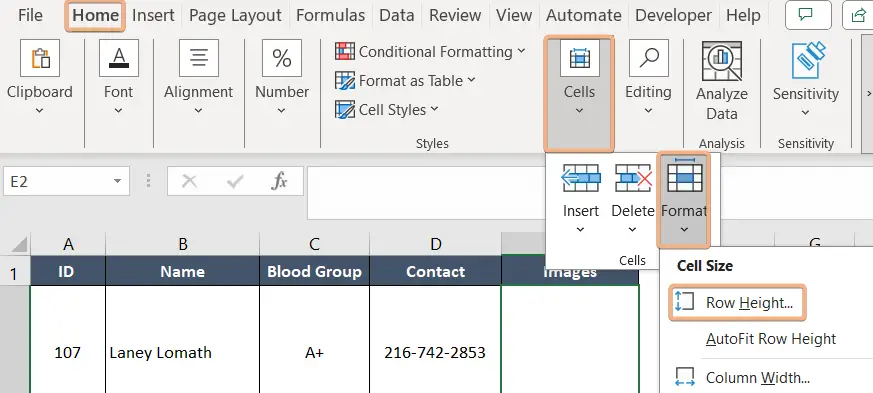
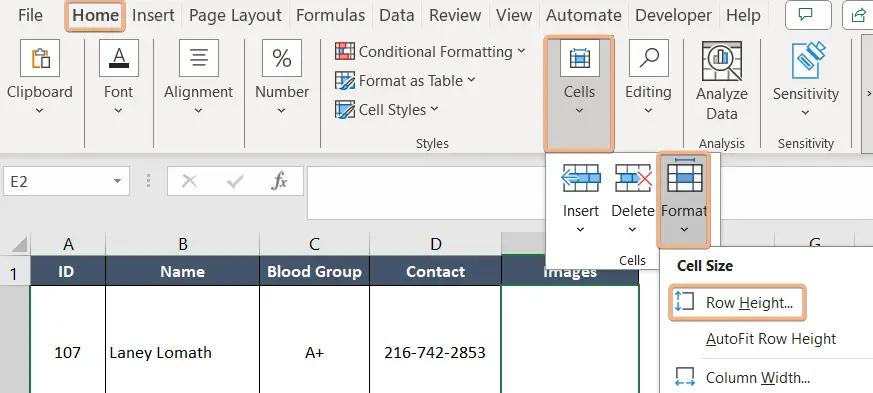
- First, go Home and Adjust the Row Height to 80. This will make the cells more visually suitable for inserting pictures.

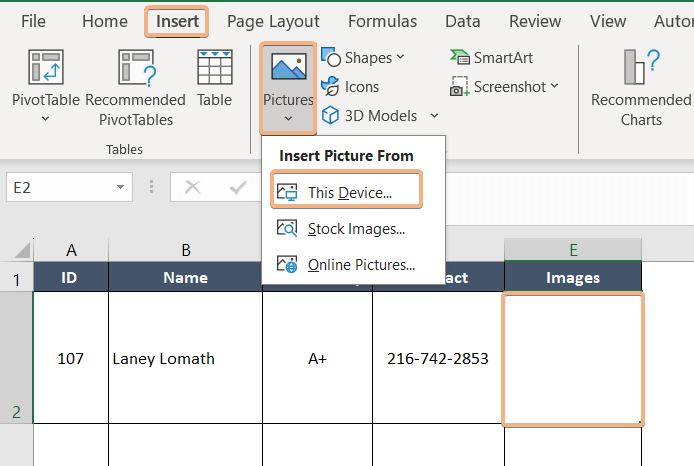
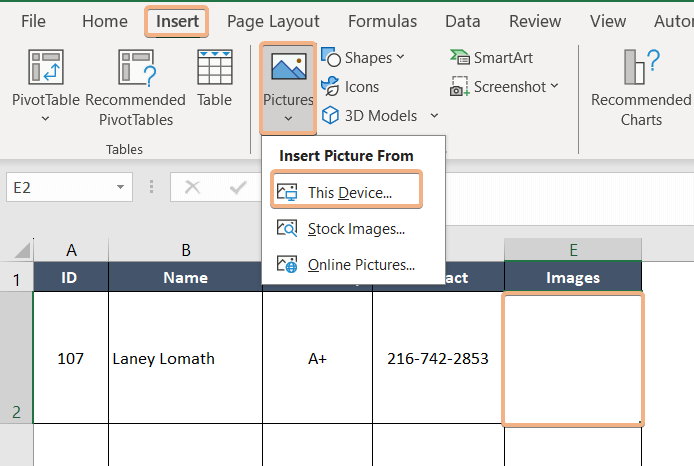
- Choose cell E2 and go to the Insert tab.
- After that select Pictures and click Insert.

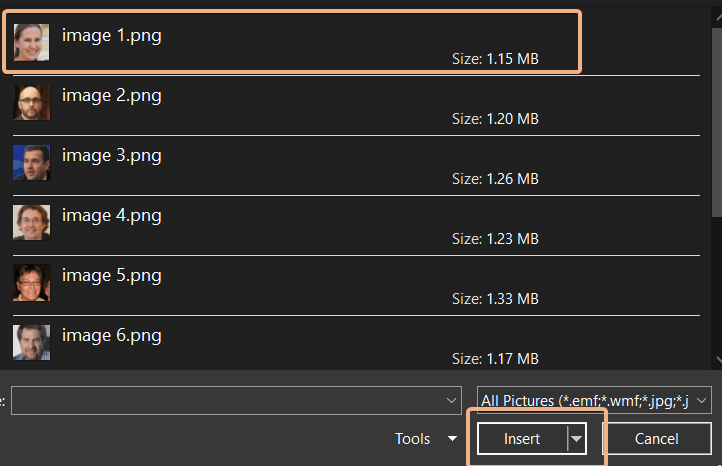
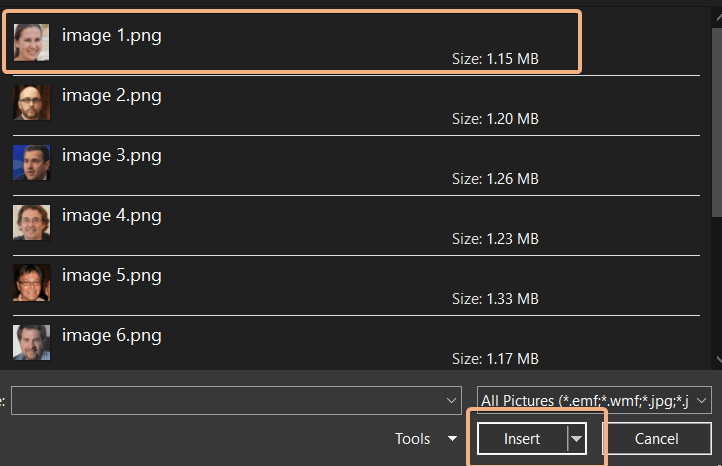
- Now select your desired picture from your storage device and click Insert.

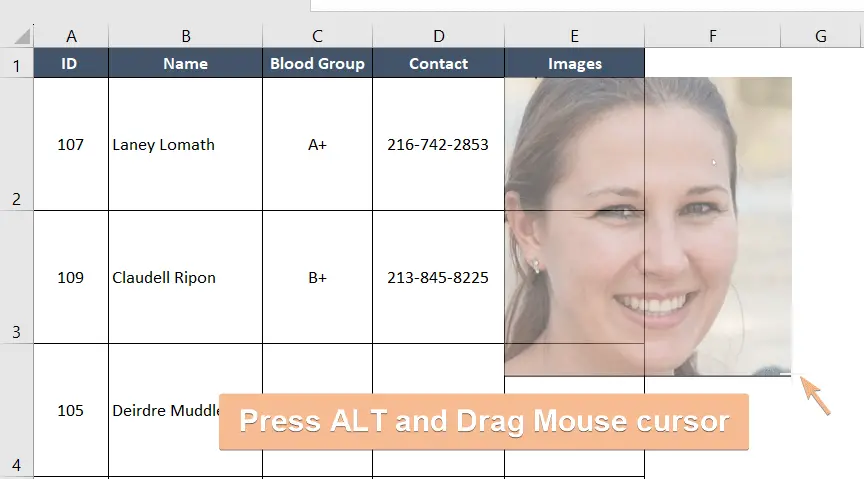
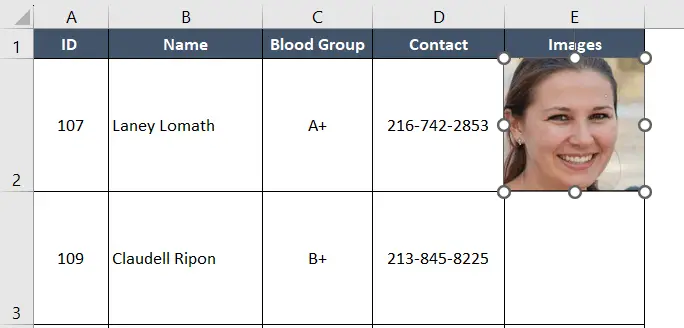
- Then hold the Alt key and drag the inserted picture until it fits in the cell. The Alt key helps in resizing the image to fill the entire cell.

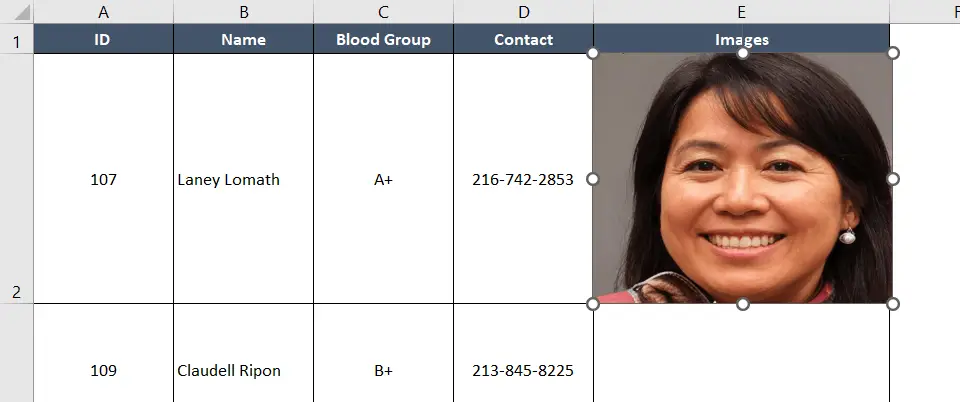
- As a result, the picture is fitted in cell E2.

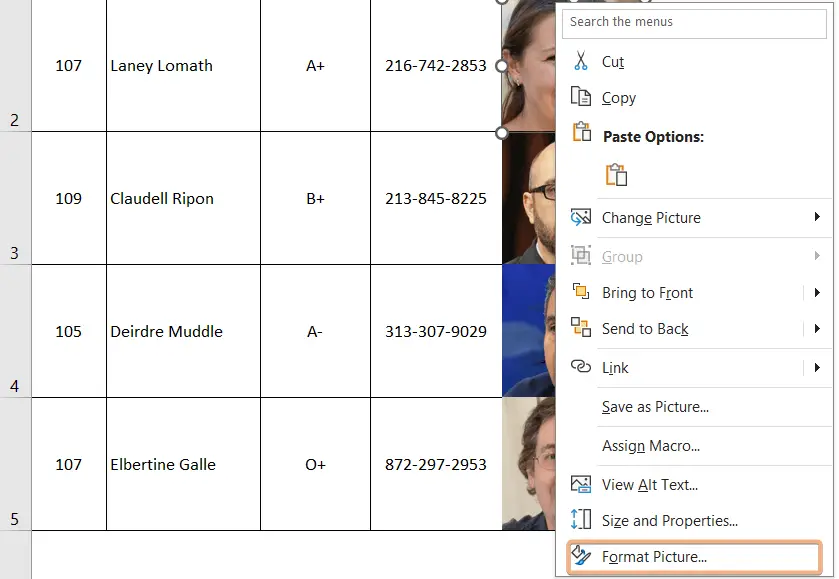
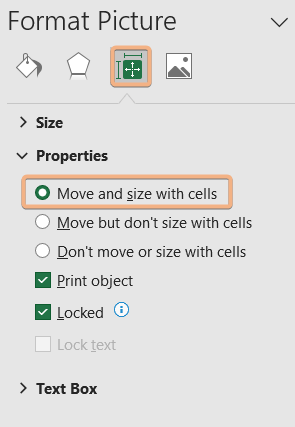
- Do the same procedure in the rest of the cells. Then every picture will be manually fitted in the cell. Now select E2:E5 and go to Format Pictures again.

- Now Click Move and Size with cells and it will make the picture automatically fitted to the cells.

If we increase the cell Height and Width the picture will automatically adjust to it.
Using VBA Code to Insert Pictures Automatically Sizes to Fit Cells in Excel
You can insert a single picture in a single cell and automatically sizes to fit cells using VBA code. It is one of the effective methods to automatically size to fit cells.
VBA code allows you to add images to Excel that will adjust their size to match the cells. Perform the following actions:
- To open Visual Basic Editor press ALT+F11.
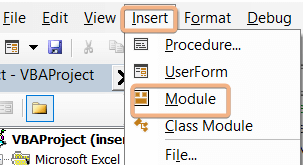
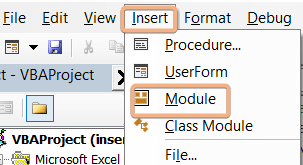
- Then select Insert > Module.

- Copy the code below and paste it.
Sub InsertPictureInSelectedCell() Dim cell As Range Dim pic As Picture Dim filePath As String Dim cellWidth As Double Dim cellHeight As Double ' Prompt the user to select a picture file (with .png format) With Application.FileDialog(msoFileDialogFilePicker) .Title = "Select a Picture" .Filters.Add "PNG Files", "*.png", 1 If .Show = -1 Then filePath = .SelectedItems(1) Else Exit Sub ' Exit the macro if the user cancels the file selection End If End With ' Select the cell where you want to insert the picture On Error Resume Next Set cell = Application.InputBox("Select a cell to insert the picture", Type:=8) On Error GoTo 0 ' Check if a valid cell was selected If cell Is Nothing Then MsgBox "No valid cell selected. Exiting macro." Exit Sub End If ' Get the width and height of the selected cell cellWidth = cell.Width cellHeight = cell.Height ' Insert the picture and set its properties Set pic = ActiveSheet.Pictures.Insert(filePath) With pic .Left = cell.Left .Top = cell.Top .Width = cellWidth ' Set the width to the cell width .Height = cellHeight ' Set the height to the cell height ' Set the picture's format to move and size with cells .Placement = xlMoveAndSize End With End Sub - Press CTRL+S to save the Module.
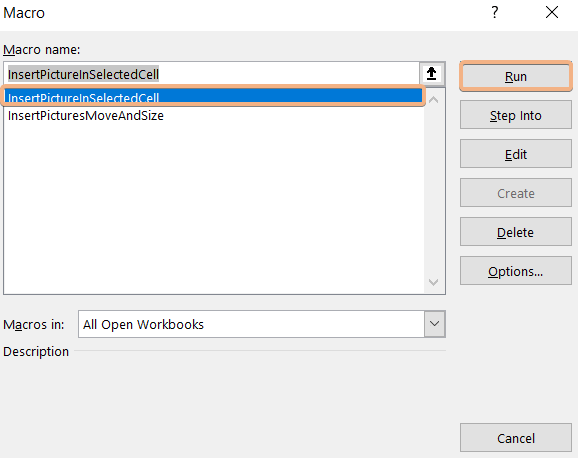
- Now press ALT+F8 to open the Macro dialog box.
- Select InsertPictureInSelectedCells and hit the Run button.

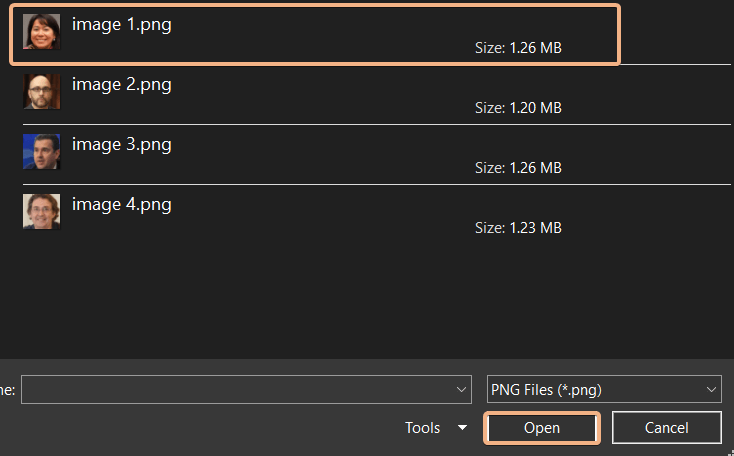
- Now choose your Picture from the desired Folder.

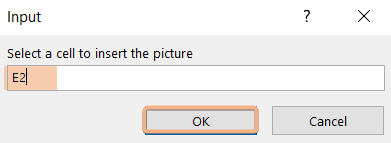
- Choose your desired cell where you want to insert the picture.

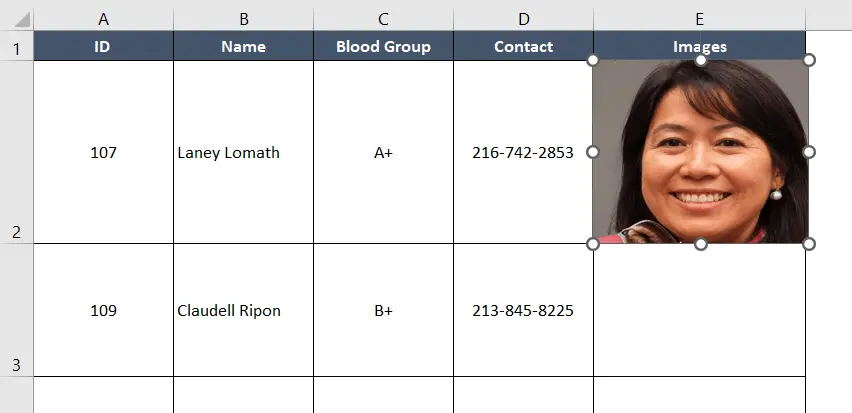
- Now we can insert the picture in the cell.

- Now if we change the height and width of the cell the picture will automatically fit in it.

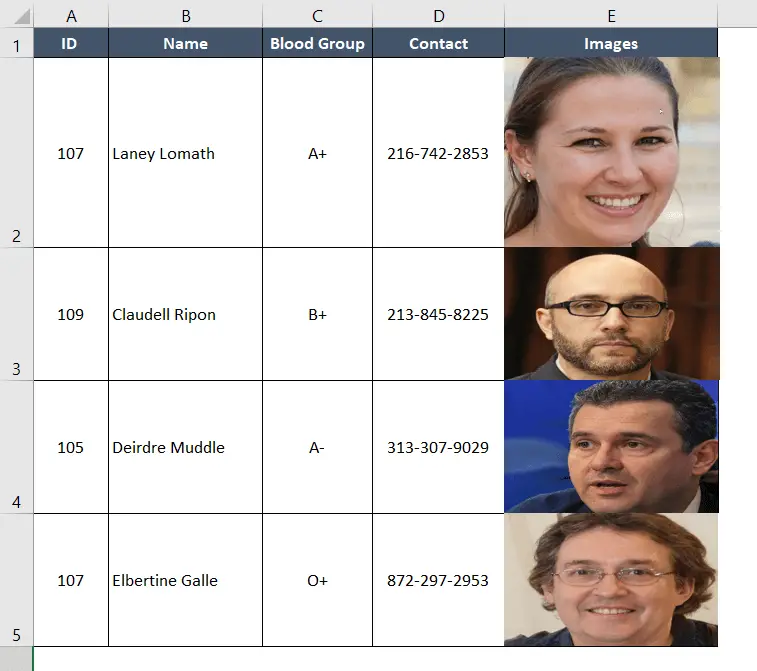
Applying this VBA code to all the cells finally we find our exact result.
Insert Multiple Pictures in Excel Automatically Size to Fit Cells with VBA
Pictures can be automatically sized to fit cells when they are inserted into Excel using VBA (Visual Basic for Applications) code.
Multiple images that will automatically resize to match the cells in Excel can be inserted using VBA code. Execute the following steps:
- Press ALT+F11 to open Visual Basic Editor.
- Then select Insert > Module

- Copy the code below and paste it.
Sub InsertPicturesMoveAndSize() Dim ws As Worksheet Dim pic As Picture Dim startCell As Range Dim folderPath As String Dim imgPath As String Dim imgPaths() As String Dim i As Long Dim picWidth As Double Dim picHeight As Double Dim picAspect As Double ' Set the active sheet as the target sheet Set ws = ActiveSheet ' Prompt the user to select the starting cell On Error Resume Next Set startCell = Application.InputBox("Select the starting cell:", Type:=8) On Error GoTo 0 ' Exit the macro if the user cancels the input box or doesn't select a valid cell If startCell Is Nothing Then Exit Sub End If ' Prompt the user to select a folder containing images With Application.FileDialog(msoFileDialogFolderPicker) .Title = "Select a folder containing images" .AllowMultiSelect = False If .Show = -1 Then folderPath = .SelectedItems(1) Else Exit Sub End If End With ' Check if there are image files in the selected folder imgPaths = GetImageFilesInFolder(folderPath) ' Loop through each image path and cell, starting from the selected cell For i = LBound(imgPaths) To UBound(imgPaths) ' Specify the image path imgPath = imgPaths(i) ' Clear the cell's contents startCell.ClearContents ' Check if the image file exists If Dir(imgPath) <> "" Then ' Insert the picture Set pic = ws.Pictures.Insert(imgPath) ' Calculate aspect ratio picAspect = pic.Width / pic.Height ' Calculate the new width and height based on cell dimensions picWidth = startCell.Width picHeight = picWidth / picAspect ' Position and resize the picture to fit the cell With pic .Top = startCell.Top .Left = startCell.Left .Width = picWidth .Height = picHeight End With ' Set the picture to move and size with cells pic.Placement = xlMoveAndSize ' Move to the next cell Set startCell = startCell.Offset(1, 0) Else MsgBox "Image file not found: " & imgPath, vbExclamation End If Next i End Sub Function GetImageFilesInFolder(folderPath As String) As String() Dim imgFile As String Dim imgFiles() As String Dim i As Long ReDim imgFiles(1 To 1) i = 1 imgFile = Dir(folderPath & "\*.png") ' You can adjust the file extension as needed Do While imgFile <> "" ReDim Preserve imgFiles(1 To i) imgFiles(i) = folderPath & "\" & imgFile i = i + 1 imgFile = Dir Loop GetImageFilesInFolder = imgFiles End Function - Save the module by pressing CTRL+S.
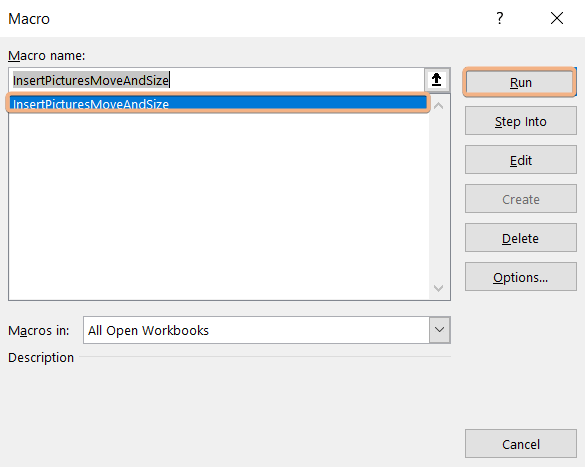
- Now press ALT+F8 to open the Macro dialog box.
- Select InsertPicturesMoveandSizes and hit the Run button.

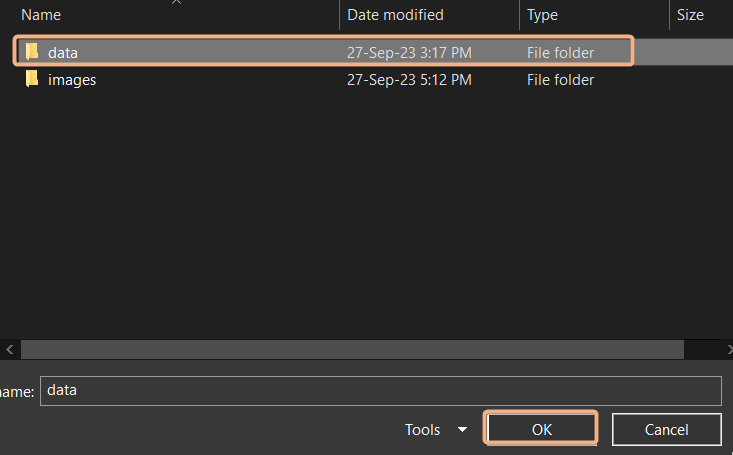
- Now choose your Folder.

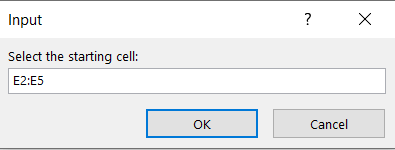
- Choose your desired cell range E2:E5 where you want to insert the picture.

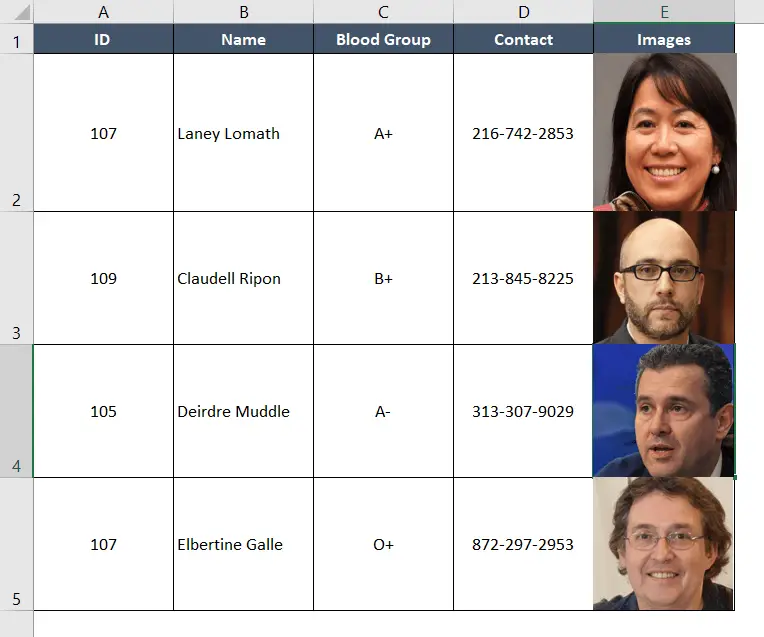
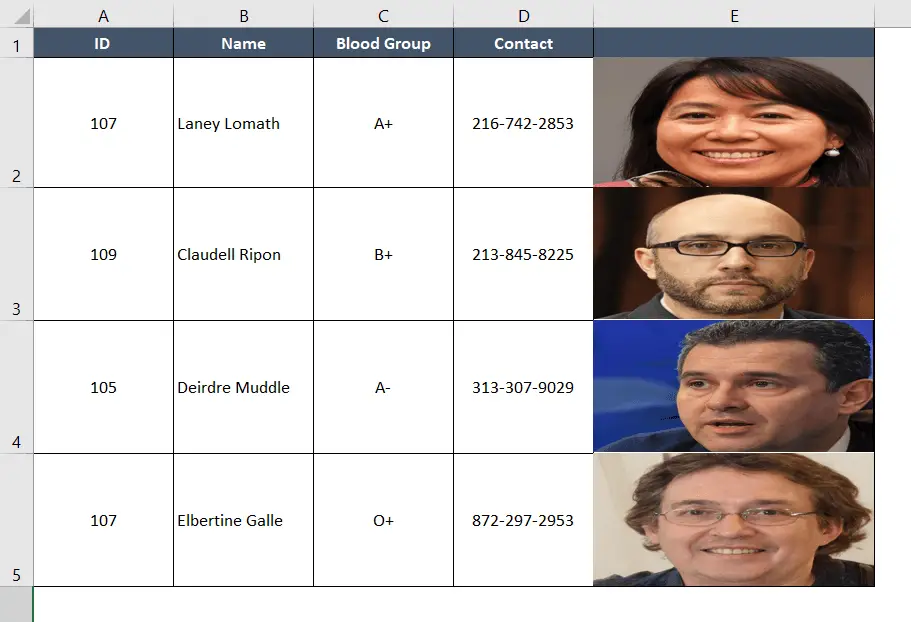
After running the VBA code we see that all images are automatically resized in the desired cells.
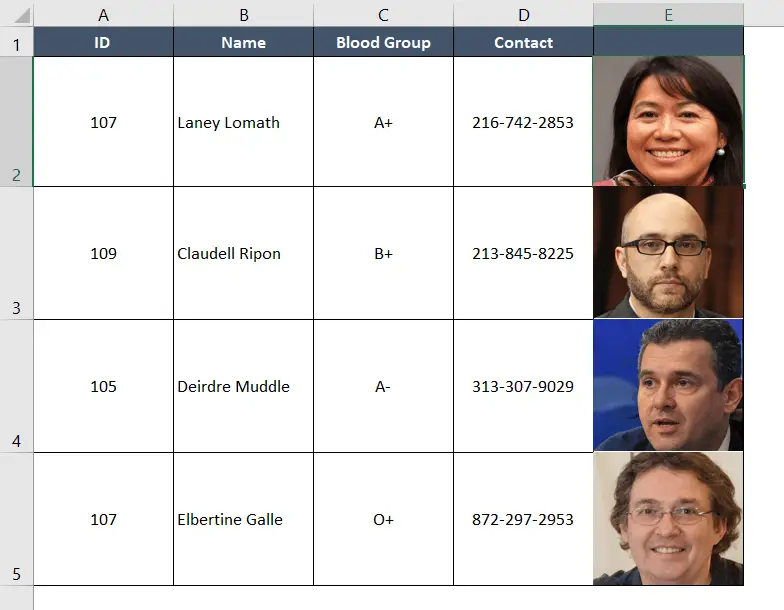
Now if we increase or decrease the cell size the size of the image is also increasing and decreasing according to the cell size.
Use the Shape and Fill Option to Insert Pictures in Excel Manually Size to Fit Cells
In Microsoft Excel, you can change the fill color of shapes, such as rectangles, circles, and other drawing objects, to enhance your worksheets’ visual appeal or convey information. You can add your desired pictures in this shape. The process is discussed below.
You can manually resize an image to fit a cell in Excel by using the shape and fill options. Observe the following actions:
- Go Home and set the Row Height to 80 first. By doing this, the cells will make it easier to place images.

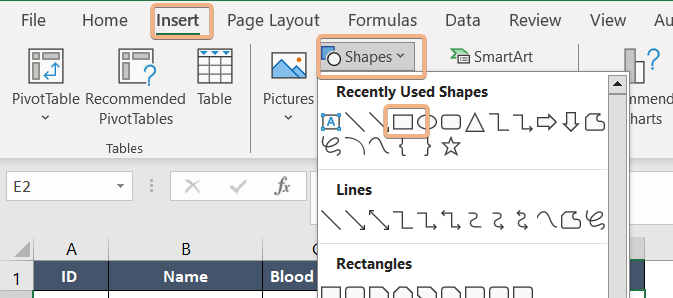
- Choose cell E2 and go to the Insert tab.
- After that select Shapes and also select Rectangle.

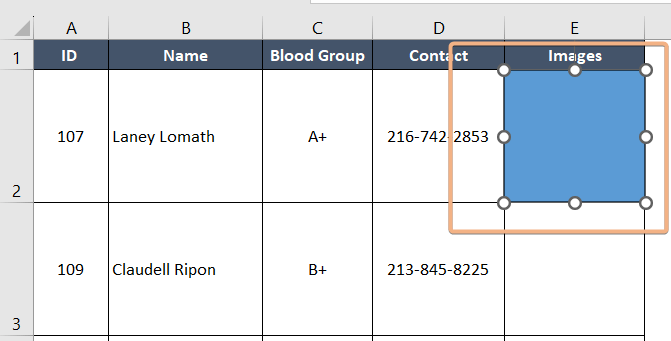
- Then draw the Rectangle Shape in cell E2.

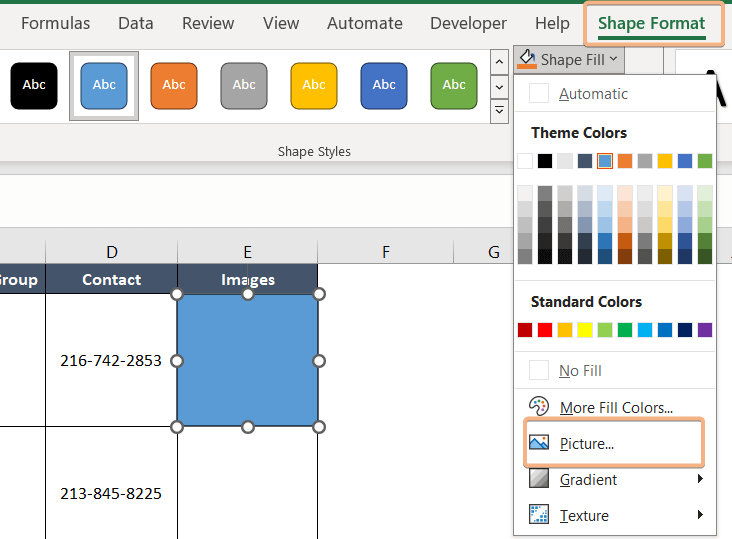
- After drawing the Rectangle Shape go to the Shape Format and select Picture.

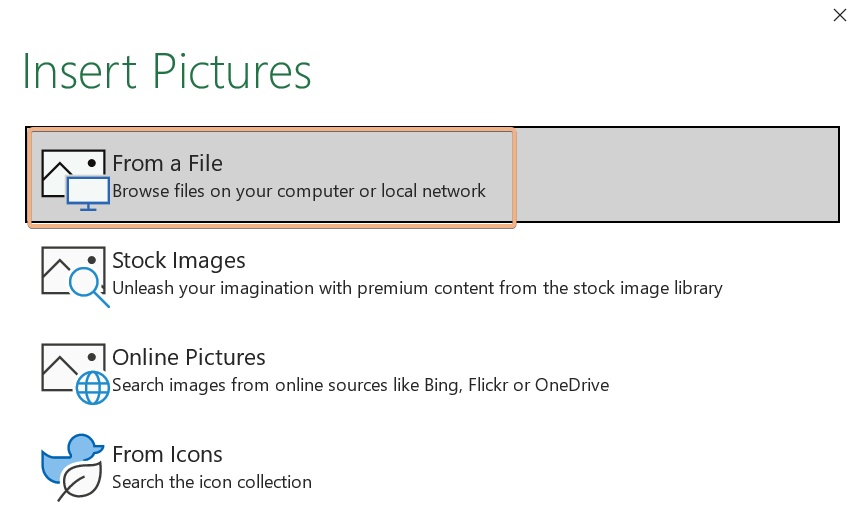
- Then a new dialogue box will open and it shows you from which storage device you want to insert Images.

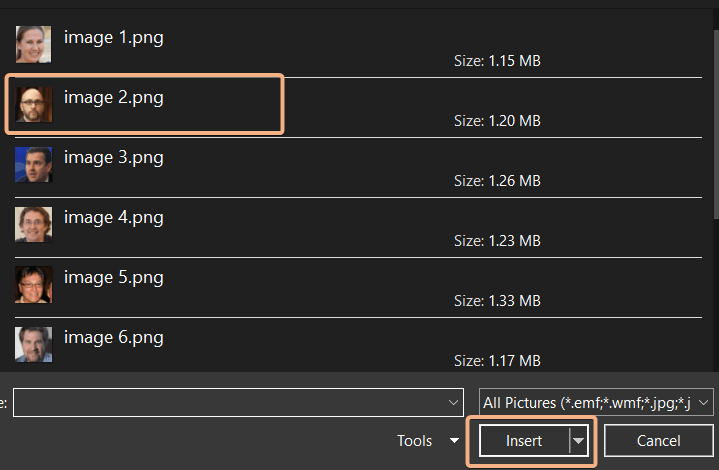
- Click From a File and Choose your Image.

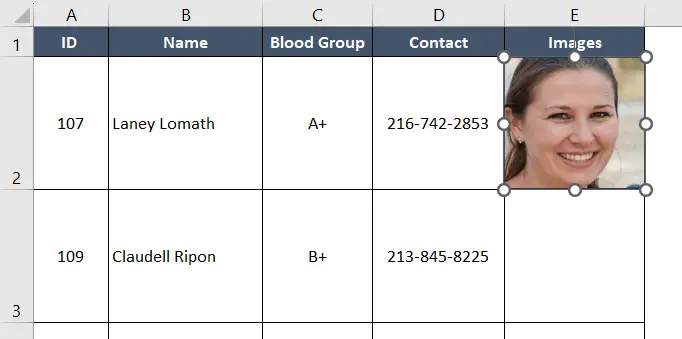
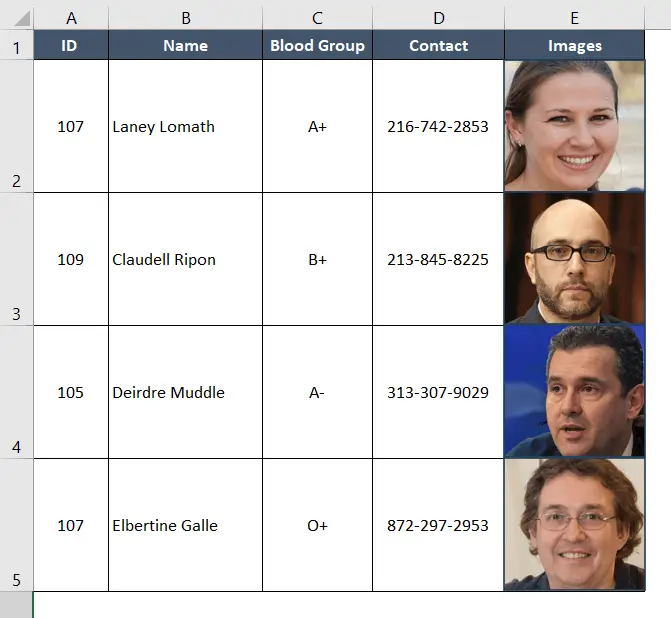
- After that, the Image will be automatically fitted in the Shape.

Doing the same procedure to all cells we can easily insert pictures in every cell.
Use Format Picture Option to Insert Pictures in Excel Manually Size to Fit Cells
The “Format Picture” feature in Microsoft Excel lets you insert images and automatically resize them to fit cells. The procedure is quite straightforward and easy. Furthermore, it works with every version of Microsoft Excel.
To manually insert pictures into an Excel spreadsheet that fits a cell, use the format picture option. Take the actions listed below:
- First, go Home and Adjust the Row Height to 80.

- Select cell E2 and go to the Insert tab.
- Then select Pictures and click Insert.

- Now select your desired picture from your storage device and click Insert.

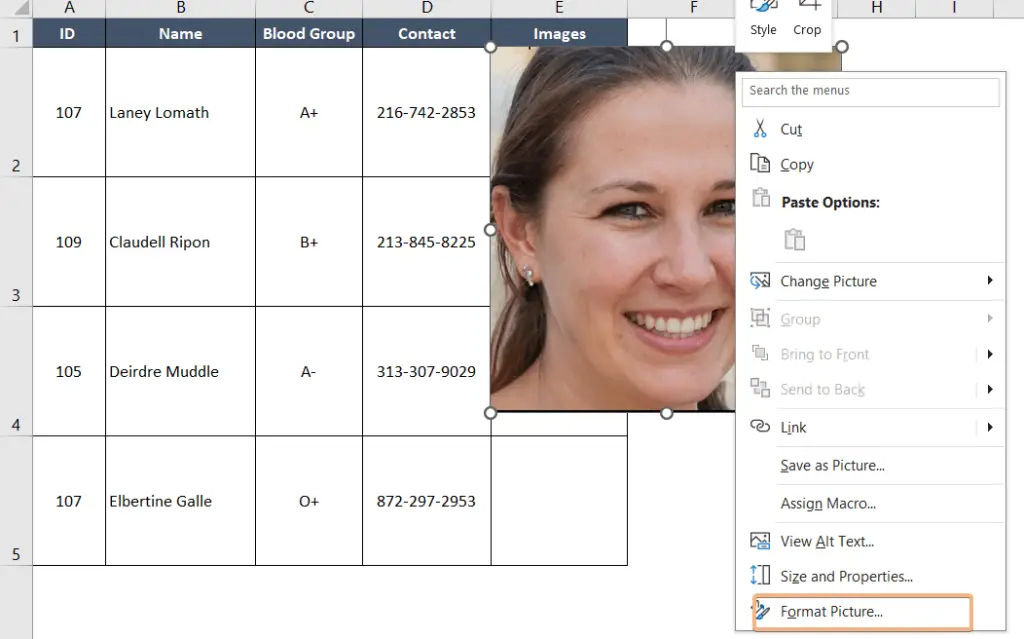
- Then Right click the mouse and go to the Format Picture option.

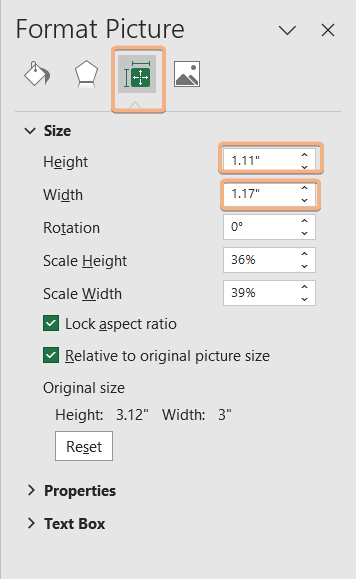
- This will open the Format Shape option and therefore go to the Size & Properties, you give your desired value to the Height & Width option. In this case, I give the Height as “1.11” inches and the Width as “1.17” inches.

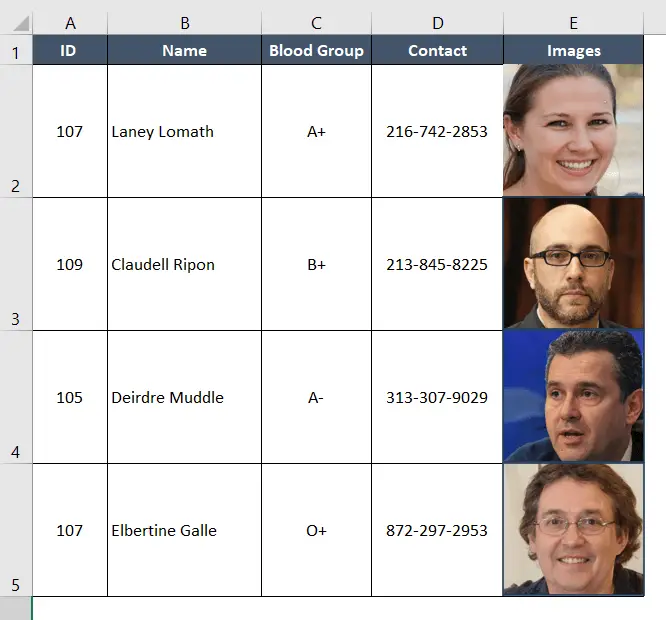
- After that, we see that in cell E2, our picture is automatically fitted, and do this method for other cells.

Finally, we see that every picture is automatically fitted in every cell by formatting pictures.
Conclusion
You can insert photographs in Excel that automatically resize to fit cells by following these steps. Overall, we require this for a number of reasons when it comes to managing time. I’ve provided several techniques along with their corresponding examples.
