How to Freeze Top Row and First Column in Excel
- Go to the View tab.
- Select a cell. Its above row and left column will be frozen.
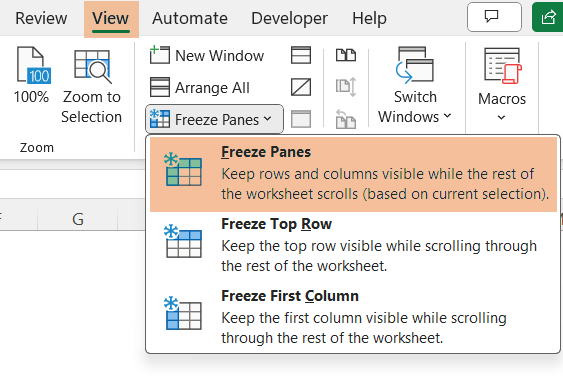
- Select the Freeze Panes.
How to Add Freeze Panes to Excel Ribbon
To begin with, to freeze the top row and first column in Excel, you must know to add the Freeze Panes on the Excel ribbon if it is not present on the View tab of Excel Ribbon.
Just follow the steps:
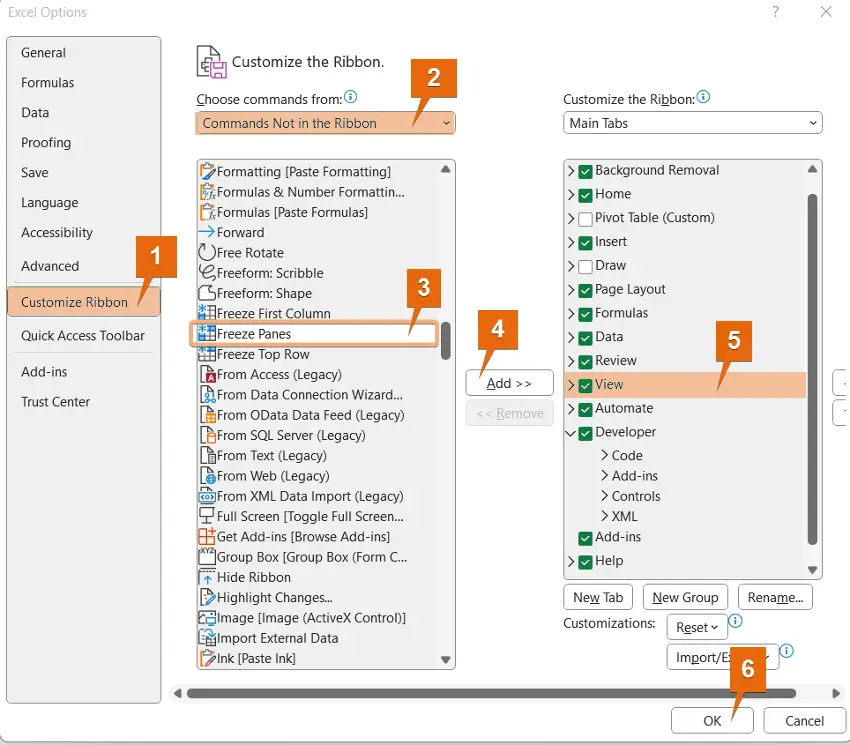
- First, right-click on the Excel ribbon and select Customize the Ribbon.

- Then, it will open the Excel Options window. Now, choose Commands Not in the Ribbon under Customize the Ribbon. Then, select Freeze Panes > Add. Next, check the View tab. Click OK.
 Now, you will see the Freeze Panes tool under the View tab on the ribbon.
How to Freeze Top Row and First Column Simultaneously
While working on an Excel file, you will encounter situations where you need both the top row and the first column fixed. There are several ways to deal with this problem. Here you will find all possible solutions to freeze the top row and first column at once.
Method 1: Apply Freeze Panes to Freeze Top Row and First Column
To freeze both the top row and the first column, we can go through the steps.
Follow the instructions:
- Navigate to the View tab.
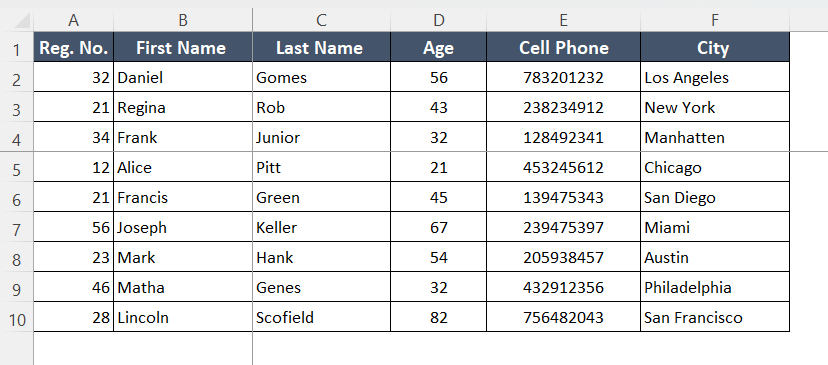
- Select cell B2. Now, choose the option Freeze Panes.
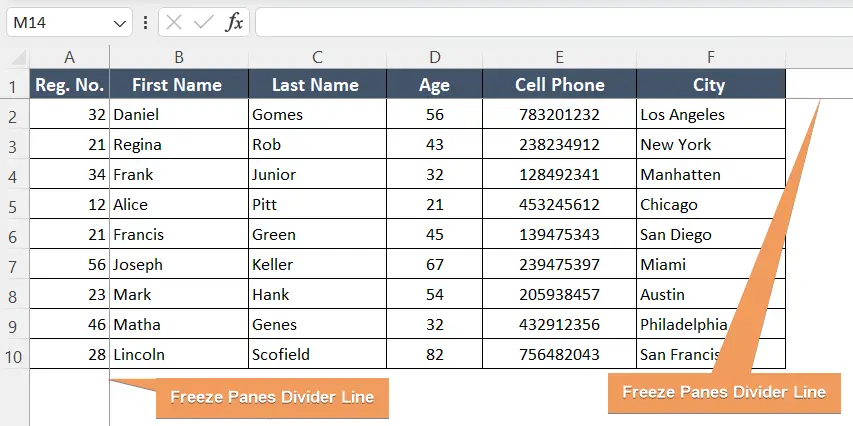
 We have frozen the top row and the first column successfully. You will understand by the Freeze Panes Divider Line.
Method 2: Freeze Top Row and First Column by Splitting Panes
The easiest way to make the top row and the first column fixed is using Split under the View tab.
Now, go through the instructions below:
- Firstly, access the View tab.
- Now, click on cell B2 and choose the Split.
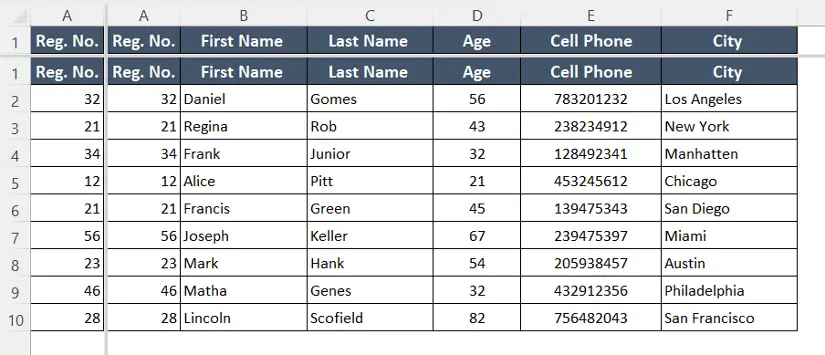
 We have locked the top row and the first column like the image. Hence, even if we scroll down or scroll to the right, the header row and the first column will be fixed.
Method 3: Freeze Top Row and First Column Simultaneously with VBA
You can use VBA code to freeze top row and first column simultaneously in Excel. Just follow the procedure below:
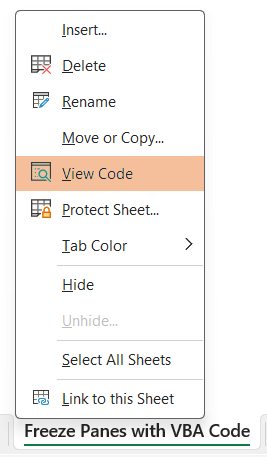
- Go to the sheet’s name at the below of worksheet. Then right-click on that. Now, select View Code to open Visual Basic Editor.

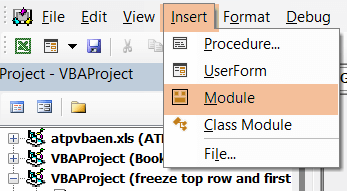
- Now, go to Insert > Module.

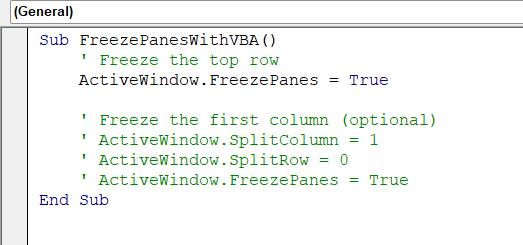
- Copy the code below and paste it into the module.
Sub FreezePanesWithVBA()
    ' Freeze the top row
    ActiveWindow.FreezePanes = True
    ' Freeze the first column (optional)
    ' ActiveWindow.SplitColumn = 1
    ' ActiveWindow.SplitRow = 0
    ' ActiveWindow.FreezePanes = True
End Sub
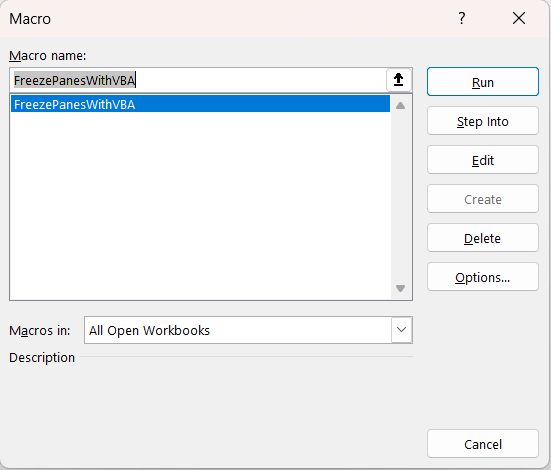
- Now, go back to the spreadsheet. Then, Select cell B2 and click ALT+F8 to open the Macros window. Next, click Run.
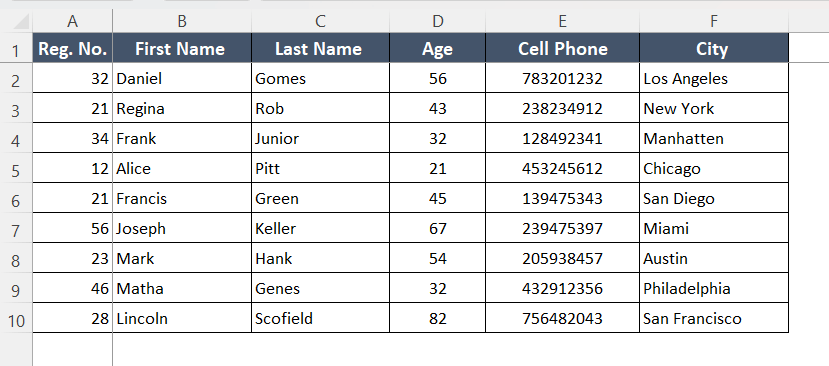
 Have a look at the screenshot. You have enclosed top row and first column at a time. You can identify it by the Freeze Panes Divider Line.
How to Freeze Top Row Only in Excel
For data entry in a large spreadsheet, if we find the top row fixed, it becomes easy to deal with. So, when you need to freeze only the top row, you can follow the following methods to do that.
Method 1: Use Table to Freeze Top Row
When you want to freeze the top row, you can just convert the data range into a table. Here are the steps to follow.
Follow the steps below:
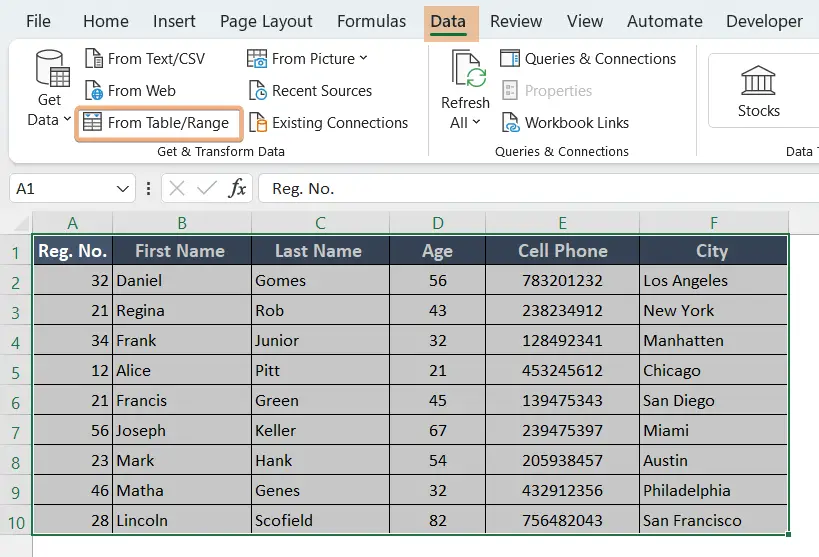
- Select the range, you want to convert into a table. Go to Data and click on From Table/Range.

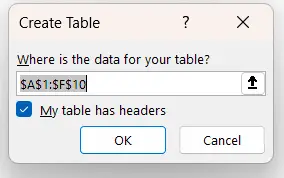
- Now, a window will appear like the image. Then, specify the range and click OK.

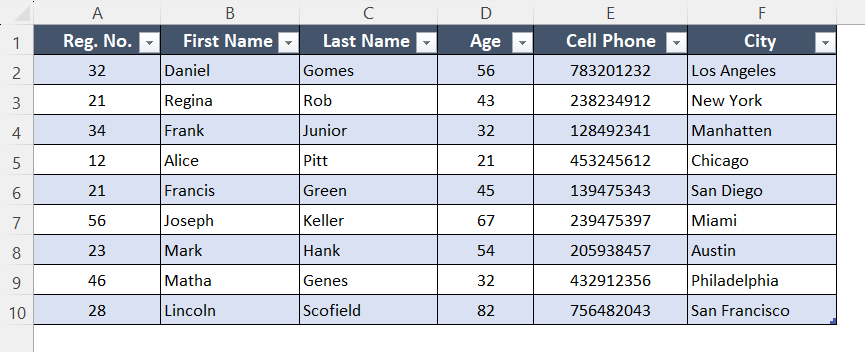
- After clicking OK, you will see the range converted into a table.
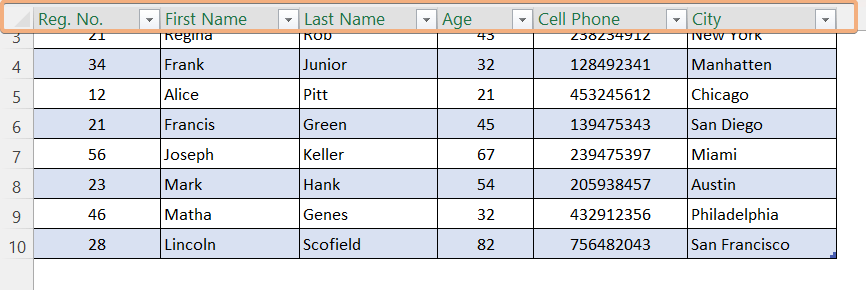
 Now, even when scroll down to the sheet, you will see a fixed header. See the image.
Method 2: Activate Freeze Top Row from the Ribbon in Excel
You can use the Freeze Top Row tool from the ribbon to lock the top row in Excel. Now, proceed by following the instructions to do this.
Now, follow the instructions below:
- Go to the View tab.
- Then, click the dropdown of Freeze Panes and select Freeze Top Row.
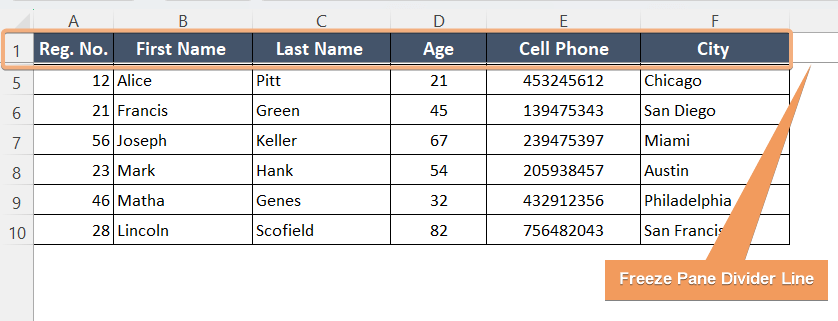
 You will see a Freeze Panes Divider Line below the top row after freezing. See the result in the screenshot.
Method 3: Freeze Top Row in Excel Using Split
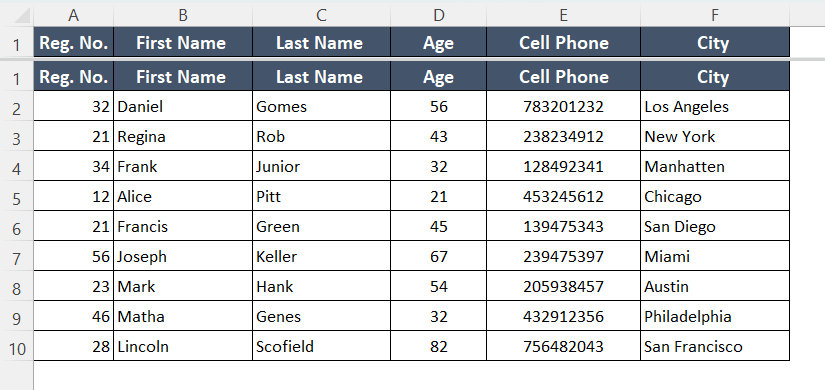
To freeze the top row, you can use the Split tool. Just select cell A2 and click Split.
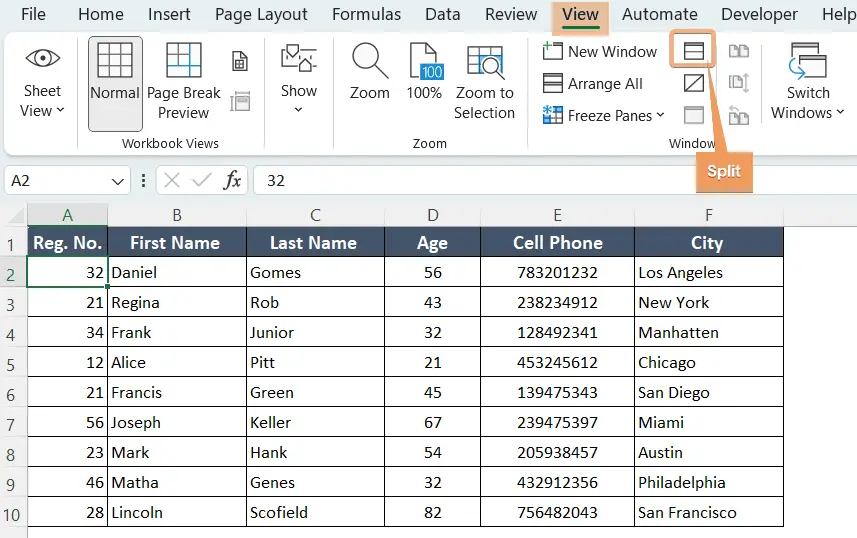
Final Result
You can see that I locked the top row.
How to Freeze First Column Only
Freezing the first column is pretty similar to freezing the top row in Excel.
Method 1: Freeze First Column Only by Enabling Freeze First Column Option
If you want to freeze only the first column, just go through the following steps:
- Click on the View tab on the ribbon.
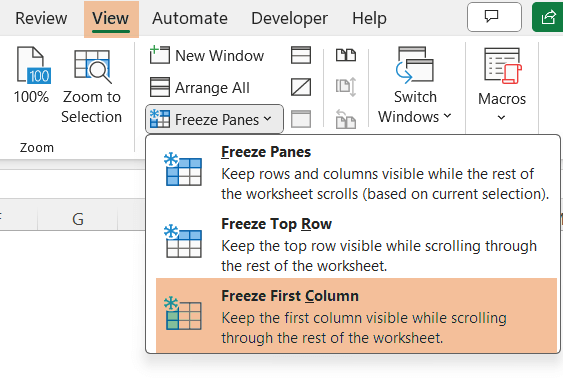
- Then, click the dropdown of Freeze Panes and select Freeze First Column.

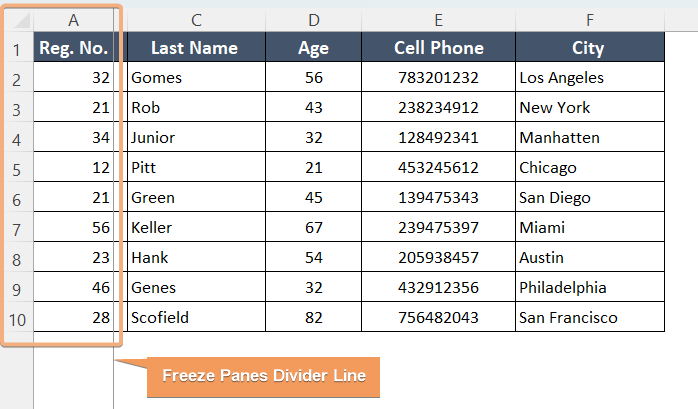
See the screenshot below. Here, the Freeze Panes Divider Line is on the right side of the first column.
Method 2: Use Split Command to Freeze First Column in Excel
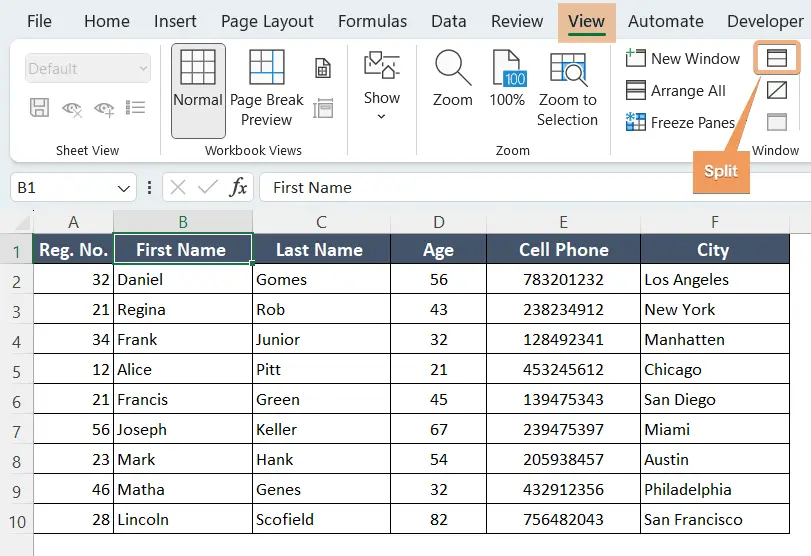
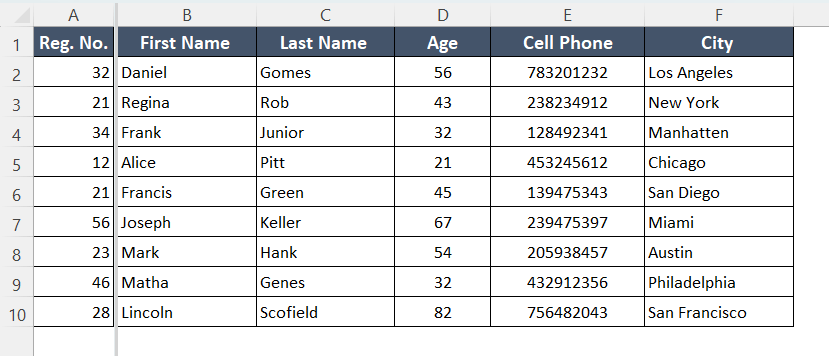
To freeze the first column, you can use the Split tool. Just select cell B1 and click Split.
Final Result
Here is the result. You can see the locked first column.
How to Freeze Multiple Rows and Columns in Excel
If you want to freeze several rows and/or columns, Excel also offers some tools to complete that task.
Freeze Multiple Rows Using Freeze Panes Command
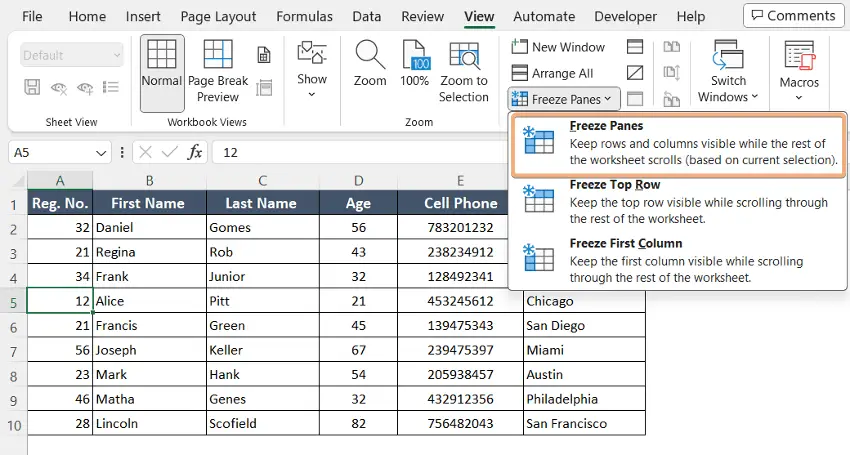
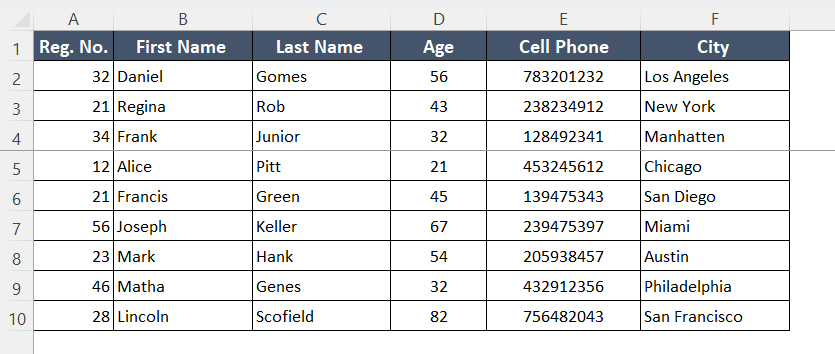
To freeze multiple rows, select the first column right below the row you want to freeze. Here, I have selected cell A5 to freeze till row 4. Then, click on Freeze Panes.
Final Result
Now, you can see the result.
How to Freeze Multiple Columns in Excel
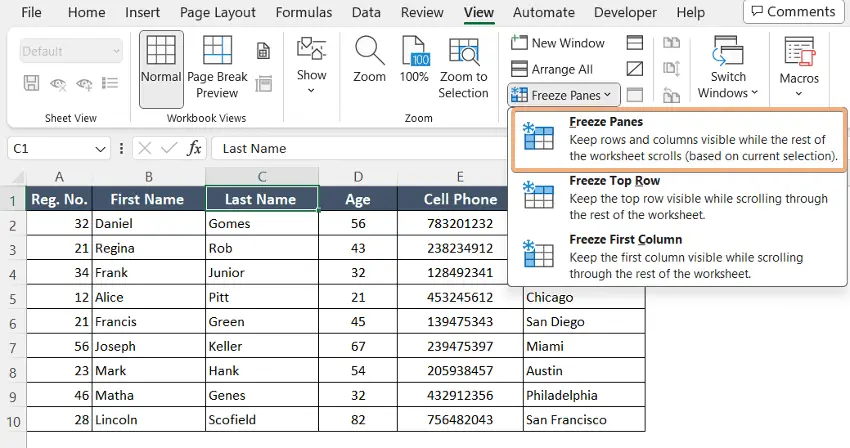
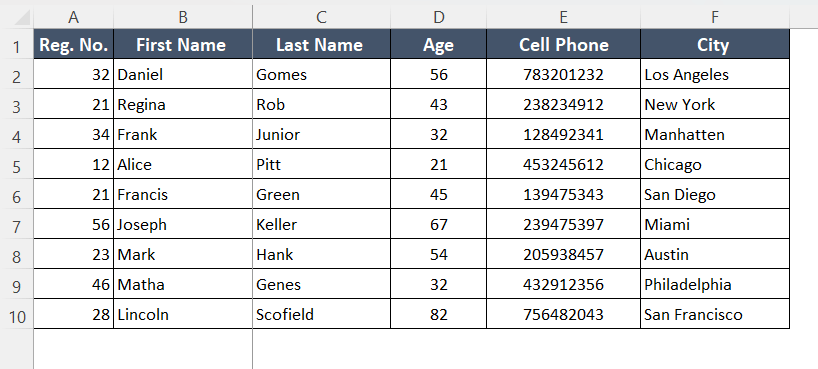
To freeze multiple columns, select the first row right beside the column you want to freeze. Here, I have selected cell C1 to freeze till column B. Then, click on Freeze Panes.
Final Result
See the image.
How to Freeze Multiple Rows and Columns Simultaneously
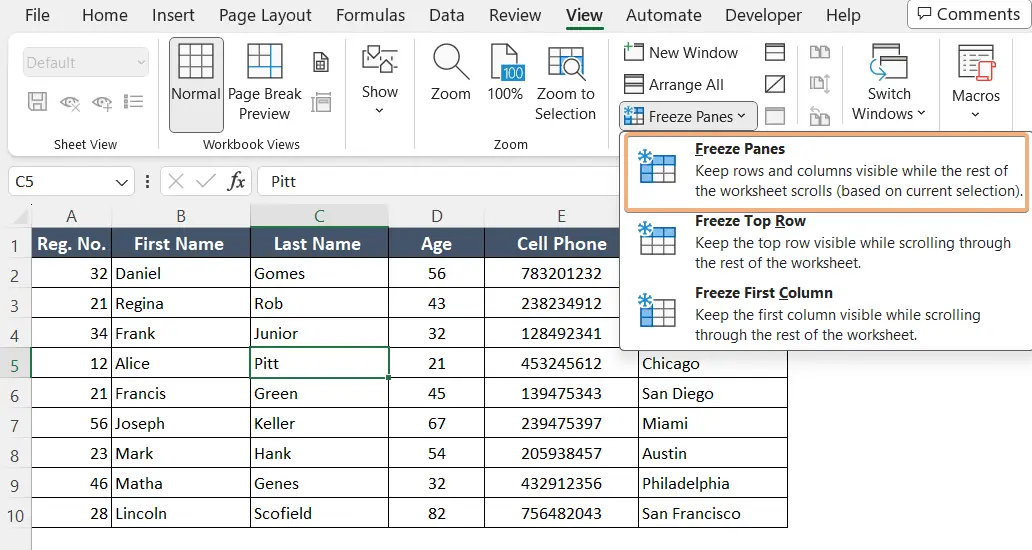
To lock both multiple rows and columns simultaneously, select the cell right below the row and right beside the column, you want to freeze.
Here I have selected cell C5 to freeze till row 4 and column B.
Final Result
See the final output in the screenshot.
How to Unlock Frozen Rows and Columns in Excel
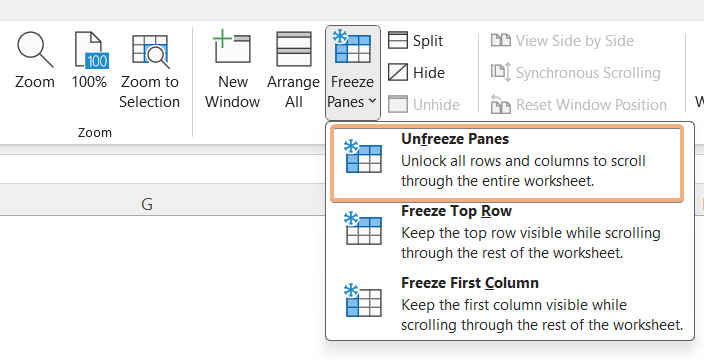
To unfreeze the frozen rows and columns is a simple step to follow. Go to the View tab. Then click on the dropdown of Freeze Panes. Now select Unfreeze Panes.
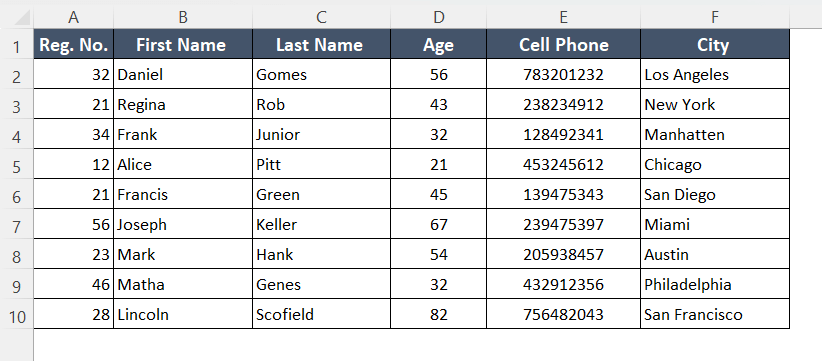
Final Result
After that, you will see the unfrozen rows and columns.
Conclusion
To summarize, I’ve discussed 3 different methods to freeze top row and first column simultaneously in Excel. The methods use Freeze Panes and Split commands as well as VBA. Sometimes, you may find the Freeze Panes dropdown missing which I’ve got it covered too. In addition to these, you can also learn to freeze only top row or first column separately. I really hope you can solve all of your issues related to freezing row and column in Excel and streamline your productivity. Happy Excelling!
Frequently Asked Questions
What is Excel freeze panes?
Excel Freeze Panes is a feature that enables users to lock specific rows or columns in a spreadsheet, providing a convenient way to keep crucial information, like headers, visible while scrolling through extensive datasets. This enhances data visibility and facilitates easier navigation in large Excel workbooks.
Why can’t I freeze panes in Excel?
If you can’t freeze panes in Excel, consider the following solutions:
- Select the Correct Cell: Ensure that you have selected the cell below and to the right of the rows and columns you want to freeze. Freezing panes is based on the cell you’ve selected.
- Unfreeze Panes: If you previously froze panes, you need to unfreeze them before applying a new freeze. Go to the View tab, click on Freeze Panes, and select Unfreeze Panes.
- Zoom Level: Check your zoom level. Sometimes, extreme zoom levels can affect freezing panes. Adjust the zoom level to a standard setting before freezing panes.
- Excel Version: Some older versions of Excel or certain configurations may have limitations. Ensure you are using a version of Excel that supports the freeze panes feature.
- Protect Workbook/Worksheet: If the workbook or worksheet is protected, it may restrict certain actions, including freezing panes. Check if protection is enabled and remove it if necessary.
- Too Many Frozen Panes: Excel has a limitation on the number of rows and columns that can be frozen. If you’ve reached this limit, consider using other methods like splitting.
If the issue persists, there might be other technical or software-specific reasons, and seeking assistance from Excel support forums or your IT department could provide further insights.


 We have locked the top row and the first column like the image. Hence, even if we scroll down or scroll to the right, the header row and the first column will be fixed.
 Have a look at the screenshot. You have enclosed top row and first column at a time. You can identify it by the Freeze Panes Divider Line.
 Now, even when scroll down to the sheet, you will see a fixed header. See the image.
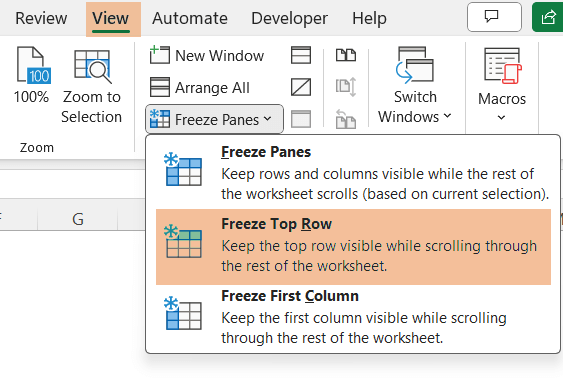 You will see a Freeze Panes Divider Line below the top row after freezing. See the result in the screenshot.