How to Create a Countdown Timer in Excel [Step-by-Step]
Step 1: Format Cells to Create Countdown Timer in Excel
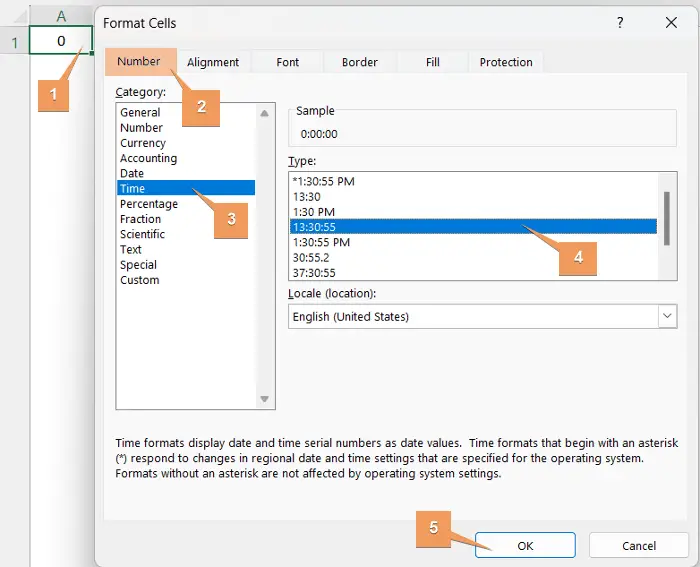
To create a countdown time in Excel, you should format the cell. Otherwise, it will be difficult to read. So, here I will format the cell in this format (h:mm:ss). It will start with hours, followed by minutes and seconds. To format, follow the steps below:
- Select a cell.
- Press CTRL+1 to open the Format Cells dialog box.
- Go to Number > Time > 13:30:55.
- Click OK.
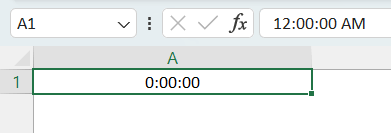
The selected cell will change like the image.
Step 2: Insert VBA Code to Create Countdown Timer in Excel
Now, insert a VBA code to create the countdown timer in Excel.
- Right-click on the sheet’s name.
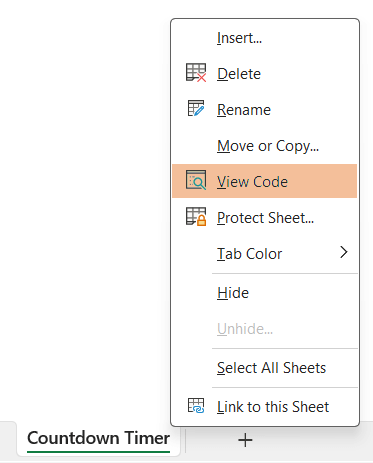
- Select View Code to open Visual Basic Editor.

- Go to Insert > Module.
- Copy the code below and paste it into the Module.
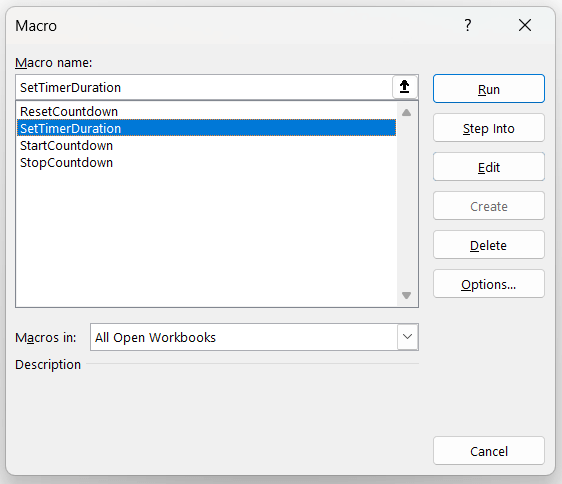
Dim StartTime As Double Dim TimerDuration As Double Dim TimerRunning As Boolean Dim ElapsedTime As Double Sub SetTimerDuration() ' Prompt the user to enter hours, minutes, and seconds Dim TimeInput As String Dim Hours As Integer Dim Minutes As Integer Dim Seconds As Integer On Error Resume Next TimeInput = InputBox("Enter the countdown time (HH:MM:SS):", "Set Timer Duration") On Error GoTo 0 ' Check if the user canceled the input box or entered an invalid value If TimeInput = "" Then Exit Sub End If ' Split the time input into hours, minutes, and seconds Dim TimeParts() As String TimeParts = Split(TimeInput, ":") If UBound(TimeParts) <> 2 Then MsgBox "Invalid time format. Please enter time in HH:MM:SS format.", vbExclamation Exit Sub End If Hours = Val(TimeParts(0)) Minutes = Val(TimeParts(1)) Seconds = Val(TimeParts(2)) ' Convert the input to seconds TimerDuration = (Hours * 3600) + (Minutes * 60) + Seconds ' Reset the timer display to the input time Range("A1").Value = Format(TimeSerial(Hours, Minutes, Seconds), "hh:mm:ss") ' Ensure the timer is not running TimerRunning = False End Sub Sub StartCountdown() ' Check if the timer is already running If Not TimerRunning Then ' If the timer is paused, subtract the elapsed time from the TimerDuration If ElapsedTime > 0 Then TimerDuration = TimerDuration - ElapsedTime End If StartTime = Timer TimerRunning = True ' Start the countdown Do Until Timer > StartTime + TimerDuration ' Update the countdown display in cell A1 (you can change the cell reference) If TimerRunning Then Range("A1").Value = Format((StartTime + TimerDuration - Timer) / 86400, "hh:mm:ss") End If DoEvents Loop ' When the countdown is complete, you can add your desired action here MsgBox "Countdown timer has been reset!", vbInformation ' You can also perform other actions, like running a macro or executing code. ' Reset the timer display to "00:00:00" and stop the timer Range("A1").Value = "00:00:00" TimerRunning = False ElapsedTime = 0 End If End Sub Sub StopCountdown() ' Pause the countdown If TimerRunning Then TimerRunning = False ElapsedTime = Timer - StartTime End If End Sub Sub ResetCountdown() ' Reset the countdown display and start time Range("A1").Value = "00:00:00" StartTime = 0 TimerRunning = False ElapsedTime = 0 End Sub - Go back to the worksheet. Then, press ALT+F8 to open the Macros dialog box.
- Select SetTimerDuration to set up a timer and click on Run.

Step 3: Create Buttons and Embed VBA Codes Into Them to Control Countdown Timer in Excel
To start with, create buttons to start, stop and reset. These buttons will reduce the hassle of opening Macros to run the code.
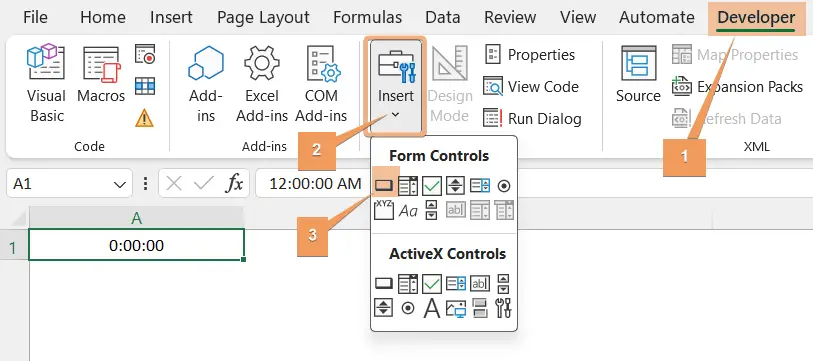
- Go to Developer in the Excel ribbon. If you can’t find the Developer tab on the ribbon, add it by following the instructions: Press ALT+F+T to open Excel Options. Go to Customize Ribbon > Main Tabs > Check the Developer tab. Then, click OK.

- Click on Insert under the Controls group.
- Select Button (from Control).
 Now, you will see a plus icon appear on your worksheet.
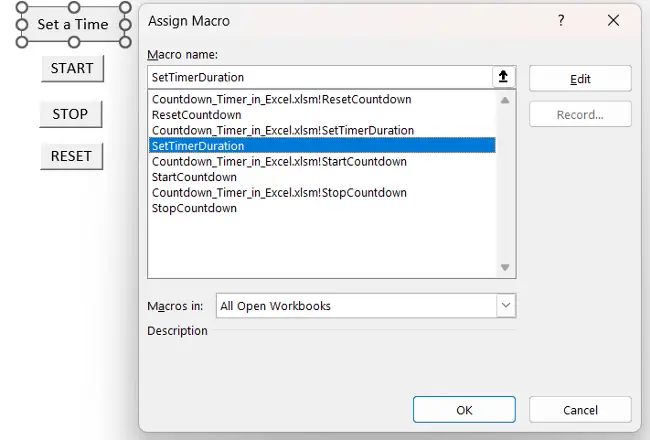
 - Click and hold the left button of your mouse and draw a rectangle to create a button with it. After releasing the mouse button, you will see the Assign Macros dialog box. Insert your button text and click OK. Now you can see your newly created button. Following this process, I’ve created Set a Time, START, STOP, & RESET buttons. To embed VBA code into the Set a Time button,
- Right-click on it and select SetTimerDuration.
- Again, click OK.

Similarly, right-click on the START button and select StartCountdown.
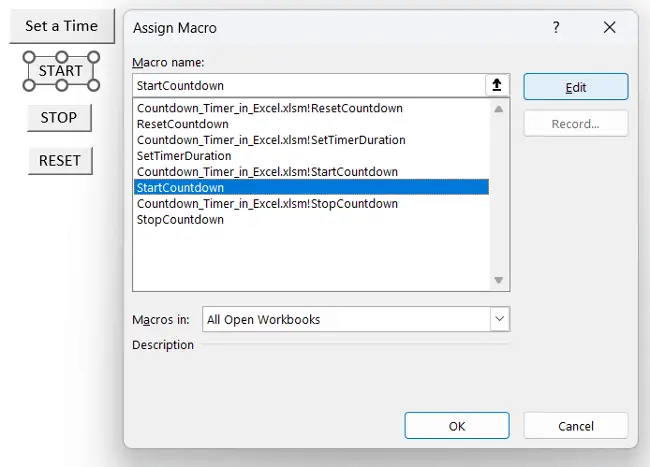
Now, right-click on the STOP button and select StopCountdown.

Lastly, to assign the VBA code to the RESET button, right-click on it and select ResetCountdown.
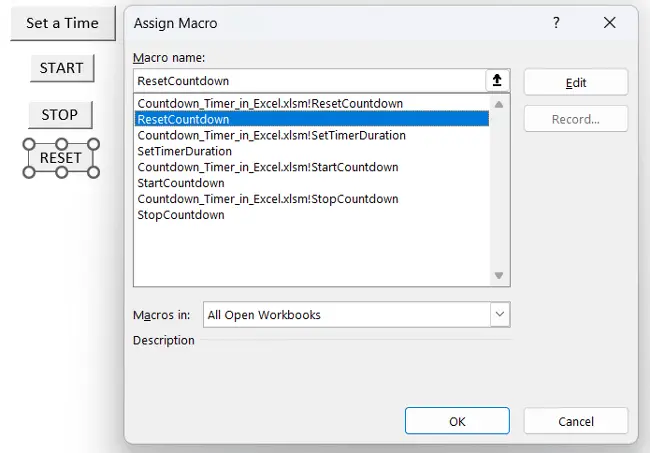
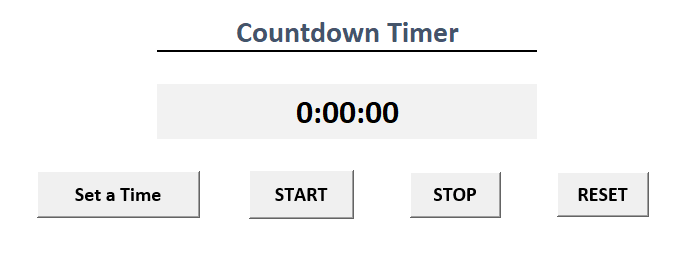
To stylize the appearance, apply some formatting. This is what the final version of the countdown timer looks like:
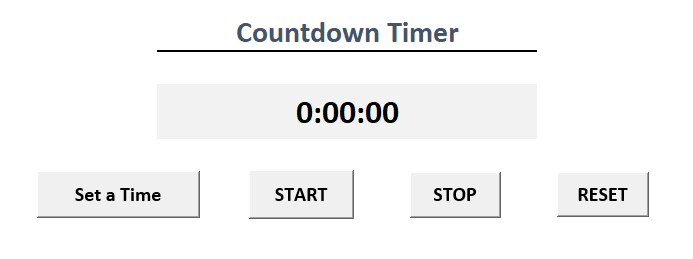
Note: To stylize the countdown timer, I’ve shifted the timer cell from A1 to C3. As the VBA code points to cell A1, you need to update it too. For this, you can go to Visual Basic Editor > Module 1. Then, use CTRL+H to open the Find and Replace dialog box. Insert A1 in the “Find What” section and C3 in the “Replace With” section and hit the Replace All button.
Finally Testing the Countdown Timer
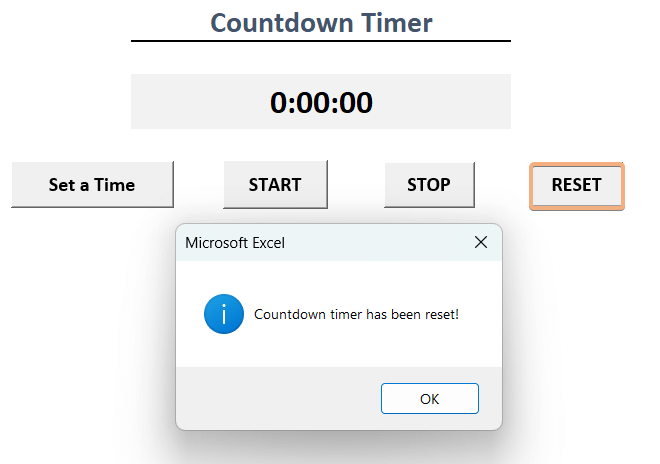
The countdown timer will appear as 0:00:00 format by default.
It has 4 buttons for setting a time, start, stop, and reset. Here, you can set up the timer by yourself. By clicking on the start button, you can start the timer. After that, when you need to pause it, click on the stop button. To start over, select the reset button. Let’s test the countdown timer.
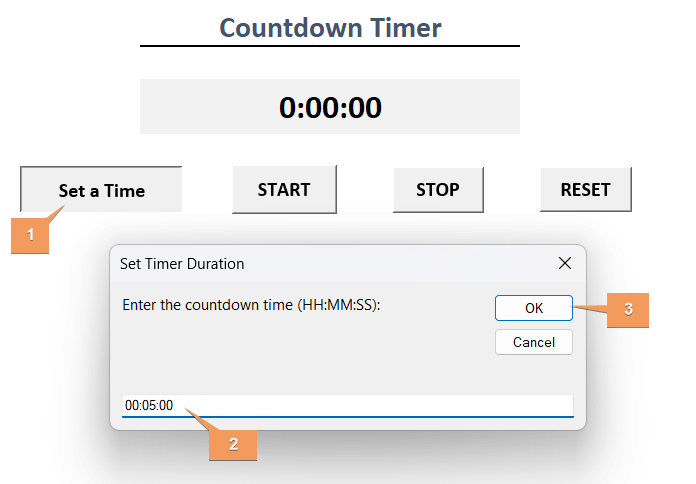
- To set your countdown time, click on the Set a Time button > enter the countdown time > click OK. Here, I have input 0:05:00 (5-minute timer).

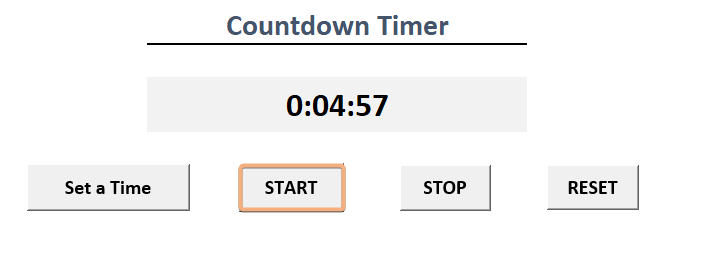
- To start the countdown, click on the START button. It will start counting backward from 00:05:00.

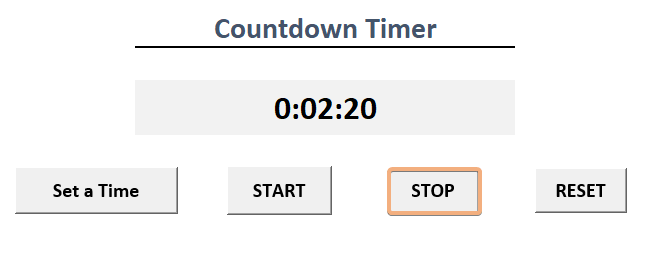
- Similarly, click on the STOP button. It will pause the counting.

- Lastly, click the reset button. It will set the timer like the default. It will show a notification message. Now, click OK.

Conclusion
To sum up, in this article, I have added all the steps to create a countdown timer in Excel. It starts with formatting the cells before applying the VBA codes. Then, you can insert a VBA code to create a countdown timer. After that, you can create buttons and assign Macros to make a shortcut to work on. Occasionally, to keep track of time-sensitive tasks in Excel, you will need to be handy to create a countdown timer and deal with it effectively. I hope this guide will be enough to deal with expertise to create the countdown timer in Excel.
Frequently Asked Questions
How do I insert a running clock in Excel?
To insert a running clock in Excel, follow these steps:
- Go to the Insert > Text Box in the Text group.
- Draw a text box on your worksheet, right-click on the text box, and choose Format Shape.
- In the Format Shape pane, go to the Fill category and adjust the outline color and width if needed.
- Right-click on the text box and select Format Shape again.
- Navigate to the Text Options tab and choose Text Box.
- Check the option for “Resize shape to fit text”.
- Click inside the text box and enter the following formula: =TEXT(NOW(), “hh:mm:ss”)
- Adjust the font, size, and color of the text as desired.
- Click outside the text box or press ENTER to close the Format Shape pane.
Now, your Excel worksheet will display a running clock that updates in real time. Keep in mind that the clock will only update when the worksheet recalculates, so you may need to press F9 to force a recalculation or set your workbook to update more frequently.
How do I create a day counter in Excel?
To create a day counter in Excel, follow these steps:
- Open Excel and the workbook where you want to create the day counter.
- Enter the start date in a cell (e.g., A1).
- In another cell, enter the formula: =TODAY() – A1
- Format the cell as a number.
- Optionally, use custom formatting for a user-friendly display (e.g., “X days”).
The counter will update automatically with the current date. Now, your Excel sheet will display the number of days since the specified start date. The counter will dynamically update based on the current date.
How do you calculate countdown to a date in Excel?
To calculate a countdown to a date in Excel, follow these steps:
- Choose a cell (e.g., A1) and enter the target date.
- In another cell, enter the formula: =A1-TODAY()
- This formula calculates the difference between the target date in A1 and the current date.
- Format the cell with the countdown result as a number or use custom formatting for better presentation.
- If you want to display the countdown in days only, use the formula: =INT(A1-TODAY())
The countdown will update automatically as the current date changes. This simple process allows you to create a countdown to a specific date in Excel.

 Now, you will see a plus icon appear on your worksheet.